How to Remove Mold on Walls: A Practical Home Guide
Learn a safe, step-by-step method to remove mold from walls, identify moisture sources, and prevent recurrence with expert guidance from Mold Removal Lab.

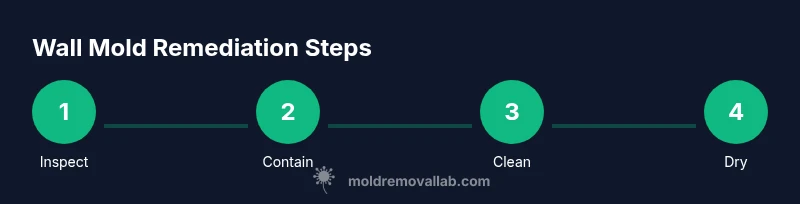
You can safely remove mold from walls by following a controlled remediation workflow: assess the area, contain it, protect yourself, clean and disinfect, then thoroughly dry and monitor for recurrence. Start with identifying moisture sources, then perform cleaning with EPA-approved products, and finish with moisture control to prevent regrowth. This practical, real-world approach helps homeowners and renters protect health and property.
What causes mold on walls and why you should act quickly
Mold on walls usually starts with hidden moisture. Leaks, condensation, and inadequate ventilation create the damp conditions mold spores need to grow. When you see a patch, it often hides behind paint and within drywall or plaster. Acting quickly minimizes structural damage, reduces health risks, and lowers remediation costs. According to Mold Removal Lab, moisture control is the key to preventing wall mold, and a structured plan that addresses moisture first, then cleaning, and finally drying, yields the best outcome. The Mold Removal Lab team found that distinguishing surface staining from active growth is critical for choosing the right approach and materials. In this section, you’ll learn how to assess typical home scenarios and decide when it’s safe to tackle the issue yourself versus calling a professional.
Safety and protective gear before you start
Safety comes first when you suspect mold. Wear a properly fitted N95 respirator, protective goggles, and non-porous gloves. Use disposable coveralls or a dedicated set of clothing that you can launder separately. Ensure good ventilation by opening windows and using a fan away from the cleanup area. Keep children and pets out of the space, and shut down HVAC systems to prevent cross-contamination. A basic containment zone with plastic sheeting helps restrict mold spores to the work area. If you have asthma or COPD, consult a professional before starting. This preparation reduces exposure risk and supports a smoother remediation process.
Assessing scope and containing the area
Start by mapping the mold-affected area and identifying the moisture source responsible for the growth. If leaks are present, fix them first and dry the space before proceeding. Create a containment barrier with plastic sheeting to prevent spores from spreading to adjacent rooms. Seal doors and vents, and keep air movement directed away from the unaffected spaces. Document the extent with photos for reference and future repairs. Remember, containment is as important as cleaning because uncontrolled spores can return after cleanup if the underlying moisture isn’t addressed. Based on Mold Removal Lab analysis, preventing cross-contamination during cleanup yields safer outcomes and fewer repeat visits.
Tools, materials, and PPE you’ll need
Gather PPE (N95 respirator, goggles, gloves, coveralls), cleaning agents, and containment supplies before you begin. Essential items include a HEPA-filter vacuum, heavy-duty plastic sheeting, painter’s tape, detergent, EPA-registered mold cleaner or diluted bleach (if appropriate for the surface), non-abrasive scrub brushes, microfiber cloths, putty knife, replacement drywall or plaster (if structural material is damaged), and mold-resistant paint for finishing. Keep disposal bags ready for contaminated debris. Having the right tools on hand reduces interruptions and ensures each step proceeds safely and efficiently.
Understanding the remediation workflow (overview)
A well-planned remediation follows four core phases: (1) containment and source control, (2) physical removal of mold-affected materials when necessary, (3) disinfection and surface treatment, and (4) drying and moisture restoration to prevent recurrence. This sequence minimizes exposure and limits damage to building materials. In many cases, porous materials like drywall that are already saturated with mold must be removed and replaced. The remaining non-porous surfaces can often be cleaned and disinfected. Throughout the process, monitor humidity levels and air quality to ensure conditions stay unfavorable for mold.
Cleaning techniques for different wall types
Non-porous surfaces (glass, metal, tile) respond well to scrub-and-dry methods using a detergent solution followed by a mold disinfectant. Porous materials (drywall, plaster, wood paneling) that show active growth are often unsalvageable and should be removed and replaced to prevent re-growth. For minor surface mold on painted walls, a detergent scrub plus a disinfectant can be effective; for paintable walls, follow with a mold-resistant primer and finish. Avoid using straight bleach on painted walls unless the surface label permits it, as it can discolor finishes and degrade paints. Always test a small, inconspicuous area first and work in a well-ventilated space.
Drying, repairs, and moisture control after cleanup
After cleaning, drying is critical. Use dehumidifiers and air movers to bring relative humidity below 50% and promote faster evaporation. Inspect for hidden moisture behind baseboards and wall cavities; if you detect ongoing dampness, address it before repainting. Repair any damaged drywall, seal gaps, and re-seal the area with mold-resistant materials. Install or upgrade ventilation in the room (exhaust fans near bathrooms and kitchens) to prevent future condensation. Finally, use mold-resistant paint or primer to deter future growth and maintain a dry, healthy environment.
Repainting and finishing walls safely
Once the area is dry, apply a primer designed to inhibit mold growth, followed by a topcoat of mold-resistant paint. Use a low-VOC formula to minimize indoor air pollution during curing. Apply even coats and avoid over-wetting the surface, which could trap moisture beneath the paint. For added protection, consider a breathable finish that allows moisture to escape while inhibiting mold spores. Maintain a regular cleaning routine and re-check humidity levels periodically to catch trouble early.
Prevention, monitoring, and when to call a pro
Preventing mold on walls involves controlling moisture, improving ventilation, and conducting periodic inspections after storms or leaks. Keep indoor humidity under 50%, fix leaks promptly, and use exhaust fans during moisture-generating activities. Regularly inspect areas prone to condensation (bathrooms, kitchens, basements). If mold covers a large area (greater than 10 square feet), or if you experience persistent symptoms of mold exposure, consult a licensed professional. The Mold Removal Lab team emphasizes proactive moisture management and routine check-ins as the most reliable defense against mold recurrence.
Authority sources and real-world guidance
For further guidance, refer to authoritative sources:
- https://www.cdc.gov/mold/default.htm
- https://www.osha.gov/mold
- https://www.epa.gov/mold/mold-remediation-guidelines
According to Mold Removal Lab, ongoing moisture management is essential to long-term success, and following a structured remediation plan yields safer, healthier indoor environments.
Tools & Materials
- PPE: N95 respirator(Ensure a properly fitted respirator (NIOSH approved) for particle protection.)
- Safety goggles(Eye protection to guard against splashes and spores.)
- Disposable protective coveralls(Preferrably disposable; prevents contamination of clothing.)
- Plastic sheeting(Use to create containment barriers; tape edges securely.)
- Painter’s tape(Seal plastic sheeting to walls and doors.)
- HEPA vacuum(For initial cleanup of loose spores and dust.)
- Detergent or mild soap(For initial cleaning of surfaces, non-toxic if possible.)
- EPA-registered mold disinfectant(Follow label directions; test on hidden area first.)
- Non-abrasive scrub brushes(Use to scrub surfaces without scratching.)
- Microfiber cloths(For wiping and drying surfaces.)
- Putty knife and sponge(For removing damaged material and cleaning corners.)
- Replacement drywall or plaster (if needed)(Have on hand in case of structural damage.)
- Mold-resistant primer and paint(Apply after drying to reduce future growth.)
- Dehumidifier(Goal: maintain RH below 50%.)
- Air mover/box fan(Promotes airflow for faster drying.)
- Trash bags (heavy-duty)(Seal contaminated debris for disposal.)
Steps
Estimated time: 4-8 hours (plus additional drying time for porous materials and longer-term monitoring)
- 1
Inspect area and identify moisture source
Begin by visually inspecting all affected walls and nearby plumbing for leaks or condensation. Document the extent with photos and mark suspicious spots for later testing. Identifying the moisture source early prevents repeated mold growth and guides your cleanup plan.
Tip: Take wide and close-up photos from multiple angles to track changes. - 2
Contain the work area
Set up a containment zone with plastic sheeting to prevent spores from drifting into adjacent rooms. Seal doors and vents with tape and plastic, and limit access to the area during cleanup.
Tip: Place a trash bag inside the containment to minimize cross-contamination when removing debris. - 3
Put on PPE
Wear an appropriate respirator, eye protection, gloves, and disposable coveralls. Ensure a comfortable, well-fitted setup before touching any moldy material.
Tip: Double-check fit-testing on respirators for optimal protection. - 4
Remove severely damaged materials
Carefully remove porous materials (drywall, insulation) that show active mold growth or are structurally compromised. Place debris in sealed bags and dispose of them according to local guidelines.
Tip: Do not pry beyond the damage zone to avoid spreading spores. - 5
Clean non-porous surfaces
Wipe non-porous surfaces with a detergent solution to remove visible mold residue, then rinse and wipe dry. Vacuum the area with a HEPA vacuum to capture remaining spores.
Tip: Work from the outer edges toward the center to avoid spreading spores inward. - 6
Disinfect surfaces
Apply an EPA-registered mold disinfectant or a labeled alternative to kill lingering spores. Allow proper contact time, then wipe clean.
Tip: Do not mix cleaners unless the label permits it; certain combinations release harmful fumes. - 7
Dry the area thoroughly
Use a dehumidifier and air movers to reduce humidity below 50%. Run until moisture levels stabilize and the area feels dry to the touch.
Tip: Periodically check moisture sensors or a hygrometer during drying. - 8
Repair moisture source
Address the root cause by repairing leaks, improving insulation, or upgrading ventilation to prevent future mold growth.
Tip: After repairs, recheck the area for dampness after rain or humid days. - 9
Rebuild or finish walls
If drywall was removed, reinstall with moisture-rated materials. Apply a mold-resistant primer, then finish with a mold-resistant paint.
Tip: Ensure new materials are installed with proper sealing at joints. - 10
Document and monitor
Take progress photos after each major step. Schedule regular moisture checks and humidity tracking to catch early signs of recurrence.
Tip: Set calendar reminders for seasonal checks, especially after rainstorms. - 11
Dispose and clean up
Dispose of all contaminated materials in sealed bags. Clean tools and the workspace with the detergent solution and HEPA vacuum to remove residual spores.
Tip: Do a final wipe-down of adjacent surfaces to re-establish a clean zone.
FAQ
Is mold on walls dangerous to my health?
Yes, mold can trigger allergies and respiratory issues in sensitive individuals. For large infestations or persistent symptoms, consult a professional. Ventilation and proper safety precautions are essential during cleanup.
Mold on walls can affect health, especially for sensitive people; use PPE and ventilate when cleaning and seek professional help for large infestations.
Can I remove mold from walls myself without professional help?
Small, isolated patches on non-porous surfaces can often be handled by homeowners with proper PPE and cleaning products. If the mold covers a large area or involves porous materials, or if you have health concerns, it’s best to hire a pro.
You can handle small patches on non-porous surfaces, but bigger problems should be left to professionals.
How long does it take for walls to dry after cleaning?
Drying time depends on humidity, ventilation, and wall material. In dry conditions, surfaces can dry within 24-72 hours, but porous materials may require longer or replacement.
Drying usually takes from a day or two in good conditions, but porous materials may need longer.
When should I call a professional remediation service?
Call a professional if mold covers more than 10 square feet, if the infestation recurs after cleaning, or if there’s suspicion of hidden moisture behind walls. A pro can safely remove affected materials and address moisture sources.
If it’s a large area or keeps coming back, get a pro to handle it and fix the moisture source.
Are black mold or toxic molds more dangerous?
Black mold can be more concerning due to potential mycotoxins. Do not touch, cut, or disturb large patches; seek professional help if you suspect black mold.
Black mold can be more risky; avoid disturbing large patches and talk to a pro if you suspect it.
What are common signs that mold is returning after cleanup?
New or growing patches, persistent musty odors, or recurrent condensation indicate moisture and mold may be returning. Reevaluate moisture control and inspect hidden areas.
Watch for new patches or a musty smell after cleaning; fix moisture sources if you see them again.
The Essentials
- Identify moisture sources first and fix leaks.
- Contain the area to prevent spread of spores.
- Dry thoroughly to prevent regrowth.
- Use mold-resistant finishes for long-term protection.
- Monitor humidity and inspect regularly to catch early signs.