Mold on Wood: Safe Inspection and Remediation Guide
Learn practical steps to inspect, clean, and prevent mold on wood in homes. This Mold Removal Lab guide covers safety, tools, moisture control, and long-term prevention strategies.

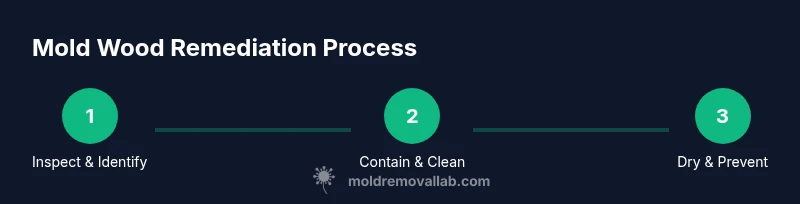
By the end of this guide, you will identify mold growth on wood, determine whether it’s superficial or structural, and perform a safe cleanup. You’ll need basic PPE, good ventilation, containment, and approved cleaners. Mold on wood can spread quickly if left untreated, so follow these steps to protect your home and health today and avoid costly repairs.
What makes mold on wood a special challenge
Wood is a porous, organic material that easily absorbs moisture. When moisture enters wood—through leaks, high humidity, or condensation—mold spores can settle and grow in places you can’t always see, like inside studs, behind baseboards, or along joists. The Mold Removal Lab team highlights that moisture control is the single most important factor in preventing mold growth on wood. Because wood can spall, crack, or warp as it dries, infestations may appear small on the surface but be extensive inside the grain. Early detection matters for home safety and cost savings. In prevention terms, the best defense is maintaining stable humidity and prompt repair of leaks.
Surface mold vs. wood-embedded mold: how to tell
Not all mold on wood looks the same. Surface mold often appears as powdery or fuzzy patches and can usually be wiped away with a damp cloth when the wood finish is intact. Wood-embedded mold, by contrast, penetrates the surface and may discolor the grain or cause a musty odor that lingers. If you see dark staining that doesn’t wipe off or if you notice soft, crumbly wood, treat this as potential structural damage and proceed with caution. The distinction matters because wood-embedded mold often requires deeper cleaning, sealing, or replacement to prevent recurrence.
Safety first: PPE, containment, and testing
Approach mold wood work with proper safety: use an N95 respirator or better, safety gloves, and eye protection. Isolate the work area with plastic sheeting to prevent spores from traveling to other rooms. If you suspect large areas, hidden cavities, or compromised structural wood, consider hiring a professional. Testing is optional for small, visible patches, but can help confirm whether mold is just surface-level or penetrates deeper. Always ventilate the area and avoid dry brushing, which can aerosolize spores.
Cleaning strategies for finished wood surfaces
For finished wood surfaces like preserved trim or furniture, light cleaning is often sufficient. Start with dry brushing to remove loose spores, then wipe with a damp cloth and a mild detergent. Do not oversaturate the wood—moisture can drive mold deeper into the finish. If you use a cleaner, choose one that is safe for wood finishes and follow the manufacturer’s instructions. After cleaning, dry the surface completely and use a wood-safe antimicrobial product if recommended by the manufacturer. Remember, sometimes a finish refinishes can be damaged by cleaning, so test in an inconspicuous area first.
Cleaning porous wood and structural components
Porous wood—like studs, framing, or reclaimed timber—requires more aggressive moisture management and cleaning. Vacuum with a HEPA filter to remove loose spores, then wipe with a cleaner suitable for porous surfaces. Do not rely on bleach for porous wood; it can cause discoloration and is not effective for deep penetration. In many cases, removing visibly contaminated portions is necessary to halt mold spread. After cleaning, ensure the area dries thoroughly, and consider applying a sealant or finish that resists moisture ingress to slow future growth.
Drying and humidity control after cleanup
Drying is crucial to prevent regrowth. Use dehumidifiers or fans to achieve a steady, low-humidity environment. Keep relative humidity below 50-60% wherever possible, and fix any leaks promptly. Continuous monitoring with a hygrometer helps you catch moisture spikes early. Mold can return within 24-72 hours if the wood remains damp, so air movement and insulation are essential components of a successful remediation plan. Based on Mold Removal Lab research, consistent moisture control dramatically reduces recurrence risk.
Sealing, finishing, and preventive wood protection
Once wood is clean and dry, applying a moisture-resistant finish can help deter future growth. Choose finishes that seal the wood’s surface and resist humidity, such as sealants and paints designed for high-moisture environments. Regular maintenance includes inspecting for leaks, re-finishing exposed wood in damp areas, and upgrading ventilation in kitchens, bathrooms, and basements. Simple steps—like using exhaust fans during showers or cooking, and keeping indoor plants away from moisture-prone zones—can substantially lower mold risk on wood.
When to call a professional and what to expect
If mold covers large areas, returns after cleaning, or affects structural wood, a professional remediation contractor is recommended. Professionals can perform containment, advanced cleaning, and moisture control more efficiently and safely. In many cases, they’ll use hepa vacuums, targeted treatments, and post-remediation verification to ensure the problem is resolved. Early consultation helps you estimate costs and determine whether replacement or repair of wood is needed.
Replacing damaged wood and structural considerations
Sometimes the mold has penetrated too deeply, compromising strength, grain integrity, or the wood’s ability to support loads. In such cases, replacement may be more cost-effective and safer than trying to salvage. Structural wood replacement requires careful assessment of framing, supports, and load calculations. Always verify with a building professional whether you should replace studs, joists, or beams, as neglecting structural integrity can lead to further problems down the line.
Long-term maintenance to prevent recurrence
Prevention hinges on moisture control and regular inspections. Address leaks promptly, monitor humidity, and ensure proper ventilation in high-moisture rooms. Consider using mold inhibitors on wood surfaces in damp areas, and keep wood away from direct water sources when possible. Schedule seasonal inspections for areas prone to dampness, and maintain proper drainage around foundations to prevent water intrusion. By staying proactive, you reduce the chance of mold returning on wood.
Tools & Materials
- PPE kit (N95 mask, safety goggles, gloves)(Essential for all mold work; change PPE for each area.)
- Disposable coveralls(Protects clothing from spores; use once and discard.)
- Plastic sheeting and tape(Create containment barriers around the work zone.)
- HEPA vacuum and HEPA filters(Captures small spores during cleanup; do not use on furniture without a filter.)
- Soft-bristle brush(Gently dislodge surface mold from wood without scratching finish.)
- Mild detergent or soap(Gentle cleaner for finished wood; avoid harsh solvents.)
- Mold-safe wood cleaner or enzyme-based product(Use products approved for wood surfaces; follow label directions.)
- Moisture meter or hygrometer(Track humidity levels after remediation.)
- Dehumidifier or industrial fan(Promotes faster drying; place near the work area but away from the finish.)
- Waste bags (heavy-duty, sealable)(Dispose of contaminated materials safely.)
- Sealant or wood finish resistant to moisture(Apply after cleaning and drying to slow future mold growth.)
Steps
Estimated time: 4-8 hours
- 1
Prepare the area and safety setup
Clear the space and establish containment with plastic sheeting. Don PPE and ensure good ventilation before touching any moldy wood. This step minimizes exposure and prevents spread of spores to other rooms.
Tip: Keep cleanup short and frequent to avoid prolonged exposure. - 2
Identify extent and isolate
Assess visible mold and use a moisture meter to gauge dampness. Isolate the area to prevent cross-contamination and determine if structural wood is affected.
Tip: Document affected areas with photos for reference and potential insurance claims. - 3
Clean non-porous surfaces first
For finished wood, wipe with a mild detergent or approved cleaner. Avoid oversaturation and let surfaces dry between passes.
Tip: Always work from clean to dirty areas to minimize spread. - 4
Treat porous wood or framing
Use a mold-safe cleaner and HEPA vacuum to remove spores from porous wood. Do not rely on bleach for porous wood; deep cleaning may be required.
Tip: If wood is crumbly or visibly damaged, stop and evaluate replacement options. - 5
Dry thoroughly and monitor humidity
Run a dehumidifier or fans and monitor humidity until readings stay below target. Mold can return quickly if unfinished drying occurs.
Tip: Aim for humidity below 50-60% and recheck after 24 hours. - 6
Seal and finish to prevent recurrence
Apply moisture-resistant finishes after cleaning and drying. Sealing helps minimize future moisture intrusion in vulnerable areas.
Tip: Test on a hidden area first to ensure compatibility with the finish. - 7
Assess structural integrity
If wood shows signs of warping, soft spots, or loss of structural strength, consult a professional for replacement or reinforcement.
Tip: Structural concerns must be evaluated by a licensed contractor. - 8
Document and verify remediation
Keep records of cleaning, humidity readings, and any professional assessments. This helps confirm the remediation was completed successfully.
Tip: Take 'before' and 'after' photos for your records.
FAQ
Is mold on wood dangerous to my health?
Exposure to mold can affect air quality and trigger allergies or asthma in sensitive individuals. Use PPE and ventilate when cleaning, and consider professional help for large or persistent growth.
Mold can affect air quality and trigger allergies in some people. Use proper safety gear and ventilate during cleaning, and call a professional for large areas.
Can vinegar or hydrogen peroxide kill wood mold?
Vinegar can help on some mold growth, but it may not reach deep into wood pores. Hydrogen peroxide is effective on some surfaces but can raise wood finish issues. Use products labeled safe for wood and test first.
Vinegar can help on some surfaces, but it may not reach deep into wood. Test first and use products labeled safe for wood.
When should wood be replaced rather than cleaned?
If wood is structurally damaged, crumbly, warped, or shows persistent mold despite thorough cleaning and drying, replacement is often safer and more durable.
If wood is structurally damaged or mold keeps returning despite cleaning, replacement is usually the safer option.
Is professional remediation necessary for all mold on wood?
For large areas, visible extensive growth, or mold penetrating framing, a professional remediation contractor is advisable to ensure containment and complete drying.
For large or penetrating mold, a professional can ensure proper containment and drying.
How can I prevent mold on wood long-term?
Keep humidity low, fix leaks promptly, ensure good ventilation, and inspect wood regularly for signs of moisture, especially in basements and bathrooms.
Maintain humidity, fix leaks fast, and inspect wood regularly to prevent mold from returning.
What is the role of humidity in wood mold growth?
High humidity promotes mold growth on wood; maintaining indoor humidity below 50-60% reduces risk and supports faster drying after cleaning.
Humidity above 60% increases mold risk; try to keep it under 60% and dry damp areas promptly.
The Essentials
- Identify moisture sources to stop mold growth.
- Wear PPE and contain the work area.
- Dry wood thoroughly to prevent recurrence.
- Use wood-safe cleaners and avoid aggressive solvents on wood finishes.
- Monitor humidity and schedule follow-up inspections.