Mold Vinegar: Safe DIY Mold Cleanup Guide
Learn how to safely use mold vinegar for small-area mold cleanup. This practical guide from Mold Removal Lab covers when to use vinegar, safety tips, a step-by-step method, and prevention to protect your home.

Using mold vinegar can help with basic, non-porous mold cleanup in small, contained areas. It’s not a universal solution and won’t replace professional remediation for large or hidden mold growth. Always test on a hidden spot, never mix with bleach, and follow a proper cleaning sequence to limit spores and recontamination.
What is mold vinegar and when should you use it?
Mold vinegar refers to white vinegar containing acetic acid that can inhibit some surface mold growth. For homeowners, it may offer a convenient, readily available option for mild, visible mold on non-porous surfaces like sealed tile, glass, or painted wood. It isn’t a cure-all; it can be ineffective against deeply embedded mold in porous materials such as drywall or porous fabrics. When used properly, mold vinegar can reduce surface spores and help regain a cleaner look, but it should be viewed as a maintenance step rather than a replacement for professional remediation in significant infestations. Remember that mold vinegar is just one tool in a broader mold-control strategy and must be paired with careful cleaning, drying, and prevention to be effective. Mold Removal Lab recommends focusing vinegar use on small, contained patches and avoiding porous substrates whenever possible to minimize risk of regrowth.
Safety and limitations: hazards and when to avoid
Safety first: mold cleanup can release spores and irritants, so PPE matters. Wear gloves, eye protection, and a simple disposable mask when spraying mold vinegar. Never mix vinegar with bleach or ammonia; mixing can create hazardous gases. Vinegar has a strong odor that some people find irritating, and it can etch or discolor certain surfaces like marble or natural stone. If you’re dealing with large areas, extensive water damage, or mold behind walls, professional remediation is the safer option. For many homeowners, vinegar is best saved for mild, surface-level mold on non-porous surfaces and as part of a broader prevention plan. Mold Removal Lab’s guidance emphasizes safety and surface testing before heavy cleaning.
Surface testing and prep: how to know if vinegar is appropriate
Always test a small, inconspicuous area first. Apply a small amount of mold vinegar and let it sit for 10–15 minutes to observe any adverse reactions such as discoloration or damage. If the surface tolerates the solution, you can proceed to clean the affected spot, using a microfiber cloth or soft brush. Prepare your cleaning area by removing nearby items, opening windows for ventilation, and laying down a protective sheet to catch drips. Surface prep reduces cross-contamination and ensures you’re cleaning the moldy area directly, not spreading spores to adjacent surfaces. Remember to check for hidden moisture behind walls that might feed regrowth and address the source of moisture alongside cleaning.
How to prepare your cleaning plan with vinegar
Plan a quick, repeatable routine: isolate the space, collect your materials, test the surface, apply vinegar, scrub gently, rinse, and dry thoroughly. Keep a log of the areas cleaned and the dates to track mold-prone zones over time. For small renovations or temporary problems, mold vinegar can help you see improvement without aggressive chemicals. However, if you notice recurring patches after cleaning or if you have asthma or allergies, consider seeking professional mold assessment and remediation advice. Mold Removal Lab highlights the importance of moisture control as the core of long-term mold prevention.
Step-by-step mold cleaning using mold vinegar
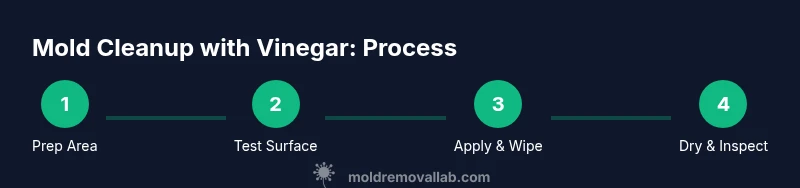
Here’s a practical approach for small, contained mold on non-porous surfaces: first, spray a mist of mold vinegar on the affected area and let it sit briefly; then, wipe with a clean microfiber cloth; next, scrub gently with a soft brush, rinse with a damp cloth, and dry completely. Repeat if needed but avoid over-wetting. This process helps reduce surface spores and improves appearance, though it won’t penetrate porous materials. Always store vinegar in a labeled bottle away from children and pets and ensure good ventilation during and after cleaning. Regular drying and moisture control are essential to prevent regrowth.
Aftercare: drying, disposal, and prevention
After cleaning, ensure the area dries fully within 24–48 hours. Use a fan or dehumidifier if the space is humid, and fix any leaks promptly. Dispose of used wipes and any contaminated towels in a sealed bag. To prevent future mold growth, address moisture sources (leaks, humidity, ventilation) and consider routine checks in basement, bathrooms, and kitchens. Mold vinegar should be part of a short-term rebound strategy, not a solo long-term solution. Ongoing prevention relies on moisture control, proper ventilation, and timely remediation for any persistent issues.
Common myths vs. reality about mold vinegar
Myth: Vinegar eliminates all mold on any surface. Reality: Its effectiveness is limited to certain non-porous surfaces and light, surface-level growth. Myth: Vinegar is safe on all materials. Reality: It can damage some surfaces like natural stone and certain finishes. Myth: Vinegar replaces professional remediation. Reality: Large infestations require professional assessment and treatment. By understanding these boundaries, homeowners can use vinegar wisely as part of a broader mold-control plan.
When to call a professional for mold remediation
If mold covers a large area, recurs after cleaning, involves wiring, HVAC components, drywall, or you have health concerns, seek a professional mold remediation service. A licensed pro can assess moisture sources, containment needs, and proper disposal. Mold Removal Lab’s stance is to use vinegar for small, contained issues and escalate to professionals for more significant problems to ensure safety and long-term results.
Tools & Materials
- White vinegar (mold vinegar)(Use plain white vinegar for cleaning; avoid flavored varieties)
- Spray bottle(Clean and labeled; 16–24 oz capacity recommended)
- Macrofiber cloths or microfiber towels(For wiping and detailing without leaving lint)
- Soft scrub brush(Optional for stubborn patches on non-porous surfaces)
- Dish soap (mild)(For initial prep if surface is dirty)
- Gloves(Protect hands from irritation)
- Safety glasses or goggles(Eye protection when spraying)
- Mask/respirator(Ventilate area; use if sensitive to odors)
- Ventilation source (fan or open window)(Improve air exchange during cleaning)
Steps
Estimated time: 45-60 minutes
- 1
Prep the work area
Move nearby items away from the cleanup zone and lay down protective coverings. Ensure good ventilation to disperse any odors and place a bag nearby for disposable materials.
Tip: Ventilation reduces inhalation exposure to airborne spores. - 2
Test the surface
Apply a small amount of mold vinegar to an inconspicuous spot and wait 10 minutes. If color or finish changes, stop and revisit surface compatibility.
Tip: Always test before full-area application. - 3
Apply vinegar solution
Spray mold vinegar generously on the affected patch and let sit for 5–10 minutes to loosen mold. Do not saturate porous materials.
Tip: Use a dedicated spray bottle to avoid cross-contamination. - 4
Scrub gently
Wipe with microfiber cloth or soft brush in gentle circular motions. Focus on removing visible mold without abrading the surface.
Tip: Avoid aggressive scrubbing that can damage finishes. - 5
Rinse and dry
Wipe away residue with a damp cloth, then dry thoroughly with a clean towel. Ensure no moisture remains in crevices.
Tip: Drying is essential to prevent regrowth. - 6
Inspect for remaining mold
Re-examine the area under good light. If you still see mold or odor, repeat steps 3–5 or escalate to professional help.
Tip: Persistent patches indicate underlying moisture issues. - 7
Document and prevent future growth
Note areas cleaned and implement moisture control measures (dehumidifier, ventilation, quick cleanup of spills). Schedule follow-up checks.
Tip: Moisture control is key to long-term success.
FAQ
Can vinegar remove all mold?
Vinegar can help with small, surface-level mold on non-porous surfaces, but it is not a universal solution. Large infestations or porous materials often require professional remediation and moisture control.
Vinegar helps with small surface mold on non-porous surfaces, but not large or porous infestations.
Is vinegar safe to use on all surfaces?
No. Vinegar can damage some materials like marble and certain stone finishes. Always test a hidden area first and tailor the approach to the surface type.
No, vinegar isn’t safe for all surfaces; test a small area first.
Should I use mold vinegar for large infestations?
No. For large areas or mold behind walls, professional assessment is advised. Vinegar is best for mild, surface-level issues and moisture prevention.
If the mold is large or behind walls, call a professional.
Will vinegar leave a lingering odor?
Vinegar odor is usually temporary and dissipates with ventilation. Use fans or open windows to speed up the process.
The vinegar smell is temporary and should fade with ventilation.
What about alternatives like hydrogen peroxide or bleach?
Hydrogen peroxide and bleach have their uses but require different handling. Do not mix with vinegar, and follow safety guidelines. For most homeowners, vinegar is a safer starting point for small areas.
Hydrogen peroxide and bleach have different rules; never mix with vinegar.
Watch Video
The Essentials
- Identify small, non-porous mold spots first
- Test surfaces before full-area use
- Use vinegar safely and avoid mixing with bleach
- Dry thoroughly to prevent regrowth
- Know when to call a professional