Mold Under Nail: A Homeowner's Remediation Guide
Learn practical steps to identify, test, and safely remediate mold under nail in moisture-prone home areas. This guide covers DIY basics, safety, and prevention to protect indoor air quality.

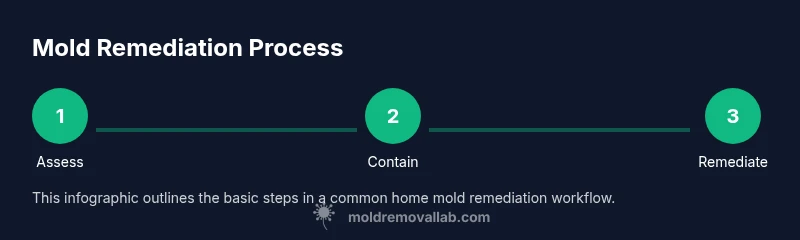
Quick answer: You can identify and safely remediate mold under nail by inspecting moisture-prone areas, isolating the affected zone, and following a step-by-step plan. Start with containment, then careful cleaning and thorough drying, plus ongoing monitoring. For large areas or uncertain exposure, hire a qualified pro. If you're unsure about how to clean porous materials, prioritize safety and ventilation.
What mold under nail might mean in a home context
In home contexts, 'mold under nail' usually refers to hidden mold growth in moisture-prone spaces behind nails or fasteners in wood, drywall, or cabinetry. It's not a medical condition. Visible signs include dark spots around nail heads on trim, musty odor, damp patches, and peeling paint near corners. The phrase often surfaces when homeowners discover mold in concealed cavities such as behind baseboards, within wall studs, or around fastening points where humidity is high. Understanding this distinction helps you target the remediation correctly and avoid overreacting to surface stains. This guide treats the term as a cue to inspect moisture-prone pockets, not a diagnosis of a medical condition.
How moisture drives mold growth in hidden spaces
Mold requires moisture to grow, and hidden spaces around nails and fasteners are ideal if leaks or condensation persist. When water enters through a roof leak, plumbing, or high indoor humidity, it creates micro-environments where mold can thrive in wall cavities, under trim, or inside cabinet frames. Even small amounts of standing water behind walls can sustain colony growth over weeks. Early signs include a musty smell, damp patches behind nail lines, or discolored wood and drywall near joints. By tracing moisture sources, you can break the growth cycle before extensive remediation is needed.
Safety first: PPE, containment, and ventilation
Personal protective equipment (PPE) is essential when dealing with mold, especially in concealed spaces. Put on an N95 respirator, eye protection, gloves, and a disposable coverall. Set up a containment zone with plastic sheeting to prevent mold spores from spreading to living areas. Use a HEPA-filter vacuum and ensure good ventilation without blasting mold spores into other rooms. Keep children and pets away from the workspace. If the area is large or shows active leaks, pause and plan a professional assessment.
Assessing scope: photos, measurements, and planning
Before cleaning, document the area with photos from multiple angles, note moisture sources, and map out the affected zone. Measure the dimensions of visible growth and any hidden pockets you can access safely. This baseline helps you determine whether the remediation is a DIY task or requires a pro. If growth covers more than a few square feet or involves porous materials like insulation, drywall, or wood, plan professional help. Maintain a containment setup during assessment to minimize exposure.
Cleaning and remediation methods for small areas
For small, contained spots, you can start with surface cleaning using a detergent solution and a non-abrasive scrub brush. After removing visible mold, wipe with a cleaner approved for mold remediation and rinse with clean water. Avoid saturating the material; moisture can worsen the problem. Dry the area thoroughly using towels and a fan, then reseal the space with appropriate sealant or caulk if necessary to prevent future moisture intrusion. Keep a log of what was cleaned and where to reference during follow-up visits.
Drying, dehumidification, and preventing recurrence
Mold growth ends when the area is thoroughly dry and humidity stays low. Use a dehumidifier and additional ventilation to bring relative humidity below 50 percent in the remediation zone. Drying times vary by material and airflow, but expect several hours for bare studs and less for finished surfaces. After drying, monitor for any signs of dampness or new mold growth over the next weeks. Fix leaks promptly and consider moisture barriers in high-humidity areas (bathrooms, basements).
When to call a professional
If mold covers more than 10 square feet, involves HVAC ducts, or if you are unsure about safety, call a mold remediation professional. Professionals can assess hidden moisture sources, contain contamination, and dispose of mold-infested materials properly. A pro can also handle remediation under building codes and warranty requirements. If you have severe asthma, allergies, or immune compromise, avoid DIY remediation and seek expert help sooner.
Documentation and ongoing monitoring
Keep records of inspections, moisture readings, cleaning dates, and any replacements of damaged materials. Recheck humidity levels weekly for the first month after remediation, then monthly. Visual checks should accompany occasional moisture readings to catch early signs of recurrence. Scheduling routine inspections can prevent mold from returning and protect indoor air quality over time.
Tools & Materials
- Nitrile gloves(Disposable, powder-free)
- N95 respirator(Fit-tested if possible)
- Safety goggles or face shield(Eye protection)
- Protective coveralls(Disposable or washable)
- Plastic sheeting (6 mil or heavier)(Create containment zone)
- Tape to seal containment(For seams and door gaps)
- Detergent or EPA-registered cleaner(Mild cleaner for initial wipe)
- EPA-registered mold cleaner(Follow label directions)
- Non-abrasive scrub brush(Soft bristles to avoid damage)
- Rags or disposable towels(For wiping and drying)
- HEPA-filter vacuum or HEPA attachment(Dust containment)
- Moisture meter or hygrometer(Track humidity)
- Dehumidifier or fans(Aid drying)
- Bucket and spray bottle(Mixing cleaners)
- Leak repair materials (caulk, sealant)(If moisture source found)
- Sealable waste bags(For disposal)
Steps
Estimated time: 3-6 hours
- 1
Identify moisture source and contain area
Locate the likely moisture source (leak, condensation, or high humidity) and stop water access if safe. Establish containment by sealing the area with plastic sheeting and ensuring doors or vents to the rest of the home are closed. Label the boundary so others avoid disturbing the work.
Tip: Place signage and keep doors closed to prevent cross-contamination. - 2
Protect yourself and others
Put on PPE (N95, goggles, gloves, coveralls) before touching any surfaces. Keep others away from the workspace to minimize exposure. Verify that PPE fits properly and remains intact during the work.
Tip: Do a quick fit check on your respirator before starting. - 3
Stop the moisture and dry the space
If a leak is present, stop the water source or have it repaired by a professional. Increase airflow with fans and a dehumidifier to begin drying the area. Monitor with a moisture meter to confirm drying progress.
Tip: Aim for RH below 50% in the remediation zone. - 4
Clean visible mold and contaminated surfaces
Gently scrub moldy surfaces with detergent solution, then use an EPA-registered cleaner on treated areas. Avoid soaking materials; excessive moisture can spread mold. Rinse with clean water and wipe dry.
Tip: Never mix cleaners; follow label directions exactly. - 5
Dry thoroughly and monitor humidity
Continue drying until moisture readings stabilize and surfaces feel dry to the touch. Use dehumidifiers with continuous drain if possible. Re-check humidity levels daily for the first week after remediation.
Tip: Keep a drying log with times and readings. - 6
Document, repair, and prevent
Photograph the cleaned area, note any materials that had to be removed, and plan repairs to prevent recurrence (sealing, ventilation improvements, or envelope repairs). Schedule follow-up checks over the next 1-3 months.
Tip: Address exterior moisture sources to prevent recurrence.
FAQ
What does mold under nail mean in home remediation?
It typically points to hidden mold growth in moisture-prone spaces near fasteners. It is not a medical condition. Inspect for dampness around walls, trim, and cabinetry and address water sources before cleaning.
Hidden mold near nails usually means damp spots behind walls or trim; check for moisture and fix leaks before remediation.
Can I remove mold under nail myself?
Yes for small, contained spots with proper PPE and approved cleaners. If growth is extensive, porous materials are involved, or you have health concerns, hire a professional.
Small spots can be cleaned with the right safety gear, but big jobs should be left to pros.
What are signs mold is spreading in hidden spaces?
Persistent musty odor, new damp patches, or discoloration around joints can indicate spreading. Wet spots that reappear after cleaning also suggest ongoing moisture problems.
Look for musty smells and new damp patches as signs mold could be spreading.
How long does remediation take for small areas?
Small, contained jobs can be completed in a few hours. Larger or more complex spaces may require a full day or more.
Expect a few hours for small spots, longer for bigger jobs.
Should I test mold before cleaning?
Testing is optional for many DIY scenarios. If you choose to test, use certified labs and interpret results with caution; visual cues and moisture readings are often sufficient for remediation decisions.
Testing can help confirm mold type, but isn’t always necessary.
What costs are involved in professional remediation?
Costs vary by area and severity. Get multiple quotes and discuss containment, removal of damaged materials, and follow-up checks with the contractor.
Prices vary; obtain several estimates for a clear scope.
Watch Video
The Essentials
- Identify moisture sources before cleaning
- Contain the area to limit spread of spores
- Use proper PPE and safe cleaners
- Dry thoroughly and monitor humidity
- Call a pro for large or uncertain jobs