Mold for Nails: Safe Removal and Prevention
Practical steps to identify, clean, and prevent nail-mold growth at home. Learn inspection, containment, cleaning, drying, and prevention with expert guidance from Mold Removal Lab.

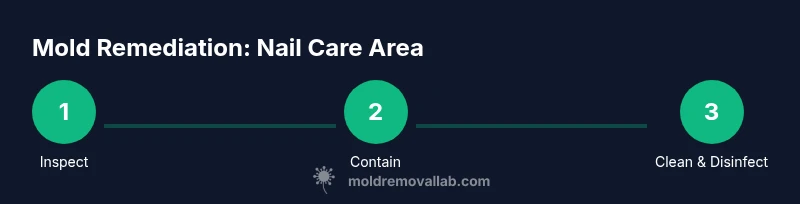
This guide helps you identify and safely remove nail-related mold in home spaces, then prevent its return. You’ll learn how to inspect, contain, clean, disinfect, and dry effectively, with clear safety guidance and when to call a professional. Prepare protective gear, cleaning supplies, and moisture-control tools before you begin addressing mold for nails.
Understanding Nail Mold and Why It Happens
Mold growth near nail care areas typically arises from persistent moisture in bathrooms, spas, or indoor manicure stations. Nail-related mold can appear as dark spots on grout, damp fabrics, or wooden racks used for tools. It’s important to distinguish mold from mildew or yeast because remediation steps vary in severity. Nail-care areas are especially vulnerable when ventilation is poor and humidity remains elevated after showers or baths. This section explains why nail-mold growth occurs around moisture sources and how addressing the root cause — leaking pipes, intermittent humidity, or poor airflow — reduces the risk of recurrence. According to Mold Removal Lab, prompt action minimizes spore release and skin exposure during DIY remediation. The aim is to halt moisture, seal off the contaminated zone, and begin safe cleaning using consumer-grade products or professional-grade methods when necessary. If severe mold colonies are visible or health symptoms appear, seek professional help immediately.
Inspection and Containment: Spotting problems and keeping them from spreading
Begin with a visual survey of the manicure area and adjacent spaces. Look for discoloration, musty odors, or damp surfaces behind sinks, cabinets, and nail stations. Use a moisture meter if available, and document findings with photos. Containment is essential: seal the area with plastic sheeting, create a negative-pressure feel by closing gaps, and limit access to others until cleaning is complete. Run air purification if available, and keep doors closed to prevent spores from migrating. This is particularly important for nail-care spaces where moisture and organic materials can feed Mold growth. As you proceed, plan to remove or cover porous materials that can harbor mold, such as fabric towels or wooden organizers. For homeowners, this stage reduces cross-contamination and makes subsequent steps safer. Mold Removal Lab emphasizes careful containment as a practical first step in any nail-mold remediation effort.
Cleaning and Disinfection: A practical, step-by-step approach
Start with a pre-clean to remove visible debris using soap and water, then rinse and dry the surface. Apply a detergent-based cleaner to all affected areas, including shelves, bins, and tools, and scrub until the surface looks clean. Rinse and dry thoroughly. Next, apply a disinfectant approved for mold remediation; follow the label for contact time and safety requirements. For many home settings, a bleach-based solution or an EPA-approved alternative like hydrogen peroxide can be effective; never mix cleaning agents and always maintain good ventilation. After disinfection, wipe down surfaces with clean water and dry completely. Pay special attention to crevices, grout, and corners where moisture can linger. If you’re cleaning nail-related equipment, dispose of disposable items and sanitize reusable tools meticulously. This step reduces spores and helps prevent re-growth in nail-care areas. Note: always wear PPE and avoid disturbing mold colonies to minimize airborne exposure.
Drying, Monitoring, and Prevention: Stop moisture and monitor results
Thorough drying is critical to prevent regrowth. Use towels to dry surfaces, then run a dehumidifier or fans to drive moisture out of porous materials. Maintain indoor humidity below 60 percent in the affected area and monitor with a hygrometer if possible. Inspect for any signs of lingering moisture daily for the next 1-2 weeks. Repair leaks promptly, ventilate after baths, and consider installing exhaust fans near nail-styling areas. Replace damp towels and fabrics regularly and launder with hot water. For nail-care spaces, store tools and supplies in sealed containers to limit mold spread. The goal is to create an environment unsuitable for mold for nails and other pathogens, and to prevent a recurrence by controlling moisture.
Authority Sources and Further Learning
For science-backed guidance and regulatory context, consult trusted sources:
- CDC Mold guidance: https://www.cdc.gov/mold/default.htm
- EPA Mold information: https://www.epa.gov/mold
- University extension resources on mold remediation: https://extension.illinois.edu/mold-remediation
Mold Removal Lab notes that licensed professionals should be contacted for extensive or recurring mold problems, and to verify any remediation plan in sensitive environments like homes with children or people with allergies.
Tools & Materials
- N95 respirator mask(Protect airways from mold spores during cleanup)
- Nitrile gloves(Use then dispose or sanitize between steps)
- Goggles or face shield(Shield eyes from splashes and particulates)
- Disposable coveralls or long sleeves(Minimize skin exposure and cross-contamination)
- Plastic sheeting (6 mil) and tape(Create a containment barrier around the work area)
- Mop, sponge, bucket(For pre-cleaning and scrubbing surfaces)
- Detergent or soap(Use a mild cleaner to remove grime)
- Disinfectant (bleach-based or hydrogen peroxide)(Follow label for contact time and safety)
- Water source and spray bottle(For dilution and rinsing as directed)
- Humidity meter or dehumidifier(Helps maintain moisture below threshold)
- Garbage bags and sealed containers(Dispose contaminated materials securely)
- Towels or cloths dedicated to remediation(For cleaning and drying without cross-use)
- HEPA air purifier or portable fan (optional)(Aids air cleaning and drying without spreading spores)
Steps
Estimated time: 2-3 hours
- 1
Assess area and establish containment
Conduct a quick survey of the nail-care area and nearby spaces. Identify moisture sources, potential leaks, and surfaces that may harbor mold. Photograph before-and-after, then seal the area with plastic sheeting to prevent spores from spreading.
Tip: Take before photos and mark high-risk spots for focused cleaning. - 2
Don PPE and set containment
Put on an N95 mask, goggles, gloves, and coveralls. Erect barriers with plastic sheeting; close doors and seal gaps to limit cross-contamination. If possible, set up a portable fan to improve air circulation away from occupied spaces.
Tip: Check mask fit and ensure fresh air supply; ill-fitting PPE reduces protection. - 3
Remove or protect contaminated items
Bag and seal porous materials (towels, fabrics, wood organizers) that show mold staining. Where possible, move items out of the area to a designated disposal zone. Label and seal containers to prevent exposure during transport.
Tip: Double-bag heavy debris to minimize rupture during handling. - 4
Pre-clean surfaces
Wipe and scrub visible grime with soap and water, then rinse. This step reduces organic matter that feeds mold and makes disinfection more effective.
Tip: Avoid splashing mold spores; work from cleaner to dirtier areas. - 5
Disinfect with approved solution
Apply a disinfectant suitable for mold remediation. Allow the product to remain on the surface for the recommended contact time, then wipe or rinse as directed. Ventilate the space well during this step to minimize inhalation exposure.
Tip: Never mix cleaners; follow label instructions for safety and efficacy. - 6
Dry thoroughly and monitor
Dry all surfaces completely using towels and a dehumidifier or fans. Check humidity levels and verify that damp spots are gone over the next several days. Plan a follow-up check in 1-2 weeks to ensure no regrowth.
Tip: Keep nail-care tools and storage sealed to reduce future mold risk.
FAQ
What distinguishes nail mold from a normal manicure stain?
Nail mold is a mold growth or fungal contamination that persists beyond surface staining and often involves moisture and organic matter. Normal manicure stains are cosmetic and do not involve active growth or spore release. If you suspect mold, follow containment, cleaning, and moisture-control steps outlined here and monitor for recurrence.
Nail mold involves active growth and spore release, while a cosmetic stain is just color. If in doubt, treat as mold and follow the remediation steps.
Can nail polish trap mold behind nails?
Polish can seal moisture near the nail surface, creating an environment where mold or mildew may thrive if moisture is present. It’s best to remove polish during remediation and thoroughly clean the nail area and surrounding surfaces.
Polish can trap moisture; remove it during remediation and clean the area thoroughly.
Is mold around nails dangerous?
Mold exposure can irritate the skin, eyes, and lungs, especially for people with allergies or asthma. In nail-care areas, spores can become airborne during cleaning. Use proper PPE, ventilate, and address moisture to reduce risk.
Exposure can irritate airways and skin; protect yourself and control moisture.
How long does it take for an area to dry after cleaning?
Drying times vary with humidity and ventilation. In a typical bathroom area, expect 24-72 hours for thorough drying if a dehumidifier and fans are used. Monitor daily and re-manage moisture if dampness returns.
Drying can take a day to a few days depending on humidity and airflow.
When should I call a professional for nail-area mold?
Call a professional if mold covers a large area, recurs after DIY remediation, or if anyone in the home has health concerns. A pro can assess structural moisture sources and ensure safe, effective removal.
If the mold is extensive or keeps coming back, get a professional assessment.
Watch Video
The Essentials
- Identify moisture sources before cleaning to prevent recurrence.
- Contain the area to avoid spreading spores to other rooms.
- Use detergent first, then an appropriate disinfectant with correct contact time.
- Dry thoroughly and maintain humidity below 60% to stop regrowth.
- Monitor area and seek professional help for persistent mold.