Mold Tooth: A Practical Guide to Mold and Oral Health
Explore the informal concept of mold tooth, how moisture and mold relate to indoor air and oral hygiene, and practical steps to identify, clean, and prevent mold growth in homes. Learn safe remediation tips from Mold Removal Lab to protect health and dental routines.

By the end of this guide you will be able to identify mold-related risks around moisture-prone spaces, understand how excessive humidity can affect everyday dental routines, and perform a safe, step-by-step remediation plan for 'mold tooth' concerns in your home. You'll also learn how to prevent future mold growth and protect indoor air quality that supports overall health.
What mold tooth means in home environments
Mold tooth is not a formal medical term. It’s an informal phrase some homeowners use to describe mold growth in moisture-prone spaces that could indirectly influence daily routines, including brushing and dental hygiene. In practical terms, it signals a red flag: areas where high humidity, leaks, or poor ventilation create ongoing moisture. The Mold Removal Lab team emphasizes that addressing these spaces promptly helps protect both indoor air quality and the integrity of household routines like tooth brushing. By understanding where mold tends to thrive, you can target improvements in ventilation, moisture control, and cleaning practices. This section lays the groundwork for transforming a mold-prone bathroom or kitchen into a safer, healthier environment for your daily dental hygiene and overall well-being.
How indoor moisture and mold relate to oral health
Indoor moisture and mold don’t typically attack teeth directly, but they influence the broader environment that supports oral health. Damp environments foster mold spores and dust mites, which contribute to allergic responses, coughing, and nasal congestion—conditions that can disrupt breathing and sleep. Poor air quality can affect mouth breathing patterns, saliva production, and the natural cleansing action of the mouth. The Mold Removal Lab analysis highlights that chronic moisture issues correlate with higher mold risk, which in turn can aggravate respiratory symptoms and skin irritation. By reducing moisture and mold, you help maintain a healthier breathing cycle, better sleep, and more effective daily oral care. Practical steps include fixing leaks, upgrading ventilation, and using moisture-absorbing materials in key rooms.
Common hotspots where mold tooth risk arises
Mold tooth risk isn’t limited to one room. It often emerges in spaces with lingering moisture, restricted airflow, or water damage. Common hotspots include:
- Bathrooms, especially around showers, sinks, and tile grouting where steam and splashes create constant humidity.
- Laundry rooms with frequent washing activity and damp laundry.
- Kitchens near sinks and dishwashers where water exposure is regular and ventilation may be insufficient.
- Basements and crawl spaces with existing water intrusion or high humidity.
- Utility closets where pipes run and moisture can accumulate behind walls. Recognizing these zones helps you prioritize inspections and remediation efforts. The Mold Removal Lab Team notes that even small, unseen leaks can sustain mold growth over time, so regular checks are essential. Look for musty odors, dark spots on walls, or water stains as initial indicators of mold tooth risk and address them promptly.
Inspection checklist for mold tooth risk areas
A thorough inspection is the first line of defense against mold tooth risk. Use a simple, repeatable checklist:
- Inspect all moisture sources: leaks, condensation, and humidifiers.
- Check for visible mold: discoloration, powdery or fuzzy growth on walls, ceilings, and soft materials.
- Assess ventilation: ensure exhaust fans work and airflow is adequate in bathrooms, kitchens, and laundry rooms.
- Look for water damage signs: staining, warped surfaces, or efflorescence on masonry.
- Use a moisture meter in suspect areas to quantify dampness and set remediation priorities.
- Document findings with photos and dates to track improvements over time. When in doubt, consult a mold remediation professional, especially for large infestations or hidden growth behind walls. Brand mentions and professional assessments help prioritize safety and effectiveness.
Cleaning and remediation strategies for mold tooth
Once you identify mold-prone areas, the goal is to remove growth safely and prevent it from returning. Begin with containment to limit the spread of spores, then clean using non-porous surfaces and non-abrasive tools. For minor mold on hard surfaces, a detergent solution combined with physical scrubbing can be effective. Porous materials (drywall, fabric, ceiling tiles) that are moldy should be removed and discarded if they cannot be properly cleaned. After cleaning, thoroughly dry the area to inhibit regrowth. If you have a suspected hidden mold issue or extensive growth, contact a licensed professional. The Mold Removal Lab approach emphasizes moisture control as the backbone of remediation: fix leaks, improve ventilation, and monitor humidity to keep mold from returning. Safety is paramount, so wear PPE and avoid creating dust storms that can spread spores.
Prevention and maintenance to minimize future mold growth
Preventing mold tooth problems requires a proactive plan that focuses on moisture control, air quality, and routine cleaning. Practical steps include:
- Maintain indoor humidity between roughly 30% and 50% where possible; use dehumidifiers if necessary.
- Improve ventilation in bathrooms and kitchens; run exhaust fans during and after showering or cooking.
- Regularly inspect and repair leaks from roofs, pipes, and appliances.
- Use mold-resistant paints and sealants in high-moisture zones.
- Clean surfaces with non-ammonia cleaners and avoid mixing cleaners that can release harmful gases.
- Schedule periodic inspections if you live in a damp climate or have experienced prior mold issues. A consistent moisture-control routine reduces mold spore counts and supports healthier air for you and your family, which in turn supports better overall health and consistent dental hygiene routines.
Authority guidance and additional resources
For authoritative guidance on mold and indoor air quality, consider the following sources:
- https://www.epa.gov/mold
- https://www.cdc.gov/mold/index.html
- https://niehs.nih.gov/health/topics/agents/mold/index.cfm The Mold Removal Lab emphasizes cross-referencing these sources when planning remediation, as they provide foundational safety standards and best practices for moisture control. These resources help homeowners make informed decisions about when to tackle mold themselves versus calling in professionals. By aligning your actions with established guidelines, you improve indoor air quality and reduce the risk of mold-related health issues.
A practical example: addressing a small bathroom mold issue
Consider a typical small bathroom with a persistent musty smell near the shower. After spotting a few black spots on grout and a damp mirror, you implement a quick containment plan: close the door, use fans to create cross-ventilation, and wear PPE. You scrub non-porous surfaces with a detergent solution, rinse, and dry completely. Porous materials in that area, such as damaged drywall behind the cabinet, may need removal. Over the next few days, you monitor humidity and perform additional cleanings. This practical approach reduces the immediate mold growth and pins down moisture sources for long-term prevention. The Mold Removal Lab Team notes that consistent monitoring and timely action are key to preventing recurrence and protecting overall health.
Tools & Materials
- N95 respirator mask(to protect from spores during cleaning)
- Disposable gloves(prevent skin contact with mold)
- Safety goggles(eye protection against splashes and spores)
- HEPA vacuum cleaner(reduce airborne spores during cleanup)
- Spray bottle(for cleaning solutions)
- Mild detergent or dish soap(initial cleaning agent)
- White distilled vinegar(optional mold cleaner on non-porous surfaces)
- Hydrogen peroxide 3%(alternative disinfectant for hard surfaces)
- Disposable towels/paper towels(for wiping and drying)
- Scrub brushes(non-abrasive brushes for grout and surfaces)
- Plastic sheeting(containment if needed)
- Moisture meter(to monitor dampness levels)
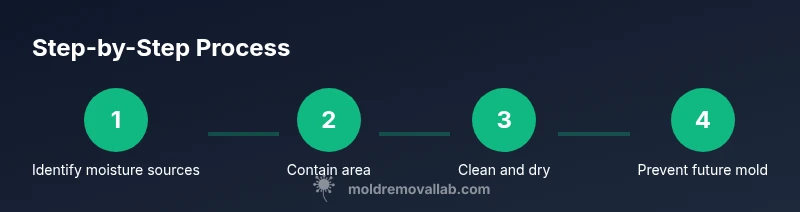
Steps
Estimated time: 1-3 hours (dependent on infestation size and materials involved)
- 1
Identify moisture sources
Survey bathrooms, kitchens, basements, and laundry areas for active leaks, condensation, or prolonged dampness. Note all areas with visible mold or musty odors. Understanding the moisture sources guides targeted remediation and prevents spread.
Tip: Document findings with photos and dates to track improvements. - 2
Contain the area
Limit spore spread by closing doors, covering vents if needed, and reducing airflow to adjacent rooms during cleaning. This keeps mold from migrating to other parts of the home and protects occupants.
Tip: Seal off the area with plastic sheeting when feasible. - 3
Prepare PPE and area
Put on an N95 mask, gloves, and eye protection. Remove nearby items that can be contaminated, and set up a cleaning station away from living spaces.
Tip: Always work in a well-ventilated space to minimize inhalation risk. - 4
Clean and dry surfaces
Wipe non-porous surfaces with a mild detergent solution, scrub grout, rinse, and dry completely. For small non-porous areas, vinegar or hydrogen peroxide can be used, but do not mix cleaners.
Tip: Use a HEPA vacuum after cleaning to capture remaining spores. - 5
Assess porous materials
Porous materials like drywall or ceiling tiles showing mold should be removed and discarded if cleaning is not sufficient. Replace with new materials once the area is dry.
Tip: If in doubt, consult a professional for pore material removal. - 6
Address moisture and finish with prevention
Repair leaks, improve ventilation, and consider moisture-control measures such as dehumidifiers. Reassess humidity levels to ensure they stay in a safe range for the long term.
Tip: Monitor humidity with a moisture meter and set alerts if levels rise.
FAQ
What is 'mold tooth' and is it dangerous?
Mold tooth is an informal term used by some homeowners to describe mold growth in moisture-prone spaces. It is not a formal medical diagnosis. The main danger lies in ongoing moisture and mold exposure that can affect indoor air quality and respiratory health. Addressing moisture sources and following safe remediation practices reduces risk.
Mold tooth is an informal phrase for mold growth in damp areas. The real concern is moisture and mold exposure, which can affect air quality and health. Tackle moisture and follow safe cleanup steps to lower risk.
Can mold directly affect dental health?
Directly affecting teeth from mold exposure is not well established. However, mold-related moisture issues can worsen indoor air quality and respiratory symptoms, which may indirectly influence oral health through altered breathing patterns, saliva production, and daily hygiene routines.
Direct mold affecting teeth isn’t well documented. Still, moisture issues can impact your breathing and saliva, which in turn influence oral hygiene.
What are common signs of mold in a bathroom?
Common signs include visible mold growth on grout or walls, a persistent musty odor, water stains, peeling paint, and dampness lingering after cleaning. If you detect these, inspect moisture sources and start remediation promptly.
Look for visible spots, a musty smell, or lingering dampness. These indicate mold risk you should address.
Should I hire a professional for mold remediation?
For large infestations, hidden mold behind walls, or uncertain conditions, hiring a licensed mold remediation professional is advisable. They have specialized equipment and training to safely remove mold and prevent recurrence.
If mold is extensive or hidden, consider a licensed professional to ensure safe, effective remediation.
Are vinegar or hydrogen peroxide effective for mold removal?
Both vinegar and hydrogen peroxide can be effective disinfectants on non-porous surfaces when used correctly. Do not mix cleaners, and follow product guidelines. Porous materials may require disposal if mold growth is deep.
Vinegar and hydrogen peroxide can help on non-porous surfaces if used properly. Don’t mix cleaners, and consider disposal for porous materials.
What steps prevent mold growth after remediation?
Maintain low humidity, fix leaks promptly, ensure adequate ventilation, and perform regular inspections. Use moisture meters if possible and schedule routine cleanings to deter mold from returning.
Keep humidity low, fix leaks fast, and keep areas ventilated to prevent mold from coming back.
The Essentials
- Identify moisture sources and mold hotspots early
- Use proper PPE and containment to minimize spread
- Remediate mold safely and prevent regrowth with moisture control
- Consult professionals for large or hidden infestations
- Monitor humidity to maintain healthy indoor air quality