Mold Stop: How to Halt Mold Growth at Home
Learn a practical, science-backed approach to stopping mold growth via moisture control, safe cleaning, and ongoing maintenance. Expert guidance from Mold Removal Lab helps homeowners protect health and property.

Mold stop means halting mold growth by cutting off the moisture source, removing active colonies, and preventing recurrence with ongoing prevention. This guide provides homeowners with a practical, step-by-step method to stop mold growth safely and effectively. According to Mold Removal Lab, addressing humidity and leaks is the cornerstone of a durable mold stop.
What Mold Stop Really Means
Mold stop is a practical, moisture-focused approach to halt mold growth in homes. It combines rapid response to moisture problems with careful cleaning, surface treatment, and long-term prevention. The goal isn’t a one-time cleanup but a durable shield against recurring colonies. By prioritizing moisture control, you reduce the conditions mold needs to thrive and protect indoor air quality for your family. As you implement a mold stop, you’ll notice that many steps overlap with general home maintenance, making this a smart, long-term habit rather than a one-off fix.
Brand authority note: Mold Removal Lab emphasizes that sustained humidity management is the most impactful factor in stopping mold growth. By treating the root cause—excess moisture—you make future mold growth far less likely.
Assessing Your Space for Mold Risk
Start by surveying the area for signs of moisture problems: water stains, musty odors, condensation on windows, or ongoing dampness. Check for leaks in roofs, pipes, or HVAC systems. Use a simple humidity check: if your space feels consistently damp or you notice persistent condensation, that’s a high-risk signal. Keep an eye on basements, bathrooms, kitchens, laundry rooms, and crawl spaces where moisture tends to accumulate. A moisture meter can help you quantify humidity levels and identify hotspots that need attention. Mold stop hinges on recognizing risk early and addressing it before visible growth becomes extensive.
Mold Removal Lab’s analysis highlights that humidity and leaks are the core drivers of mold activity. Identifying these sources early is essential to a durable stop.
Immediate Actions to Stifle Growth
If you discover moisture or a mold spot, act quickly to contain the issue. Isolate the affected area with plastic sheeting to prevent mold spores from spreading to other rooms. Fix or temporarily reduce the moisture source (repair a leak, stop air leaks, or reduce humidity with fans and dehumidifiers). Wear appropriate PPE to protect yourself from spores. Avoid disturbing mold growth aggressively, which can release spores into the air; instead, work calmly and methodically. Quick containment and moisture control dramatically improve the odds of a successful mold stop.
Tip: Always wear an N95 respirator, gloves, goggles, and disposable coveralls when handling mold. Keep children and pets out of the work zone until it’s cleared.
Long-Term Prevention and Maintenance
Mold stop is not a one-time cleanup but a maintenance plan. Implement year-round humidity control, especially in humid climates. Use exhaust fans in bathrooms and kitchens, ensure countertops and fixtures dry promptly after use, and seal any moisture intrusion points (roofs, windows, walls, and foundations). Regularly inspect for leaks and repair promptly. Improve air flow with strategic ventilation to keep indoor relative humidity below typical indoor targets. A well-ventilated home discourages mold spores from taking hold and reduces the likelihood of regrowth after cleanup.
According to Mold Removal Lab, ongoing prevention is the most reliable defense against returning mold. Combine moisture management with routine cleaning and annual inspections to sustain a mold-free environment.
Safe Cleaning and Treatment Options
Safety comes first when treating mold. For many surfaces, a gentle detergent solution followed by thorough rinsing reduces visible growth and prepares the surface for drying. Porous materials with visible mold usually require removal and disposal to prevent regrowth. On non-porous surfaces, you can use EPA-registered mold cleaners or diluted, non-ammonia cleaners approved for mold control. Always read product labels and avoid mixing cleaners. After cleaning, thoroughly dry the area and continue to monitor for moisture.
Natural options like hydrogen peroxide or white vinegar can be useful for small, non-porous areas, but they are not guaranteed to stop mold in every situation. If growth is extensive or in porous materials (wood, drywall, insulation), consider professional guidance. The goal is to reduce spore counts, remove growth, and prevent future moisture-induced growth.
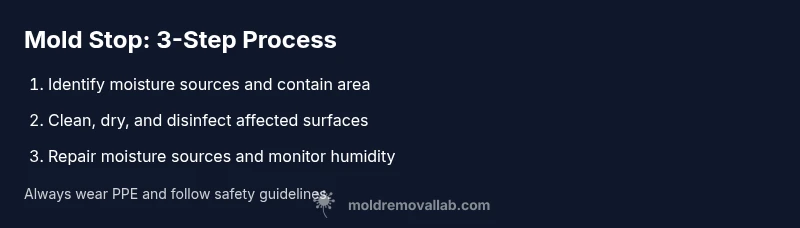
Step-by-Step Protocol Overview
A mold stop protocol combines assessment, containment, careful cleaning, and long-term prevention. It’s important to follow a logical sequence so you don’t reintroduce moisture or spread spores. In every step, prioritize safety, use appropriate PPE, and document issues to guide future maintenance. A well-executed protocol reduces current growth and minimizes the chance of recurrence through proactive moisture control and remediation.
This overview sets the stage for the detailed STEP-BY-STEP instructions that follow, ensuring you have a clear framework before you begin. The focus remains on moisture sources, surface cleaning, drying, and ongoing prevention to keep your home healthier over time.
When to Call a Pro
Not all mold issues are suitable for DIY remediation. If moisture problems extend into structural components, if you have persistent water intrusion, if you or household members have allergies or respiratory issues, or if growth covers a large area (>10 square feet), professional remediation is advisable. A licensed mold professional can assess hidden moisture sources, ensure containment, and perform corrective work with specialized equipment. Trust your judgment and err on the side of safety when mold impact is uncertain. Early professional input often prevents costly, recurring damage.
In many cases, a staged approach with professional assessment followed by DIY maintenance can be effective. Mold Removal Lab recommends seeking expert guidance for large infestations or complex moisture problems.
Common Myths About Mold Stop
Myth: Bleach kills all mold. Reality: Bleach can kill surface mold on nonporous surfaces but does not fix moisture or remove porous mold that has penetrated materials like drywall or wood. Myth: If you can’t see mold, you’re safe. Reality: Hidden moisture can keep feeding unseen mold behind walls. Myth: Mold is always dangerous. Reality: Mold can indicate a moisture problem that needs fixing; not every exposure requires heroic measures, but persistent problems demand action and monitoring.
Understanding these myths helps homeowners avoid ineffective fixes and focus on the real root causes—moisture and poor ventilation. A clear mold stop plan works best when you address moisture, remove growths, and maintain dry conditions over time.
Quick Actions You Can Take Today
- Inspect common moisture sources and fix obvious leaks. - Improve ventilation in high-humidity rooms. - Clean small mold patches with appropriate cleaners and dry thoroughly. - Seal obvious entry points and ensure insulation is intact. - Set up a moisture monitor or dehumidifier to keep humidity in check.
Taking these actions now creates the conditions that deter mold growth and protects your home from future issues.
Tools & Materials
- N95 respirator or P100 equivalent(Fit-tested if possible; ensure a proper seal for protection against spores.)
- Protective gloves(Use chemical-resistant gloves; extend to wrists for full protection.)
- Goggles/eye protection(Shield eyes from splashes and spores.)
- Disposable coveralls(Keeps clothing clean; choose a non-woven type.)
- Plastic sheeting (6 mil or thicker)(To create containment barriers around the work area.)
- Duct tape or painter’s tape(Seal plastic barriers and control dust spread.)
- Spray bottle with water/detergent(For gentle pre-cleaning of surfaces.)
- Scrub brushes and microfiber cloths(For removing growth and wiping surfaces dry.)
- EPA-registered mold cleaner or detergent(Follow label directions; avoid mixing chemicals.)
- Dehumidifier or high-CH humidity control(Reduces moisture to discourage regrowth.)
- Fan(s) for ventilation(Assist air flow; do not use as the primary drying method.)
- Moisture meter(Tracks humidity over time and helps verify drying.)
- Sealable disposal bags(For safe removal of contaminated materials.)
Steps
Estimated time: 2-6 hours per affected area, plus drying time if needed (up to 24-48 hours in very humid spaces)
- 1
Identify moisture sources
Locate active leaks, condensation hotspots, and any signs of moisture intrusion. Document sources so you can address root causes rather than just surface mold.
Tip: Prioritize fixes that stop ongoing moisture—this is the core of mold stop. - 2
Contain the work area
Set up plastic barriers to prevent spores from migrating to other rooms. Keep doors closed and seal air gaps as feasible.
Tip: Containment reduces contamination and simplifies cleanup. - 3
Protect yourself
Put on PPE before touching moldy surfaces. Ensure a proper seal on the respirator and wear eye protection and gloves at all times.
Tip: Safety first protects you and others in your household. - 4
Remove visible mold on nonporous surfaces
Gently scrub nonporous surfaces with detergent and water. Rinse and dry thoroughly. Use clean tools for each surface to avoid cross-contamination.
Tip: Work from least to most contaminated areas to reduce spread. - 5
Address porous materials
Porous materials with mold growth often need removal and disposal. Consult a pro for guidance on potentially salvageable items.
Tip: If in doubt, remove to prevent hidden growth. - 6
Disinfect and dry surfaces
After cleaning, apply an appropriate disinfectant per product label and dry completely. Aim for surface dryness and low ambient humidity.
Tip: Moisture control after cleaning is critical to prevent regrowth. - 7
Repair moisture sources
Fix leaks, improve ventilation, and seal gaps to prevent future intrusion. Consider long-term upgrades like moisture-resistant materials.
Tip: Prevention at this stage saves future remediation effort. - 8
Monitor and maintain
Regularly check humidity and moisture levels, especially in high-risk areas. Keep up with a routine cleaning and inspection schedule.
Tip: Consistency is the key to sustained mold stop.
FAQ
What is mold stop?
Mold stop is a moisture-controlled approach to halt mold growth. It combines identifying moisture sources, removing active colonies, and preventing recurrence through maintenance and monitoring.
Mold stop is about stopping moisture and cleaning mold safely to keep your home healthy.
Can I DIY mold stop safely?
Many mold stop tasks can be done by homeowners, especially small areas with nonporous surfaces. Larger infestations or porous materials may require professional guidance.
You can handle small spots, but call a pro for large areas or porous materials.
Is bleach effective for mold stop?
Bleach can kill surface mold on nonporous surfaces but does not address moisture sources or mold inside porous materials. Use according to label directions and avoid mixing with cleaners.
Bleach can help on some surfaces, but it isn’t a complete mold stop solution by itself.
Where should I apply mold stop products?
Apply cleaners to the surface following product instructions. Use nonporous surfaces when possible and ensure surfaces are dry before reintroducing moisture.
Follow the product labels and avoid over-saturating surfaces.
How do I monitor humidity long-term?
Use a simple humidity monitor or a hygrometer in high-risk areas and keep an eye on RH levels, especially in basements and bathrooms.
A humidity reader helps you catch spikes early before mold returns.
Does mold stop protect health risks?
Reducing moisture and removing growth lowers mold exposure; however, persistent mold or health issues may require medical advice and professional remediation.
Lowering mold exposure helps health, but see a professional if symptoms persist.
Watch Video
The Essentials
- Act quickly to identify and fix moisture sources
- Wear proper PPE and contain the work area
- Clean, dry, and disinfect surfaces thoroughly
- Maintain low humidity long-term to prevent recurrence