Mold Star 15 and Safe Home Mold Remediation
Learn how to interpret Mold Star 15 readings, control moisture, and safely remediate mold at home with practical steps, tools, and expert tips from Mold Removal Lab.

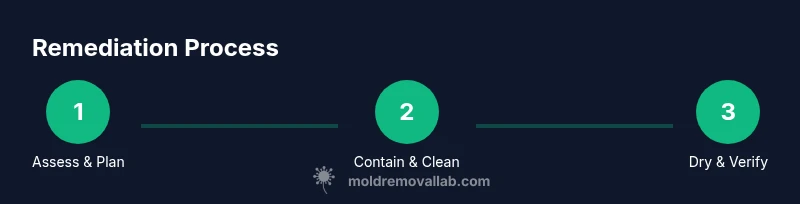
In this guide you will learn how to interpret a Mold Star 15 reading in your home and begin a safe remediation plan. You’ll identify moisture sources, choose basic PPE, seal the area, and use proven cleaning methods that reduce spores. If the reading shows active growth or you’re unsure about the extent, contact a qualified remediation professional.
What Mold Star 15 means for homes
Mold Star 15 is presented here as a practical, educational concept to help homeowners gauge mold activity during remediation. It isn't a specific lab result, but a way to think about how much growth you’re dealing with and how aggressively to respond. According to Mold Removal Lab, framing the issue this way helps families make safer, stepwise decisions rather than guessing at risk. A clear definition of the level you observe guides moisture control, containment, and cleaning strategies, reducing wandering spores and minimizing recontamination.
In real-world practice, a remediation plan starts with reliable moisture assessment and a careful surface inspection. Mold Removal Lab’s analysis shows that most indoor mold problems begin with hidden moisture sources, not just visible colonies. Treating the moisture first helps lower the Mold Star 15 level and makes subsequent steps more effective.
The science behind mold growth and moisture
Mold growth in homes is driven by excess moisture, not by spores alone. Surfaces that stay damp provide food and shelter for common indoor molds, enabling colonization over days to weeks. Temperature, airflow, and humidity influence how quickly families reach higher levels of activity. The core principle remains consistent: reduce the water supply, improve ventilation, and remove what molds feed on. This trio—moisture control, airflow, and cleanliness—helps limit mold spore suspension and potential health impacts.
Mold growth can begin behind walls or under floors before it becomes obvious. This is why long-term prevention focuses on early moisture detection, prompt repairs, and routine inspections. A steady, proactive routine lowers the risk that a modest problem becomes a large remediation project.
Interpreting a Mold Star 15 reading in your home
Think of Mold Star 15 as a scale with practical categories: low, medium, and high activity. A low reading might mean isolated spots with minimal moisture exposure; medium suggests more widespread growth with moderate moisture; high indicates active colonization requiring urgent action. Use these categories to decide whether to address leaks, seal the area, and perform cleaning; always prioritize safety and containment. Remember that hidden moisture behind walls can sustain growth even when surfaces look dry, so probing moisture carefully is essential.
To translate this into actions, start with a moisture check of suspected areas, then map out a remediation plan that targets sources of moisture, improves ventilation, and minimizes cross-contamination during cleaning.
Moisture control: the foundation of remediation
The most powerful step in any mold remediation is moisture control. If the humidity level remains high or leaks persist, any cleaning effort may be temporary. Practical approaches include fixing roof and plumbing leaks, using dehumidifiers to maintain comfortable humidity levels, and improving ventilation in bathrooms, kitchens, and basements. These measures reduce the likelihood of reinfestation and prevent future Mold Star 15 spikes.
A steady moisture-control plan often includes routine checks for condensation on windows, pipes, and exterior walls. By addressing the root cause—water in the wrong place—you reduce mold growth more effectively than by scrubbing surfaces alone.
Cleaning methods and safety considerations
Begin with a safe cleaning routine that minimizes spread. Wear appropriate PPE, including an N95 mask, eye protection, and gloves. Use a mild detergent solution for initial cleaning and take care to avoid dispersing spores into open air. For porous materials that cannot be cleaned thoroughly, consider removing and disposing of the material rather than attempting to sanitize it in place. After cleaning, thoroughly dry the affected area and monitor for returning moisture.
Avoid mixing cleaners, especially ammonia with bleach, as dangerous fumes can be produced. If you encounter an area that won't dry or shows new growth after cleanup, reassess moisture sources and sealing strategies before continuing.
When to hire a professional for Mold Star 15 readings
If the Mold Star 15 reading remains high after moisture control and cleaning, or if the problem involves large areas, complex building assemblies, or hidden moisture behind walls, a professional remediation contractor is warranted. Professionals can perform deeper moisture testing, establish containment, and use advanced remediation techniques to prevent recontamination. They can also help with post-remediation verification to ensure the space stays safe long-term.
For scenarios with uncertain scope, it’s wise to consult multiple contractors to compare approaches and pricing, while ensuring the chosen team adheres to industry guidelines and safety standards.
Debunking common mold remediation myths
Myth 1: Bleach kills mold on porous materials. Reality: Bleach often cannot penetrate porous substrates; it may only remove surface staining and not remove the mold’s root system. Myth 2: If you can’t see mold, it isn’t there. Reality: Hidden mold behind walls and under flooring is common when moisture persists. Myth 3: Mold remediation is a one-and-done job. Reality: Ongoing moisture control and follow-up inspections are essential to prevent recurrence.
Addressing these myths helps homeowners maintain realistic expectations and focus on moisture control, proper cleaning, and timely professional input when needed.
Prevention and long-term maintenance after remediation
Prevention hinges on consistent moisture control and regular inspection. Keep humidity levels low, fix leaks promptly, ensure proper ventilation in moisture-heavy rooms, and conduct seasonal checks for condensation. Use exhaust fans, dehumidifiers, and protective barriers where appropriate. Documenting the remediation process and scheduling periodic re-checks helps ensure lasting results and reduces the chance of repeat Mold Star 15 activity.
A practical habit is to re-test areas after rain events or plumbing work to detect moisture early and intervene before growth accelerates.
A practical at-home scenario illustrating Mold Star 15
Imagine a living room with a small water intrusion near a window frame. A homeowner notices a musty odor and a few discolored spots—the Mold Star 15 reading sits at a low-to-moderate level. After sealing and repairing the intrusion, the homeowner uses a detergent solution to clean surface mold, then dries the area with a dehumidifier. Over the following days, the space remains dry, sensors show low humidity, and the reading stabilizes at a low level. This scenario shows how moisture control, careful cleaning, and monitoring can prevent progression and maintain a safe living space.
Tools & Materials
- N95 respirator or P100 respirator(forms a tight seal; replace if damp or damaged)
- Disposable gloves(nitrile or latex; double-glove for contaminated cleanup)
- Safety goggles(eye protection against splashes and dust)
- Plastic sheeting (6 mil)(for containment to limit spore spread)
- Masking tape(to seal plastic sheeting and create zones)
- Mild detergent and warm water(for initial surface cleaning)
- Hydrogen peroxide or EPA-approved mold cleaner(avoid mixing with ammonia; follow label directions)
- Disposal bags (heavy-duty)(for contaminated materials and waste)
- Scrub brushes (disposable)(for scrubbing surfaces without scratching)
- Dehumidifier or moisture meter(to reduce humidity and track progress)
- Thermal moisture meter or hygrometer(for periodic checks of room humidity)
- Trash cans with lids(for safe disposal of contaminated materials)
Steps
Estimated time: 2-4 hours per area
- 1
Prepare the space and don PPE
Put on your PPE: respirator, goggles, and gloves. Create a contained work zone using plastic sheeting where feasible to minimize spore spread. Clear the area of movable furnishings and protect non-affected surfaces with tarps.
Tip: Check mask fit and seal before starting; a poor fit reduces protection. - 2
Identify and fix moisture sources
Inspect for leaks in roofs, plumbing, and windows. Repair the source and reduce humidity using controls such as fans and dehumidifiers. Document the moisture path to prevent recurrence.
Tip: Address both obvious leaks and hidden moisture behind walls. - 3
Contain the affected area
Set up barriers to prevent cross-contamination into clean spaces. Seal doors, vents, and any openings with plastic sheeting and tape. Use negative or physical containment as appropriate.
Tip: Containment reduces the need for full-room remediation. - 4
Gently clean visible mold
Use a detergent solution to wipe nonporous surfaces. For porous materials that cannot be cleaned, consider removal and proper disposal. Avoid scrubbing aggressively on delicate substrates to prevent damage.
Tip: Avoid creating aerosols by scrubbing too hard. - 5
Dry thoroughly and monitor
Run dehumidification and ventilation until the area reaches stable, dry conditions. Recheck relative humidity and moisture readings to ensure the space remains dry for several days.
Tip: Drying must outpace any residual moisture to prevent regrowth. - 6
Evaluate need for professional input
If moisture persists, if structural materials are involved, or if remediation scope is unclear, consult a licensed professional for assessment and deeper remediation.
Tip: A professional can perform advanced testing and remediation safely.
FAQ
What is Mold Star 15?
Mold Star 15 is a fictional rating used for explanation in this guide to illustrate mold activity levels. Real readings come from certified tests and assessments.
Mold Star 15 is a fictional rating used for explanation; real readings come from certified tests.
How urgent is mold remediation?
Mold should be addressed promptly, especially when moisture is present. Delays can lead to greater growth and potential health concerns.
Address mold promptly, especially when moisture is involved; delaying can worsen the problem.
Can I remove mold myself?
Small, non-porous areas with minimal growth can be tackled by homeowners using proper PPE and safe cleaners. Larger areas or porous materials usually require professional cleanup.
You can start small if it's a tiny area, but larger spots need a pro.
How long does remediation take?
Duration varies with space size, materials, and moisture levels. Plan for several hours to days for substantial projects depending on scope.
Remediation time depends on the area and moisture; larger jobs take longer.
Does bleach kill mold on porous surfaces?
Bleach often does not penetrate porous materials and may not fully remove mold roots. Safer cleaners and removal of affected material are usually better.
Bleach isn’t always effective on porous materials; safer cleaners and removal are better.
Do I need professional testing?
If you suspect hidden mold or moisture behind walls, or if initial cleanup does not resolve the issue, a professional assessment is advised.
Hidden mold or persistent issues mean you should get a professional assessment.
Watch Video
The Essentials
- Moisture control is the foundation of remediation.
- Containment reduces cross-contamination during cleaning.
- If in doubt, involve a licensed professional for safety and thoroughness.
- Document the process and monitor humidity to prevent recurrence.