Mold n more: Safe Home Mold Remediation Guide
A practical, step-by-step mold remediation guide for homeowners and renters. Learn how to identify mold, contain moisture, clean safely, dry thoroughly, and prevent recurrence with a clear, actionable plan.

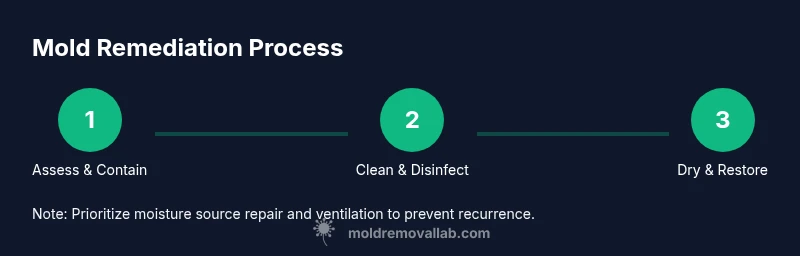
Mold n more helps homeowners identify, contain, and safely remove mold while preventing future growth. This practical six-step plan emphasizes PPE, containment, cleaning, drying, and prevention, so you can handle small problems confidently or know when to call in help. The approach centers on moisture control, documentation, and safety for any living space.
What mold n more means for your home
Mold n more is a practical framework for addressing mold in real homes. It combines identification, containment, cleaning, drying, and prevention into a single, actionable plan. According to Mold Removal Lab, mold risk rises where moisture persists and ventilation is poor. The Mold Removal Lab Team emphasizes that most mold problems come from hidden moisture sources, porous materials, and inadequate airflow. The goal is to outline a clear sequence you can follow, document, and adjust as needed.
Signs to watch for include musty odors, visible staining, warped materials, and persistent humidity. If you notice any of these in kitchens, bathrooms, basements, or around leaks, start with containment and moisture control. By treating mold as a moisture problem first, you lay a solid foundation for long-term safety and health.
Mold n more also encourages homeowners to keep simple records, including dates of inspection, moisture readings, cleanup steps, and post-cleanup checks, so you can track progress over time.
Safety First: PPE and precautions
Before you touch any mold, assemble the right PPE: an appropriately fitted N95 respirator or higher, safety goggles, and nitrile gloves. Keep skin and eyes protected, and ensure good ventilation by opening windows or using a HEPA air purifier. Do not mix cleaning agents; never use ammonia and chlorine bleach together. Remove pets and kids from the area and turn off HVAC dampers if possible to prevent spread. If anyone in the home has asthma or allergies, take extra precautions and consider delaying work until a professional can assess the situation. The Mold Removal Lab Team highlights that safety should guide every action, not speed.
Assessing the Situation: Visual cues and testing
Survey the affected area to map the extent of growth: damp walls, ceilings near leaks, and hidden spaces behind cabinets or under sinks. Look for discolored patches, peeling wallpaper, or warped materials. If you have moisture meters or moisture sensors, check ambient humidity and surface moisture. Testing for mold species is optional for DIYers, but Mold Removal Lab analysis notes that testing can help locate hidden moisture sources and guide remediation decisions. Use surface swabs or air sampling only if you have training and the results will change the approach. A careful assessment saves time and reduces risk.
Tools and Materials You'll Need
Gather the following items before you start. Essential tools are marked with a check, optional items can improve results. This helps you stay organized and minimizes repeat visits. PPE: N95 respirator, safety goggles, nitrile gloves; Containment: plastic sheeting, painter's tape, bags for disposal; Cleaning: detergent or enzyme cleaner, scrub brushes, spray bottle; Disinfection: EPA-registered cleaner or isopropyl alcohol; Moisture control: dehumidifier or fans, moisture meter; Protection: disposable coveralls; Documentation: notebook or camera to record progress. Having everything on hand reduces trips to the store and speeds up the process.
Common Pitfalls in DIY Mold Cleanup
DIY mold cleanup can go wrong quickly. Common mistakes include over-wetting porous materials, not containing the area, or scrubbing aggressively and releasing spores. Avoid using bleach on porous materials such as wood, drywall, or fabric; it can damage surfaces and fail to kill mold embedded in pores. Do not rely solely on visible mold—hidden moisture sources fuel regrowth. Always address the moisture source and ensure surfaces dry thoroughly before sealing spaces. Patience and documentation are essential to avoid recontamination.
When to Bring in Professionals
Professional remediation is advised if mold covers a large area, if there is sewage contamination, or if the mold reappears after cleaning. In homes with ongoing leaks, structural connections, or suspect HVAC contamination, call licensed remediators. Professionals use containment, negative pressure, and specialized equipment to minimize exposure and ensure proper drying. If you rent, review your landlord's responsibilities and documentation for remediation. When in doubt, consult a Mold Removal Lab guide to determine whether DIY steps are appropriate for your situation.
Maintaining a Mold-Resistant Home
Prevention is easier than removal. Control humidity, fix leaks promptly, improve ventilation, and use mold-resistant materials in high-moisture areas. Regular inspections and proactive cleaning reduce the odds of reoccurrence. Document any incidents so you can track improvement over time with a simple moisture log. The ultimate goal is a healthy indoor environment with minimal ongoing maintenance and lower risk of future mold.
Quick Reference Checklist
- Identify moisture sources and signs of mold
- Contain the area to prevent spread
- Wear appropriate PPE before touching mold
- Clean with suitable cleaners and disinfect surfaces
- Dry thoroughly and re-check for moisture
- Document findings and schedule follow-up checks
Tools & Materials
- N95 respirator(Fit-tested if possible; replace after use in contaminated areas)
- Nitrile gloves(Chemical-resistant, don before entering affected area)
- Safety goggles(Protect eyes from splashes and spores)
- Plastic remodeling film or heavy-duty plastic sheeting(Creates containment barriers)
- Painter's tape(Seal edges of containment and cover vents)
- Disposal bags (heavy-duty)(Seal and remove contaminated materials safely)
- Detergent or enzyme-based cleaner(Use on non-porous surfaces first)
- Scrub brushes and rags(Non-abrasive for delicate surfaces)
- Spray bottle(Dilute cleaner or water for misting)
- EPA-registered disinfectant or isopropyl alcohol (70%)(Used after cleaning for disinfection)
- Moisture meter or hygrometer(Monitor humidity and surface moisture)
- Dehumidifier or high-output fans(Facilitates drying; position to promote air flow)
- Disposable coveralls(Extra protection for larger jobs)
- Camera or notebook(Document progress and conditions)
Steps
Estimated time: 2-6 hours
- 1
Assess and prepare
Survey the affected area, identify moisture sources, and set a containment boundary. Put on PPE before entering, and inform household members of the plan to minimize disruption.
Tip: Double-check that all entrances to the contaminated area are sealed to prevent spread. - 2
Contain the area
Erect plastic barriers and seal doorways with tape. Establish a dedicated waste bag for contaminated materials and avoid crossing into clean areas.
Tip: Keep fans and HVAC off in the contaminated zone to reduce air movement carrying spores. - 3
Remove contaminated materials
Carefully remove porous materials that cannot be cleaned (drywall, insulation) and seal them in disposal bags. Do not pry apart materials in a way that disseminates spores.
Tip: Label bags clearly and keep a photo log of removed items for records. - 4
Clean and disinfect surfaces
Clean non-porous surfaces with detergent, then disinfect with an EPA-registered product or isopropyl alcohol. Rinse and dry thoroughly between steps to minimize moisture retention.
Tip: Avoid mixing cleaners; follow label directions for contact time. - 5
Dry the area thoroughly
Run a dehumidifier and fans, aiming to bring moisture levels close to normal. Recheck moisture on surfaces and monitor until consistent dryness is observed.
Tip: Keep humidity below typical indoor levels during the drying phase. - 6
Reassess and restore
Inspect for any remaining signs, address root moisture issues, and plan for repainting or replacing affected materials if needed. Document the process and schedule follow-up checks.
Tip: If mold returns after a cleaning, reassess moisture sources and consider professional help.
FAQ
How dangerous is household mold for health?
Most household mold exposure is a concern for sensitive individuals. It can trigger allergic reactions and respiratory symptoms in vulnerable people. If you notice persistent symptoms, seek medical advice and consider professional assessment.
Mold exposure can affect people with allergies or asthma. If symptoms occur, consult a professional and reduce exposure by improving ventilation.
Can I DIY mold remediation safely?
DIY remediation is feasible for small, contained spots on non-porous surfaces with proper PPE and containment. Large areas, porous materials, or structural concerns should be handled by professionals.
You can handle small, non-porous areas yourself, but seek help for bigger or porous mold problems.
How long does it take to dry after cleanup?
Drying time varies with space size and humidity. In typical indoor conditions, expect 24 to 72 hours of drying with airflow and dehumidification.
Drying usually takes a day or two depending on space and humidity.
Should I use bleach to kill mold?
Bleach is not recommended for most mold on porous materials; it may not penetrate pores and can cause surface damage. Use appropriate cleaners and ensure thorough drying.
Bleach isn’t ideal for porous materials; stick to proper cleaners and drying instead.
When should I hire a professional?
Call a licensed remediator if mold covers a large area, recurs after cleaning, or you suspect ongoing leaks or structure issues. Professionals offer containment, specialized equipment, and thorough drying.
If the mold is widespread or keeps coming back, get professional help.
What’s the first step in mold remediation?
Identify and fix the moisture source, then establish containment to prevent spread before cleaning. Without moisture control, mold tends to return.
First, find and fix moisture, then contain the area before cleaning.
The Essentials
- Contain the area before you start any cleanup.
- Address the moisture source as the top priority.
- Dry thoroughly and recheck moisture after cleanup.
- Document steps and conditions for future prevention.
- Know when to call a professional for complex jobs.