Mold Remediation Guide: Safe Step-by-Step for Homes
A practical, homeowner-focused guide to mold remediation covering moisture control, safe cleanup, material decisions, and prevention strategies, with expert guidance from Mold Removal Lab.

This step-by-step guide helps homeowners and renters perform mold remediation safely by identifying moisture sources, selecting appropriate cleanup methods, and preventing reoccurrence. You’ll need basic PPE, cleaning supplies, moisture-control tools, and a plan to monitor progress. Note: for clarity, this guide uses the phrase mold a willie as a placeholder example to illustrate moisture-driven remediation.
Understanding the Mold Problem in Homes
Mold growth in homes is usually driven by excess moisture, hidden leaks, or humidity that never fully dries. The phrase mold a willie appears here as a deliberate example to demonstrate how moisture signals guide remediation decisions, not as a real remediation technique. According to Mold Removal Lab, prevention begins with accurate assessment: you must know where moisture is coming from, how long it has been present, and which materials are affected. This knowledge helps you decide which cleanup methods are appropriate and how aggressively you need to act. By approaching mold as a moisture problem, you shift focus from merely cleaning visible stains to controlling the underlying conditions that invite spores to thrive. Throughout this guide, you’ll see practical steps you can take today to reduce exposure, protect occupants, and minimize future growth.
Assessing Moisture Sources and Mold Growth
Effective mold remediation starts with a thorough assessment. Look for sources of moisture such as leaks, condensation, or high humidity in damp rooms like bathrooms, basements, and laundry areas. Use simple checks—visible puddles, damp walls, or musty odors—to guide where testing and cleaning should begin. Mold often grows behind walls, under flooring, or inside cabinets, so don’t rely on surface appearance alone. Record findings with notes or photos to track progress and to support any future repairs. Mold Removal Lab analysis shows that addressing the moisture source is as important as removing the mold itself, because without dryness, mold returns even after cleaning. This section helps you map out the scope of work before you lift a single sponge.
Containment and PPE: Protecting People and Space
Containment reduces mold spread to clean areas and protects occupants. Use plastic sheeting to seal off the work zone, and set up a dedicated entry/exit to avoid cross-contamination. Personal protective equipment (PPE) is essential: wear an P100 respirator or higher, splash goggles or safety glasses, disposable gloves, and long sleeves to minimize skin exposure. Turn off ventilation that could carry spores to other rooms and set up negative pressure if possible with a targeted fan and filtration. These practices reduce exposure and keep your work area safer. Remember, containment isn’t optional—without it, you risk moving mold to clean spaces and increasing the cleanup burden.
Cleaning Methods by Surface Type
Different surfaces require different strategies. Non-porous surfaces (like tiles or sealed metal) can be cleaned with detergent and water, followed by a disinfectant approved for mold. Porous materials (like drywall or insulation) may absorb spores and often need careful removal, drying, or replacement. For stubborn spots, a solution such as diluted detergent or a mold cleaner can be used, but avoid mixing cleaners with bleach or ammonia, which can create hazardous fumes. After cleaning, run a moisture test to confirm surfaces are drying and no damp pockets remain. The goal is to remove active mold while preserving as much of the structure as possible, without introducing new moisture problems.
When to Remove and Replace Materials
Mold can infiltrate porous materials that cannot be satisfactorily cleaned, such as drywall, carpet backing, or fiberglass insulation. In such cases, replacement is usually the safer option to prevent regrowth. If materials contain structural moisture damage or show persistent odors, plan for safe removal and disposal. Take care to seal waste in heavy-duty bags and seal the area after the removal to prevent spores from spreading. If you’re unsure about whether a material can be saved, err on the side of removing it and repairing the space afterward. This approach reduces the chance of regrowth and keeps the project on a clean path.
Drying, Monitoring, and Preventing Future Growth
Drying is a critical step after cleanup. Use dehumidifiers and fans to promote even drying and reduce ambient humidity to safer levels. Monitor the area over days or weeks with a moisture meter to confirm that moisture content is staying at safe levels. Implement long-term prevention by fixing leaks, improving attic and basement ventilation, and managing humidity with a dehumidifier in damp areas. Consider implementing a simple maintenance routine: check for condensation, ensure proper ventilation in bathrooms and kitchens, and promptly address any water intrusion. These practices help ensure that mold does not return and that indoor air quality remains healthy.
Common Pitfalls and How to Avoid Them
Rushing cleanup without securing moisture control often leads to regrowth. Skipping containment can spread spores to clean areas and create larger remediation projects. Using too much water or wet cleaning methods on porous materials can drive spores deeper into building assemblies. Avoid relying solely on consumer sprays without proper drying and ventilation. Finally, if mold covers more than about 10 square feet (or if there is unknown moisture behind walls), it’s wise to consult a professional. Being cautious and methodical reduces risks and supports long-term safety.
Tools & Materials
- N95 or higher respirator (P100 preferred)(Protect lungs from spores; avoid vented masks)
- Disposable gloves(Multiple pairs; change if contaminated)
- Safety goggles or full-face shield(Eye protection against splashes and spores)
- Protective clothing (coveralls or long sleeves)(Washable or disposable)
- Plastic sheeting and tape(Create containment barrier around work area)
- Scrub brushes and sponges(Non-abrasive for delicate surfaces)
- Detergent or mold cleaner(Use as initial cleaning solution)
- Bleach (optional) or hydrogen peroxide(Use with caution; never mix without guidance)
- Spray bottle(For ready-to-use cleaners)
- Moisture meter or hygrometer(Track dryness levels)
- Dehumidifier(Maintain low humidity in the area)
- Trash bags (heavy-duty)(Seal mold-contaminated waste securely)
- Replacement materials (as needed)(Drywall, insulation, carpet padding)
- Ventilation fan with exhaust(Move air out of the work area)
Steps
Estimated time: 4-8 hours
- 1
Assess mold extent and document findings
Begin with a visual survey and note all affected areas. Photograph or sketch the mold layout, noting both visible growth and damp zones. This helps you create a clear remediation plan and supports future repairs.
Tip: Take readings at multiple times of day to account for humidity fluctuations. - 2
Stop moisture at the source
Identify leaks, condensation, or ongoing water intrusion and repair them before or during cleanup. Without stopping the moisture, mold can regrow even after cleaning.
Tip: Fix leaks with appropriate sealants or replace damaged components first. - 3
Contain the work area
Seal off the space with plastic sheeting and create a dedicated entry/exit to minimize cross-contamination. Keep doors closed and limit access to essential personnel only.
Tip: Use tape to seal gaps and create negative pressure with a fan directed outside the building if available. - 4
Clean non-porous surfaces
Wash hard, non-porous surfaces with detergent and water, then apply an approved disinfectant. For stubborn spots, repeat cleaning and ensure the area dries fully before proceeding.
Tip: Rinse and dry surfaces after each cleaning pass to prevent residual moisture. - 5
Address porous materials
Porous materials that are mold-impacted and absorbent (like drywall) may require removal and replacement. If removal is not feasible, treat with care and allow thorough drying but expect limited effectiveness.
Tip: Contain dust during removal to protect other parts of the home. - 6
Dry, monitor, and prevent recurrence
Run dehumidifiers and fans, re-check moisture levels with a meter, and ensure the space remains below the target humidity. Implement preventive measures to reduce future moisture buildup.
Tip: Set periodic reminders to re-run moisture checks after rain or high humidity.
FAQ
What is the first step in mold remediation?
The first step is to identify and stop the moisture source causing mold growth. Without addressing the moisture, mold will likely return after cleaning.
Start by finding and fixing the moisture source to prevent future mold growth.
Is it safe to clean small mold patches myself?
For small areas (less than about 10 square feet) and stable occupants, DIY cleaning can be feasible with proper PPE and containment. Larger areas or health concerns warrant professional assessment.
Small patches can be DIY if you take proper precautions; bigger jobs should be handled by pros.
Should I use bleach to kill mold?
Bleach can be effective on non-porous surfaces but is not always necessary. Use it only as directed and avoid mixing with other cleaners. For porous materials, removal may be more reliable than chemical treatment.
Bleach is sometimes useful on hard surfaces, but porous materials may require removal.
How long does it take to dry after remediation?
Drying times vary with room size and humidity. Expect several hours to a day with proper dehumidification and airflow; continue monitoring moisture after cleanup.
Drying can take hours to a day depending on humidity and space; keep checking moisture levels.
Can mold return after remediation?
Mold can return if moisture control is not maintained. Regular checks and rapid response to any moisture problem reduce recurrence risk.
If you keep moisture under control and monitor, mold is unlikely to return.
When should I call a professional?
Call a professional if mold covers a large area, if there is extensive water damage, or if you have health concerns. They can assess, contain, and remediate safely.
If the area is large or you’re unsure, hire a mold remediation professional.
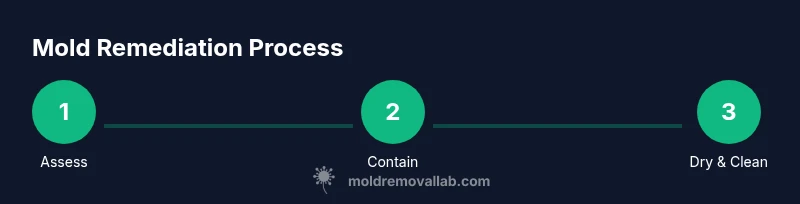
The Essentials
- Identify moisture sources before cleaning
- Contain the area to prevent spread
- Choose surface-appropriate cleaning methods
- Dry thoroughly and monitor moisture after cleanup
- Plan for prevention to avoid recurrence