i have mold: Practical Mold Remediation Guide
Learn practical steps to identify, assess, and safely remediate mold in your home. This guide covers inspection, cleanup, and prevention with Mold Removal Lab guidance.

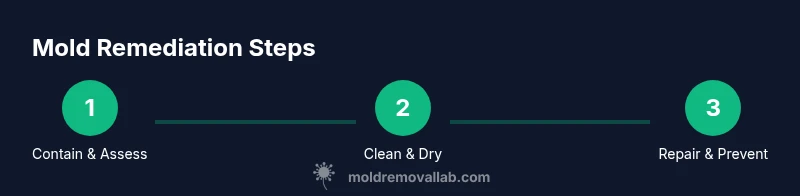
You can start by confirming mold signs, limiting exposure, and setting up a basic cleanup plan. Begin with containment, safety gear, and basic cleaning; know when to call a pro for large or toxic growth. According to Mold Removal Lab, a structured approach reduces health risks and damage. Keep the scope limited to the affected area and document progress.
If you have mold: quick reality check
If you say i have mold, you're not imagining things—the growth is a sign of moisture problems that require careful, deliberate action. The Mold Removal Lab team emphasizes that early identification and containment can prevent spread to other rooms. This section lays the groundwork for a safe, practical remediation plan and introduces the key decision points: DIY for small, contained patches; professional help for larger, hidden growth or suspected toxins. According to Mold Removal Lab, prompt, structured steps minimize health risks and property damage. Document visible signs, odors, moisture sources, and any recent water events to guide your next actions. By recognizing the problem early, you empower yourself to take control and reduce long-term costs.
In the following sections, you’ll find practical indicators and a decision framework that helps homeowners choose safe, effective methods while prioritizing health and safety.
Signs mold commonly appears and where to check
Mold often grows where moisture thrives, so start with kitchens, bathrooms, basements, laundry rooms, and spots behind furniture or appliances. Look for discolored patches, fuzzy or slimy textures, a musty odor, or staining on walls, ceilings, or carpets. Hidden growth behind drywall, under cabinets, or inside insulation can be more difficult to spot but is equally important to address. If you notice dampness that persists after cleaning or repainting, that’s a sign the moisture source needs more attention. Regular inspections after heavy rain, plumbing repairs, or high humidity are essential to catch reoccurrence early. By mapping the problem areas, you create a focused remediation plan that minimizes disruption and maximizes effectiveness.
Safety first: PPE, containment, and ventilation
Safety comes first when dealing with mold. Wear an N95 respirator, protective goggles, and gloves to reduce exposure to mold spores. Set up a containment zone using plastic sheeting to prevent spores from drifting to other rooms. Ventilate the work area with outside air when possible, but avoid blowing mold spores into living spaces. If you have asthma or allergies, or if the growth is extensive, consult a professional to avoid unnecessary risk. Proper ventilation helps drying and reduces secondary moisture problems, which are common causes of mold return.
DIY remediation vs professional remediation: when to decide
Small, isolated patches under 10 square feet and limited to non-porous surfaces can often be cleaned with consumer products and proper safety measures. Larger areas, porous materials, water-damaged items, or mold growth behind walls usually require professional remediation to ensure complete removal and to prevent recontamination. If you’re uncertain about the extent, or if you encounter black mold or mycotoxins, stop and call a licensed remediator. The goal is a thorough remediation that protects health and preserves the structure.
Cleaning small patches: a practical, safe approach
For small patches on non-porous surfaces, use a detergent solution, rinse, and dry thoroughly. Avoid bleach on porous materials unless the label specifically permits it and you’ve tested a small area first. Don’t mix cleaners; use one product at a time and ensure adequate ventilation. After cleaning, seal or repaint only when completely dry to prevent regrowth from residual moisture. Keep washcloths and disposable wipes contained in a plastic bag for disposal.
Moisture control and prevention: key to lasting results
Mold returns when moisture is present, so addressing humidity is essential. Fix leaks promptly, use a dehumidifier in damp spaces, and improve ventilation in bathrooms and kitchens. Regularly inspect window seals, pipes, and roof lines after storms. A proactive approach—scheduled moisture checks, prompt repairs, and ongoing air circulation—dramatically lowers recurrence risk.
When to test for mold and how to interpret results
Mold testing can confirm the presence and type of mold, but it doesn’t replace remediation. Tests are most useful when you’re unsure about the extent or when an indoor air quality assessment is needed for health concerns. Use accredited labs and interpret results in the context of moisture sources and remediation progress. Testing should accompany a documented remediation plan, not replace it.
Realistic expectations and common mistakes to avoid
Expect remediation to be a multi-step process, especially after water damage. Common mistakes include rushing cleanup, skipping containment, and failing to dry the area thoroughly. Do not rely on one-size-fits-all products; mold types and surfaces demand tailored approaches. By following a structured plan and avoiding shortcuts, you will reduce health risks and protect your home.
Tools & Materials
- N95 respirator mask(Fit-tested if possible; replace if soiled)
- Protective gloves(Disposable or reusable rubber gloves)
- Safety goggles(Eye protection against splashes and spores)
- Disposable plastic sheeting (6–10 mil)(To create containment zones)
- Tapes and utility knife(For sealing plastic barriers)
- HEPA vacuum with hepa filter(Use only for cleanup, not for initial air disturbance)
- Mild detergent and clean water(For initial cleaning)
- White vinegar or non-toxic mold cleaner(Alternative to bleach on non-porous surfaces)
- Spray bottle and microfiber cloths(For targeted cleaning)
- Disposable bags (heavy duty)(For sealed disposal of contaminated materials)
- Moisture meter or hygrometer(Optional; tracks humidity levels)
- Dehumidifier(Keeps RH below 50-60%)
Steps
Estimated time: 2-4 hours
- 1
Contain the area and prep
Establish containment with plastic sheeting to prevent spores from moving to other areas. Put on PPE before touching any mold. Gather cleaning supplies and set up a cleaning zone so you’re not moving back and forth between spaces.
Tip: Seal seams with tape and ensure doors have a plastic splash sheet to minimize cross-contamination. - 2
Identify moisture sources and dry the space
Find the moisture source (leak, high humidity, condensation) and fix it whenever possible before cleaning. Use a dehumidifier or fans to start drying the area; run for several hours and monitor humidity.
Tip: Drying first prevents mold spores from settling on new surfaces during cleanup. - 3
Clean visible mold safely
Begin with non-porous surfaces using a detergent solution or vinegar. Wipe gently to remove the colony, then dry immediately. For porous materials, you may need to remove and replace if damaged beyond cleaning.
Tip: Never use bleach on porous materials; it can worsen damage and release more spores. - 4
Dispose of contaminated materials
Place contaminated fabrics and porous materials in sealed bags and remove them from the home promptly. Do not reuse cleaning rags; destroy or properly launder them and dispose of plastic containment after a complete cleanup.
Tip: Double-bag and label waste to prevent accidental exposure. - 5
Sanitize tools and area after cleanup
Wipe down non-porous tools with a cleaner and dispose of single-use items. Vacuum the area with a HEPA vacuum if allowed by the product instructions, then seal the area with air sealing devices to prevent recontamination.
Tip: Avoid aerosolizing spores; keep cleaning to compact, contained motions. - 6
Inspect, monitor, and plan for prevention
Recheck moisture levels and visible patches over the next days; address any lingering dampness promptly. Plan for ongoing humidity control and regular inspections to prevent recurrence.
Tip: Document moisture readings and mold checks to track progress.
FAQ
What counts as hazardous mold and when should I call a pro?
Visible growth over large areas, black mold, or growth in ventilation systems often requires a licensed professional. If you have health concerns or suspect mycotoxins, seek expert help promptly.
Call a licensed professional for large areas, black mold, or suspected toxins, especially if you have health concerns.
Can I remove mold myself in one day?
Small patches on non-porous surfaces can be addressed with proper safety steps. Major growth, porous materials, or hidden pockets should be handled by professionals to ensure complete removal and prevent recurrence.
Small patches are doable with care; large or hidden growth should be left to pros.
Is mold remediation covered by homeowners insurance?
Some policies cover mold remediation when caused by covered perils like burst pipes or leaks. Check your policy details and document moisture events to support a claim.
Coverage varies; review your policy and document the moisture event for a claim.
What tools are essential for mold cleanup?
PPE (N95 mask, gloves, goggles), plastic sheeting, cleaner (detergent or vinegar), microfiber cloths, and a HEPA vacuum are key for safe, effective cleanup.
PPE, containment, and a good cleaner plus a HEPA vacuum cover the basics.
How long does it take to know if mold is gone?
Moisture needs to be controlled and the area dried; you should see no new growth over at least a few days to weeks, and possibly run a follow-up check after a moisture-control cycle.
Keep an eye on the area for a few days to weeks after drying and remediation.
Watch Video
The Essentials
- Contain the area to prevent spread of spores.
- Wear proper PPE and ensure adequate ventilation.
- Dry thoroughly before closing up repairs.
- Decide DIY vs pro based on area size and material.