Solution for Cleaning Mold: Safe DIY Remediation Guide
A practical, safety-forward guide to cleaning mold at home. Learn when to DIY, which cleaners to use, moisture control, and steps to prevent regrowth—backed by Mold Removal Lab research.

Learn how to safely clean mold at home with a practical, moisture-control approach. This quick guide outlines essential steps, PPE, and when to seek professional help, focusing on effective cleaning and prevention. From selecting the right cleaning solutions to ventilation and containment, you'll gain a clear plan to reduce mold growth and protect your family.
Understanding the Mold Cleaning Solution Landscape
Mold is more than a surface problem; it signals an underlying moisture issue that needs addressing. When homeowners search for a "solution for cleaning mold," they want methods that are safe, effective, and capable of preventing recurrence. According to Mold Removal Lab, the most durable mold cleanup combines cleaning with moisture management and timely action rather than a one-off wipe-down. Cleaners are not a substitute for a dry, ventilated environment; they reduce surface colonies but won't fix the root cause if humidity remains high. For households with small, non-porous patches, consumer-grade cleaners can be sufficient. For porous materials like drywall or wood, you may need specialized products or professional intervention. This section unpacks the different types of cleaners, their appropriate uses, and common pitfalls. A key takeaway from Mold Removal Lab analysis is that moisture control consistently outperforms cleaners alone in preventing regrowth. Practically, plan to address humidity, leaks, and poor ventilation as part of any cleaning strategy.
Types of Cleaning Solutions and When to Use Them
Different surfaces demand different cleaners. Porous materials such as drywall, carpet, or fabric usually require more conservative approaches and sometimes professional removal. Non-porous surfaces like tile or concrete can benefit from stronger cleaners with antimicrobial properties. Common options include hydrogen peroxide, white vinegar, enzyme-based cleaners, and, in some cases, diluted household detergents. Bleach is sometimes used on non-porous surfaces but should be avoided on porous materials and never mixed with ammonia or other cleaners. For areas with ongoing moisture, focus on products that both kill spores and help maintain a dry surface. Always test a small area first to confirm compatibility and colorfastness, and follow label directions for concentration and contact time. If a mold patch exceeds 10 square feet or is spreading behind walls, professional remediation is advised.
Evaluating Safety and Ventilation Standards
Safety comes first when tackling mold cleanup. Wear protective gear—N95 mask, gloves, and eye protection. Work in a well-ventilated area, ideally with a fan directed outward to push contaminants outside. Seal off the cleaning zone with plastic sheeting to prevent spores from traveling to other rooms. Never start a cleanup if you or household members have respiratory issues, allergies, or compromised immune systems. Keep children and pets away during the process. After cleaning, ventilate the area for several hours and monitor the humidity; a dehumidifier can be a valuable ally in preventing regrowth. These practices align with Mold Removal Lab recommendations for reducing exposure and improving overall indoor air quality.
Porous vs. Non-Porous Surfaces: How Cleaners Differ
On non-porous surfaces, cleaners can physically remove mold and inactivate spores with shorter contact times. Porous materials absorb moisture and harbor mold deeper, making complete removal harder and sometimes requiring replacement. For porous surfaces, mechanical removal (scraping, sanding) may be necessary, followed by proper disposal of contaminated material. In many cases, sterilizing or sealing the area is not a substitute for drying out the space. When in doubt, consider a professional to assess structural materials and determine whether replacement is needed. The right approach balances cleaning effectiveness with long-term moisture control.
Preventing Recurrence: Moisture Control and Maintenance
Cleaning mold is only part of the solution. Long-term prevention hinges on moisture control: fix leaks promptly, improve drainage, and maintain indoor humidity below 60 percent (ideally 30-50 percent in living spaces). Use exhaust fans in bathrooms and kitchens during and after use, and consider a dehumidifier in damp basements or crawl spaces. Regularly inspect problem areas for condensation, especially after rain or strong temperature changes. Establish a routine of cleaning and monitoring, and document any persistent issues that could indicate hidden water intrusion. A proactive approach reduces recurrence and protects the home over time, aligning with the Mold Removal Lab guidance on sustainable mold remediation.
Common Myths About Mold Cleaning Debunked
Many homeowners cling to myths that can hinder safe remediation. For instance, bleach is not a universal solution for all surfaces, especially porous materials. Some cleaners are marketed as instant fixes, but mold often grows back if moisture isn’t controlled. Another myth is that visible mold is the only danger; spores can travel and colonize unseen areas. Always verify claims with product labels and evidence-based guidance. Informed decisions save time and reduce risk, keeping families safe while improving indoor air quality.
When to Call a Professional
Professional remediation is advised when mold covers large areas (typically more than 10 square feet), when mold recurs after cleaning, or when it appears in HVAC systems or behind walls. A certified mold remediator can assess moisture sources, perform controlled removal, and ensure proper disposal. While DIY approaches can address small, contained patches, broader problems require specialized equipment and expertise to prevent cross-contamination and structural damage. The Mold Removal Lab perspective emphasizes a cautious threshold: if you’re unsure about the extent, seek professional guidance early to minimize risk.
Practical Tips for Documentation and Future Prevention
Document the mold discovery with photos and dates to track progress. Maintain a moisture log, noting humidity levels, leaks, and ventilation improvements. Keep records of cleaning products used and their concentrations for future reference. Consider upgrading ventilation, sealing leaks, and using mold-resistant paints or sealants in problem areas. A well-documented, moisture-aware strategy not only resolves current mold but sets a foundation for a healthier home long-term.
Authority and Additional Resources
For rigorous, vetted guidance, refer to authoritative sources. The EPA outlines mold basics, prevention strategies, and safe cleaning practices. The CDC’s mold health information covers risk factors and exposure concerns. NIOSH provides indoor environmental guidance relevant to mold and moisture. These sources complement practical steps and reinforce best practices for safe cleanup and prevention. See the links below for direct access to trusted, government-backed information.
Tools & Materials
- Protective gear (N95 mask, gloves, eye protection)(Choose NIOSH-approved mask; ensure a comfortable seal.)
- Personal protective clothing(Wear long sleeves and pants you can launder after use.)
- Spray bottle with cleaning solution(Use a solution appropriate for the surface (see guide).)
- Non-porous scrub brush or sponge(Soft-bristle to minimize surface damage.)
- Microfiber cloths(For wipe-downs and drying surfaces.)
- Plastic sheeting and tape(Contain the work area to prevent spread of spores.)
- Trash bags for contaminated materials(Seal and dispose as household hazardous waste if required.)
- Dehumidifier or fan(Helps dry the area and reduce humidity.)
- Moisture meter or hygrometer(Useful to monitor humidity levels.)
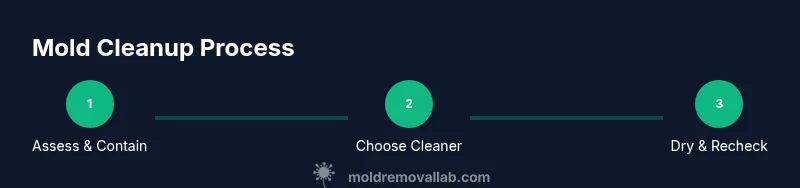
Steps
Estimated time: 60-90 minutes total
- 1
Assess the space and safety
Identify the mold-affected area and moisture source. If the area is large or connected to HVAC, pause and plan with safety measures. Document visible growth with photos for reference.
Tip: If you feel dizzy or have respiratory issues, stop and ventilate the area; consider professional help. - 2
Set up containment and PPE
Seal off the area with plastic sheeting and tape. Put on the required PPE before touching any moldy surfaces.
Tip: Keep doors closed and vents off to prevent spores from migrating. - 3
Choose and apply a cleaning solution
Select a solution appropriate for the surface. Apply generously and let it sit for the recommended contact time to kill mold.
Tip: Always spot-test a small area first. - 4
Scrub and rinse
Gently scrub with a non-porous brush or sponge, then wipe away residue with clean cloths. Avoid aggressive scrubbing on delicate materials.
Tip: Rinse surfaces with clean water if the product requires it. - 5
Dry thoroughly and recheck
Dry the area completely using towels and a dehumidifier or fans. Reassess for any remaining mold spots and re-clean if necessary.
Tip: Humidity should stay below 60% in treated spaces. - 6
Address moisture sources
Fix leaks, improve ventilation, and consider sealing methods where appropriate to prevent recurrence.
Tip: Keep a moisture log for early signs of trouble. - 7
Document progress and plan next steps
Take before-and-after photos, note cleaning products used, and schedule follow-up checks in a few weeks to ensure no regrowth.
Tip: If mold returns within a few weeks, escalate to professional remediation.
FAQ
What is the safest first step when mold is discovered?
Start by sealing off the area to prevent spores from spreading and donning appropriate PPE. Assess moisture causes and determine if the area is safe to clean yourself or if professional help is needed.
Seal the area and wear protective gear before you start. If the mold covers a large area, call a pro.
Is bleach an effective solution for all mold types and surfaces?
Bleach is mainly effective on non-porous surfaces and does not address mold growth embedded in porous materials. Use alternative cleaners for drywall, wood, or fabric.
Bleach works on hard, non-porous surfaces but isn’t a universal fix for all materials.
How long should surfaces dry after cleaning?
Aim for thorough drying within 24-48 hours, using dehumidifiers or fans to keep humidity low. Recheck for signs of moisture or regrowth during that period.
Drying usually takes a day or two; monitor humidity and recheck for mold growth.
When should I call a professional remediation service?
If mold covers a large area, recurs after cleaning, or is located behind walls or in HVAC systems, a professional remediation service is recommended.
Call a pro if growth is extensive or hides behind walls.
Can mold be prevented from returning after cleaning?
Yes, by fixing moisture sources, improving ventilation, and using mold-resistant products where appropriate. Regular inspections and humidity control reduce recurrence.
Prevent mold by controlling moisture and inspecting regularly.
How can I identify hidden mold behind walls?
Hidden mold may require professional detection methods like moisture meters or infrared imaging. Look for musty odors, unexplained humidity, or water stains as indicators.
If you suspect hidden mold, professionals can perform concealed-area testing.
The Essentials
- Test moisture levels before cleaning.
- Choose cleaning solutions by surface type.
- Contain and ventilate to prevent spread.
- Dry thoroughly to prevent regrowth.
- Document and monitor for future moisture issues.