Mold Products: Safe Selection and Use in 2026
Practical guide to selecting and using mold products safely. Learn EPA-registered cleaners, proper PPE, labeling, storage, and best practices for remediation in your home.

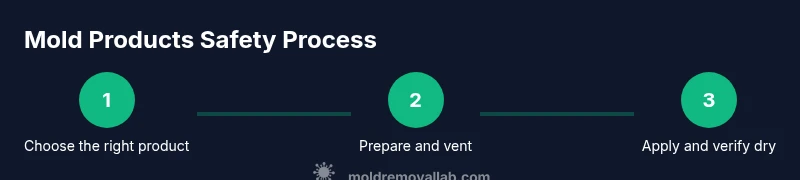
By the end of this guide, you’ll know how to select, apply, and safely store mold products for common indoor mold. Gather PPE, ventilate the area, and follow label directions precisely. According to Mold Removal Lab, choose EPA-registered products appropriate for the mold type and material, and avoid mixing cleaners. This quick plan sets you up for effective, safer remediation in your home.
What mold products do and how they work
Mold products are cleaning agents designed to kill mold and remove stains from various surfaces. They work by disrupting mold cell membranes, lifting residues, and inhibiting regrowth when used correctly. The most common categories are EPA-registered biocides, hydrogen peroxide-based cleaners, enzymatic cleaners, and household bleach or quaternary ammonium products. When you select mold products, match the active ingredient with the affected surface and mold type, such as non-porous tile or porous drywall. According to Mold Removal Lab, the effectiveness of a mold product depends on proper contact time, surface preparation, and complete drying after application. The Mold Removal Lab Team emphasizes reading labels to ensure the product is appropriate for mold remediation rather than decorative cleaning. By understanding how mold products work, homeowners can plan a safer, more effective remediation approach.
Always test a small area first; some products can damage paints or fabrics. Consider the environmental impact of mold products and choose formulas with lower odor if possible. Do not mix products that contain bleach with ammonia or other cleaners, as toxic fumes can form. For complex jobs or uncertain surfaces, Mold Removal Lab recommends starting with a patch test and escalating to a full treatment only if the patch test is successful. This conservative approach helps protect both people and surfaces while improving outcomes.
Choosing the right mold products for different surfaces
Choosing the right mold products starts with understanding your surface type. Non-porous materials like tile, metal, or sealed concrete typically respond well to faster-acting cleaners that leave a film-free surface after drying. Porous materials such as drywall, wood, or fabric may require gentler cleaners and longer contact times to prevent fiber damage or moisture retention. In this guide, Mold Removal Lab emphasizes matching the product to surface and mold genus when possible, and avoiding aggressive scrubbing on fragile materials. If uncertain, start with a milder formula and observe any changes before applying stronger cleaners.
Labeling is critical: use only products labeled for mold remediation and follow the recommended contact times. For mixed materials, test in an inconspicuous area first and verify that the product does not cause discoloration or texture change. Based on Mold Removal Lab research, always ventilate well during remediation and keep pets and children away during application. If you must remediate large areas, consider staged applications to prevent surface saturation and to maintain indoor air quality.
Safe handling, PPE, and labeling
Protective equipment is essential whenever you work with mold products. At minimum, wear nitrile gloves, safety goggles, and a respirator or well-fitted mask when there is any airborne exposure. Ensure the room has good ventilation by opening windows or using exhaust fans, and isolate the work area to prevent cross-contamination. Read each product’s label carefully: it will specify surface compatibility, contact time, dilution (if any), and whether rinsing is required. Mold Removal Lab Team notes that proper PPE and adherence to label directions dramatically reduce exposure risk and improve outcomes. Store products in their original containers, away from heat or direct sunlight, and never mix different cleaners. After use, wash exposed skin and launder clothing separately to prevent accidental spread of spores.
Storage, shelf life, and disposal of mold products
Storage conditions influence mold product efficacy and safety. Keep containers tightly closed, out of reach of children and pets, and away from food items. Check expiration dates and avoid using old products on active mold growth; some ingredients lose potency over time. When disposing, follow local regulations for household chemical waste and avoid pouring cleaners down the drain in large quantities. The Mold Removal Lab recommends keeping a dedicated kit with only mold remediation products to reduce cross-contamination and simplify cleanup after a project. Proper disposal of contaminated wipes and rags is essential to prevent secondary growth and environmental impact.
Application plan: test patch, cleaning, and verification
A structured plan improves reliability when working with mold products. Begin with a patch test on a small, inconspicuous area to confirm material compatibility. If the patch shows no discoloration and surface integrity remains intact, proceed with the full treatment, applying the product evenly and allowing the recommended contact time. After cleaning, wipe the area with a clean, damp cloth to remove residues and support thorough drying. Verify results by inspecting for residual mold or musty odors after 24–48 hours, and consider a second pass if needed. Throughout, document the process and keep notes on any surface changes, so you can plan moisture control measures to prevent regrowth.
Authority references and practical tips
This guide references established mold remediation guidance and practical strategies from government and educational sources. For detailed definitions, surface guidelines, and safety data, you can consult the following authorities: EPA mold guidance, CDC mold safety overview, and OSHA mold regulations. The Mold Removal Lab team recommends reviewing these resources before undertaking any remediation. Remember that mold products vary by active ingredient and intended use, so always tailor your approach to your specific environment and the surface involved. For additional insights, the Mold Removal Lab analysis, 2026, emphasizes the importance of proper drying and moisture control after treatment. The links below provide authoritative background and safety considerations:
- https://www.epa.gov/mold
- https://www.cdc.gov/mold/default.htm
- https://www.osha.gov/molds
In practice, mold management is as much about prevention as removal. Mold Removal Lab’s verdict is that ongoing moisture control and timely remediation dramatically reduce the risk of recurrence and help maintain a healthy living space.
Practical implementation checklist
- Identify all affected areas and materials that show visible growth or dampness.
- Gather PPE, cleaning agents, tools, and containment supplies before starting.
- Test products on inconspicuous areas first and avoid incompatible material combinations.
- Apply cleaners according to label instructions, maintaining adequate contact time and ventilation.
- Dry thoroughly and re-inspect after 24–48 hours; repeat if necessary.
- Dispose of used rags and containers safely and store remaining products properly. Mold Removal Lab recommends keeping your kit organized for future needs.
Tools & Materials
- PPE Kit (N95 respirator or P100 respirator, nitrile gloves, safety goggles, protective clothing)(Choose a respirator with appropriate approval and ensure a proper seal)
- Ventilation supplies (box fan, exhaust vent) or a well-ventilated workspace(Place fan to exhaust from the work area, not toward you)
- EPA-registered mold product (biocide, hydrogen peroxide cleaner, or enzymatic cleaner)(Select one that matches the surface and mold type per label)
- Spray bottle or low-spray application device(For even coverage and to minimize overspray)
- Scrub brushes and microfiber cloths(Soft brushes for delicate surfaces; microfiber to lift residues)
- Plastic sheeting or painter’s tape(Containment to limit cross-contamination during work)
- Buckets, disposable towels, and trash bags(For washing, wiping, and safe disposal of contaminated materials)
- Moisture meter or hygrometer (optional but helpful)(Useful to verify drying progress and moisture levels)
Steps
Estimated time: 2-4 hours (plus 24-48 hours for complete drying in some cases)
- 1
Identify affected areas
Locate all visible mold growth and damp areas. Document surfaces and assess whether materials are porous or non-porous. Check hidden corners using sufficient lighting and probing tools where safe.
Tip: Tag areas with tape or markers to prevent accidental re-handling during cleanup - 2
Ventilate and isolate the space
Open windows and set up a fan to exhaust air away from your breathing zone. Close doors to adjacent rooms and cover air intakes if needed to limit spread of spores.
Tip: Keep pets and kids out of the work zone during remediation - 3
Put on proper PPE
Don the respirator, gloves, goggles, and protective clothing before touching moldy materials. Verify respirator fit and ensure clothing is easy to remove without contamination.
Tip: Avoid wearing the same clothes outside the work zone; place contaminated items in a sealed bag after use - 4
Read the product label and select the right mold product
Review surface compatibility, active ingredients, and required contact time. Ensure the product is suitable for mold remediation rather than incidental cleaning.
Tip: If the label warns against porous surfaces, test a small patch first - 5
Test a patch on inconspicuous area
Apply a small amount of the product to a hidden spot to ensure no discoloration or surface damage occurs.
Tip: If staining appears, stop and switch to a gentler option - 6
Apply the mold product and maintain contact time
Spray evenly, avoid oversaturation, and let the product sit for the label’s recommended time. Do not mix cleaning agents.
Tip: Use a timer to enforce contact time and prevent rinsing too early - 7
Scrub, rinse, and wipe residues
Gently scrub with appropriate brush type, then wipe away residues with clean towels. Rinse as directed by the label if required.
Tip: Change towels frequently to avoid re-spreading mold residues - 8
Dry thoroughly and verify
Allow surfaces to dry completely before moving on. Recheck the area after 24–48 hours for signs of regrowth.
Tip: If moisture remains, address the root cause to prevent recurrence - 9
Dispose of waste and store products properly
Seal contaminated wipes and materials in a bag before disposal. Return the room to normal use only after thorough drying.
Tip: Label remaining containers and store in a cool, dry place away from children
FAQ
What mold products are safest for drywall?
For drywall, use milder, surface-safe cleaners labeled for mold on porous materials and follow the recommended contact time. Avoid aggressive scrubbing that can damage the paper backing. Always test first.
For drywall, choose a product labeled for porous materials, test first, and avoid heavy scrubbing.
Can I use household bleach to remove mold?
Bleach can be used on non-porous surfaces in some cases, but it may not reach mold roots embedded in porous materials. Always follow the label and ensure adequate ventilation.
Bleach might work on non-porous surfaces. Check the label and ventilate properly.
Do I need a respirator when using mold products?
Yes, use a respirator or equivalent mask when working with mold products to avoid inhaling spores and fumes. Ensure proper fit and filtration.
Yes—wear a respirator to protect yourself from spores and fumes.
How long before I can re-check the treated area?
Re-check after the label’s recommended contact time and then again 24–48 hours later to confirm there’s no regrowth or odor.
Check after the product’s contact time and again in 1–2 days.
What should I do if mold returns after treatment?
If mold recurs, reassess moisture sources and consider a follow-up treatment with appropriate products. Persistent growth may require a professional evaluation.
If it comes back, fix moisture and consider professional help.
Watch Video
The Essentials
- Choose EPA-registered mold products appropriate for the surface.
- PPE and ventilation are essential for safe remediation.
- Test patches before full application to protect surfaces.
- Do not mix cleaners; follow label instructions precisely.
- Dry thoroughly and recheck for regrowth after 24–48 hours.