How to Stop Mold Smell in an Air Conditioner
Practical, step-by-step guide to identify, clean, and prevent mold odors coming from your air conditioner, improving indoor air quality and comfort in 2026.

You can stop a mold smell air conditioner by identifying moisture sources, cleaning the unit, and improving drainage and airflow. Start with a basic inspection for standing water and visible mold, then clean evaporator coils and the condensate pan. Replace the cabin air filter, sanitize surfaces, and run the system on a dry cycle to confirm the odor is gone.
What causes a mold smell in an air conditioner
A mold smell air conditioner is not just unpleasant—it signals a moisture problem inside the unit or surrounding ductwork. According to Mold Removal Lab, condensation that isn’t properly drained creates standing water that feeds mold on evaporator coils, insulation, and the condensate pan. Dust, dirt, and organic debris provide food for fungi, intensifying the odor. Humid climates, infrequent cleaning, and blocked drainage lines are common culprits. Hidden growth can lurk behind panels or inside ducts, so a careful inspection to identify moisture sources is essential for effective remediation. By understanding where moisture hides, you can target cleaning and moisture control measures where they count most.
Common sources include a clogged condensate drain, a wet or moldy drain pan, a dirty or damp air filter, and damp insulation in the air handler. Even small leaks around refrigerant lines can create damp conditions that encourage mold growth over time. The good news is that most odors originate from these accessible areas and can be addressed with a methodical cleaning and maintenance plan.
How to assess whether the odor is mold
Mold odors are typically musty, earthy, or sour, and they often persist even after cleaning if the source isn’t resolved. Start by checking for visible signs of mold on coils, in the condensate pan, and around the air filter housing. A damp or dark environment behind the front panel is a red flag. If you notice watery streaks, staining, or a persistent damp feel in the unit, mold growth is likely present. Airflow changes, such as reduced cooling efficiency, can accompany mold growth because clogged coils or ductwork restricts circulation. Allergic or respiratory symptoms during AC operation—nasal congestion, coughing, or headaches—may indicate mold spores entering living spaces. A simple sniff test isn’t enough; use a flashlight to look for discoloration, fuzzy growth, or moisture buildup and plan a cleaning routine accordingly.
Step-by-step cleaning plan for a mold-smelling AC
-
Power down and access the unit: Turn off the AC at the thermostat and breaker. Remove front panels to expose coils and the condensate pan. This reduces shock risk and lets you inspect internal surfaces.
-
Vacuum and remove debris: Use a vacuum with a HEPA filter to remove dust from the coil fins and surrounding areas. Do this before wet cleaning to minimize spreading particles.
-
Clean evaporator coils: Apply a coil cleaner or mild detergent solution with a soft brush. Gently scrub to lift grime, then rinse with water if the product requires. Avoid bending or damaging coil fins.
-
Clean the condensate pan and drain line: Wipe and disinfect the pan; flush the drain line with enzimatic cleaner or a vinegar solution to break down organic buildup. Ensure proper drainage to prevent standing water.
-
Sanitize and deodorize: After cleaning, sanitize non-porous surfaces with a 3% hydrogen peroxide solution or white vinegar diluted with water. Lightly mist and allow to air dry. Avoid mixing incompatible cleaners.
-
Replace or clean the air filter: Install a fresh cabin air filter appropriate for your unit. A clogged filter restricts airflow and fosters mold-friendly conditions.
-
Dry, test, and monitor: Run the system on fan mode for 20–30 minutes to dry residual moisture, then run a normal cycle. If odor persists, repeat cleaning or consider a professional assessment.
Why this order matters: addressing moisture first prevents rapid re-growth and ensures cleaners reach mold-prone surfaces for thorough remediation.
Cleaning products: what to use and what to avoid
For routine cleaning, mild detergents and water are safe on metal and plastic components. Use white vinegar or hydrogen peroxide (3%) for sanitizing non-porous surfaces, and reserve commercial coil cleaners for coils when available. Avoid abrasive scrubbers that can damage coil fins. Bleach can be used sparingly on non-porous surfaces like plastic pans, but never on coil fins; never mix bleach with ammonia or acidic cleaners. Enzymatic cleaners can help break down organic residues in the drain line and on damp insulation. Always follow product labels and ventilate the space when cleaning.
Moisture control and drainage improvements
Prevention hinges on eliminating standing water and maintaining proper drainage. Inspect the condensate drain for clogs and ensure the drain line slopes correctly toward the discharge point. If you see pooling, install or clean a drain trap and consider upgrading to a condensate pump in areas with poor gravity drainage. Check for leaks around the housing and seals, and address any air leaks that bring humid air into the unit. Use a dehumidifier or an inline air purifier in particularly damp environments to keep humidity below 50-60% in peak seasons. Consistent maintenance reduces the likelihood of mold returning after a cleanup.
When to replace components or call a pro
If visible mold recurs after cleaning, if the evaporator coil is severely corroded, or if ductwork shows extensive growth, replacement may be more cost-effective and safer than ongoing cleaning. Airtight duct sections and mold-contaminated insulation may require professional remediation. A persistent odor that returns after cleaning often indicates a hidden moisture source or structural issue, which warrants a pro assessment. In humid climates, proactive professional inspections can prevent recurring mold issues and protect indoor air quality.
Preventing future mold smells in your AC
Consistency is key. Schedule a quarterly or biannual maintenance check, especially in humid seasons. Replace filters on a recommended timetable, clean the condensate pan and drain line during routine service, and ensure the unit dries completely after each cleaning. Consider installing a UV-C light in the duct or using a high-quality air purifier with a HEPA filter near the return vent to reduce mold spores in the living space. Keeping indoor humidity low and properly ventilating spaces further lowers the risk of mold-related odor formation.
Common mistakes that worsen odors
Avoid relying on a single cleaning session; mold can re-establish itself if moisture remains. Don’t skip drying phases after cleaning, as residual dampness fosters regrowth. Avoid using incompatible cleaners or high-pressure spraying that can push mold deeper into insulation or gaps. Finally, neglecting duct hygiene or failing to replace clogged filters will often be the reason odors return—maintenance is a long-term investment in healthier indoor air.
Tools & Materials
- Nitrile gloves(Protect hands from mold and cleaners)
- N95 respirator or P100 mask(Limit inhalation of mold spores)
- Goggles(Eye protection during cleaning)
- Vacuum with HEPA filter(Remove dust before wet cleaning)
- Spray bottle(For cleaners and disinfectants)
- All-purpose cleaner or mild detergent(Surface cleaning)
- White vinegar(Natural deodorizer)
- Hydrogen peroxide 3%(Sanitizing on non-porous surfaces)
- Bleach(Use sparingly on non-porous surfaces; never mix with ammonia)
- Baking soda(Odor absorption and drying aid)
- Commercial coil cleaner(Follow label instructions)
- Replacement cabin air filter(Keep on hand if needed)
- Bucket(Rinsing and soaking rags)
- Soft-bristled brush(Gentle coil scrubbing)
- Towels or rags(Drying and cleanup)
Steps
Estimated time: 90-150 minutes
- 1
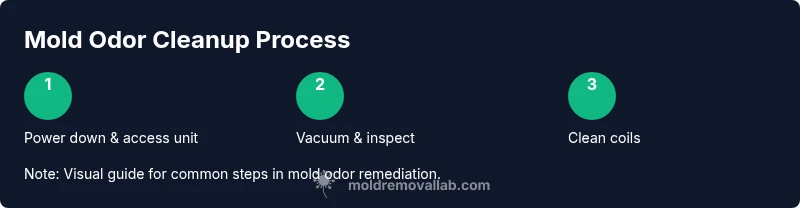
Power down and access the unit
Turn off the AC at the thermostat and breaker. Remove the front panels to expose the evaporator coils and condensate pan. This reduces electrical risk and gives you access to mold-prone surfaces.
Tip: Take photos of panel layout before disassembly to reassemble correctly. - 2
Vacuum and inspect
Use a vacuum with a HEPA filter to remove loose dust and debris around the coils and housing. Look for damp spots, discoloration, and visible growth that indicate moisture zones.
Tip: Vacuum before wet cleaning to minimize spreading mold spores. - 3
Clean evaporator coils
Apply coil cleaner or a mild detergent to the fins, then gently scrub with a soft brush. Rinse if the product requires it and ensure fins remain intact to maintain airflow.
Tip: Never use abrasive tools that bend or break coil fins. - 4
Clean condensate pan and drain
Wipe the pan with disinfectant and flush the drain line using an enzymatic cleaner or vinegar solution to remove organic buildup. Confirm there is a clear path for drainage.
Tip: Check for standing water after flushing; if present, address the leak and dry thoroughly. - 5
Sanitize surfaces
Spray non-porous surfaces with hydrogen peroxide or diluted white vinegar. Allow contact time, then air dry. Avoid mixing cleaners.
Tip: Ventilate the workspace to avoid strong fumes. - 6
Replace air filter
Install a fresh cabin air filter appropriate for your unit. A clean filter improves airflow and reduces mold nutrients.
Tip: Check the filter’s orientation and ensure a proper seal. - 7
Dry, test, and monitor
Run the unit on fan mode for 20–30 minutes to dry residual moisture, then run a normal cooling cycle. Recheck for odor and any signs of moisture.
Tip: If odor returns, repeat steps or call a professional for a deeper assessment.
FAQ
What causes a mold smell in an air conditioner?
A mold smell in an air conditioner is typically due to moisture buildup that supports mold growth on coils, insulation, and drainage components. Persistent moisture from leaks or clogged drains creates a hospitable environment for mold, leading to musty odors. Addressing moisture sources and cleaning critical surfaces usually resolves the odor.
Moisture in or around the AC causes mold smells; fixing leaks, clearing drains, and cleaning the unit usually stops the odor.
Can I use bleach to clean the AC coils?
Bleach can be used cautiously on non-porous surfaces, but it is not recommended for evaporator coils because it can damage metal fins and release fumes. Use coil cleaners or mild detergents instead, and reserve diluted bleach for non-porous parts like the condensate pan if needed.
Bleach is not ideal for coils; use coil cleaner or mild detergent and avoid mixing cleaners.
How often should I clean my AC to prevent mold odors?
Aim for a routine cleaning every 6–12 months, or more often in humid climates or after heavy rain. Regular maintenance, including filter changes and drain line checks, significantly reduces mold risk and odor.
Clean every 6 to 12 months, more in humid areas; replace filters regularly.
Is a mold smell dangerous to health?
Yes. Mold can trigger allergic reactions and respiratory symptoms, especially for sensitive individuals. If odors persist despite cleaning, seek professional help to ensure indoor air quality and reduce exposure risks.
Mold odors can affect health; persistent symptoms mean seek professional guidance.
When should I call a professional for mold in my AC?
Call a professional if you notice widespread mold growth, recurring odors after DIY cleaning, or visible mold behind panels or in ducts. A pro can assess structural moisture sources and perform thorough remediation.
Call a pro if mold keeps coming back or is visible in hidden areas.
Watch Video
The Essentials
- Identify moisture sources before cleaning to prevent rapid mold return.
- Clean coils, drain lines, and pans with appropriate cleaners and dry thoroughly.
- Replace filters and manage humidity to reduce future mold risk.
- Call a professional if mold returns after cleaning or if large ductwork is involved.