Mold Removal Tips: A Practical Guide for Home Remediation
A practical, step-by-step guide to mold removal tips for homeowners. Learn moisture control, safe cleaners, surface-specific methods, and prevention strategies from Mold Removal Lab to keep homes safe.

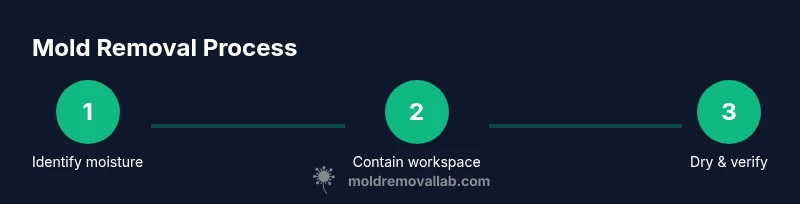
To tackle mold effectively, follow practical mold removal tips that emphasize moisture control, safe cleaning, and thorough drying. Start by identifying and fixing the moisture source, then clean nonporous surfaces with soap and water or approved cleaners, dry completely, and monitor humidity levels to prevent regrowth. Porous materials with contamination should be removed and discarded when necessary.
Understanding Why Mold Appears in Homes
According to Mold Removal Lab, moisture is the primary driver of indoor mold growth. Mold needs a persistent moisture source—whether from a leaky roof, a burst pipe, or high humidity—to establish itself on walls, ceilings, and basements. In many homes, the problem is not a single visible patch but a pattern of damp conditions behind walls or in crawl spaces. Recognizing these patterns helps homeowners stop mold before it becomes a health concern. The Mold Removal Lab team emphasizes that addressing the moisture source is the first and most important step, because without moisture control, cleaning alone cannot solve the problem.
Key takeaways:
- Look for stains, musty odors, and visible discoloration near water sources.
- Check for hidden moisture behind cabinets, behind drywall, or under carpeting.
- Prioritize fixes that stop ongoing water intrusion; temporary remedies won’t prevent regrowth.
In implementation, you’ll want to create a small, contained workspace, gather your PPE, and plan a careful, methodical cleanup that reduces airborne spores during the process.
Moisture Control: The Foundation of Mold Prevention
Mold thrives where moisture lingers. The cornerstone of mold removal tips is stopping the water source and reducing humidity to discourage regrowth. Practical steps include repairing leaks promptly, sealing gaps where moisture enters, and using dehumidifiers in damp rooms such as basements or bathrooms. Real-world remediation requires a two-pronged approach: fix the moisture problem and then treat the affected surfaces. The Mold Removal Lab team notes that consistent airflow—via opening windows when safe or using fans directed outdoors—helps keep humidity in check during cleanup. Do not delay moisture repairs; even small leaks can sustain mold colonies for weeks.
In this stage, measure and monitor: identify the source, plan a repair, and prepare to remove contaminated materials if needed. Weather conditions can influence moisture levels, so consider seasonal factors like rain and humidity when scheduling remediation. By prioritizing moisture control, you dramatically reduce the likelihood of mold returning after cleanup.
Practical action list:
- Inspect roofs, pipes, and plumbing for leaks.
- Seal potential moisture entry points around windows and doors.
- Use a dehumidifier or fans to improve air movement in damp spaces.
- Keep bathroom exhaust fans running after showers to minimize condensation.
- Recheck areas after 24–48 hours to confirm drying progress.
Cleaning Nonporous vs Porous Surfaces: What Works Best
Not all surfaces respond to cleaning the same way. Nonporous materials such as tile, glass, metal, and sealed concrete are typically easier to clean and decontaminate because mold growth is on the surface. For these surfaces, start with soap and water, then apply a mold-safe cleaner if needed. The Mold Removal Lab analysis shows that nonporous surfaces retain less moisture and are less likely to harbor deep spores once cleaned and dried. Porous materials—like drywall, insulation, or carpet—tend to absorb moisture and mold spores deeper into the fibers, which can make cleaning less effective and may require removal and replacement.
Recommended approach:
- Clean nonporous areas with soap, water, and a scrub brush or sponge.
- For stubborn spots, use an EPA-registered cleaner or a vinegar-based solution, following safety guidelines.
- Evaluate porous materials for structural integrity; if mold penetrates deep, removal may be necessary to prevent regrowth.
- Always dry surfaces fully to prevent a quick rebound.
When in doubt about porous materials, err on the side of caution. If you’re unsure whether a material can be salvaged, consult a professional consulting service or indoor air quality expert to assess potential health risks.
Safe Materials, PPE, and Handling: A Practical Toolkit
Before you begin, assemble a basic toolkit and PPE to reduce exposure to spores. The recommended gear includes nitrile gloves, eye protection, a respirator rated for particulates, and protective clothing you can launder after cleanup. Use nonabrasive cleaners and avoid harsh chemical mixes that can release fumes. The Mold Removal Lab team advises choosing cleaners that are labeled as mold cleaners and following the product’s directions closely. Ventilation is essential, so work near an open window or use a fan directed outdoors, ensuring it doesn’t blow spores into other rooms.
Key kit items:
- PPE: gloves, goggles, respirator (N95 or better)
- Cleaning products: soap, water, and a mold-safe cleaner
- Tools: scrub brushes, microfiber cloths, spray bottles
- Containment: plastic sheeting and tape for minimizing spread
- Drying aids: dehumidifier and fans
Safety reminder: Never mix cleaners (for example, bleach with ammonia) due to toxic gas production. Store cleaners out of reach of children and pets when not in use.
When to Call a Pro: Recognizing Limits and Safety Risks
DIY mold cleanup is feasible for small, easily accessible areas (less than 10 square meters, no visible growth behind walls). For larger infestations, hidden growth behind walls, or when there’s persistent moisture, professional remediation is advised. The Mold Removal Lab Team stresses that licensed professionals can perform thorough containment, remove contaminated materials safely, and ensure proper air filtration during and after remediation to protect occupants. If you notice recurring mold after cleanup, or if there is a history of moisture problems, professional intervention is warranted to prevent health issues and structural damage.
Pro guidance:
- For mold covering more than a few square feet, seek a professional assessment.
- If mold returns after cleaning, there may be an ongoing moisture issue that needs engineering fixes.
- Large basements, crawlspaces, or areas behind walls typically require professional equipment and expertise.
- If occupants experience allergies or respiratory symptoms, consider a professional IAQ (indoor air quality) evaluation.
Remember, timely and professional action can prevent long-term damage and health risks.
Preventing Mold Recurrence: Long-Term Strategies
Prevention is the best mold treatment. After cleaning, implement a maintenance plan to keep moisture levels in check and reduce condensation. The Mold Removal Lab team recommends a combination of moisture management, improved ventilation, and regular inspections. Simple actions like fixing leaks promptly, using exhaust fans during cooking and showering, and maintaining clean, dry spaces can dramatically reduce mold growth. Consider a routine: inspect damp areas quarterly, run dehumidifiers in humid seasons, and promptly address water intrusions from storms or plumbing failures. A proactive approach helps maintain a healthier living environment over time.
Practical prevention steps:
- Schedule seasonal inspections of roofs, plumbing, and HVAC systems.
- Maintain low humidity with dehumidifiers in damp rooms.
- Use ventilation fans and keep indoor spaces dry after activities that produce moisture.
- Seal leaks and improve insulation where condensation is common.
- Monitor for musty odors and address sources quickly.
Quick Maintenance Checklist: Easy Day-to-Day Wins
A concise, repeatable routine can prevent mold growth from taking hold. This checklist is designed for homeowners and renters who want to stay ahead of problems without a full remediation project. Use it to guide monthly inspections and weekly cleaning habits. The points below complement moisture reduction and air quality improvement efforts, helping you maintain a healthier home environment over time.
Checklist highlights:
- Inspect high-moisture rooms (bathroom, kitchen, basement) for leaks.
- Run exhaust fans during and after moisture-generating activities.
- Wipe down surfaces prone to condensation with a dry cloth.
- Keep spaces dry and well-ventilated; use a dehumidifier if needed.
- Schedule a professional IAQ check if symptoms persist or mold recurs.
The Role of Humidity and Airflow in Mold Control
Humidity and airflow are the invisible knobs controlling mold behavior. By reducing steady moisture and increasing air exchange, you create an environment that is inhospitable to mold. The Mold Removal Lab analysis shows that consistent airflow reduces stagnant moisture and helps dry materials more quickly after cleaning. Pairing mechanical ventilation with passive airflow can dramatically impact long-term outcomes. In practice, aim to keep spaces dry, clean, and well-ventilated, especially in basements and bathrooms, and incorporate humidification management into seasonal home maintenance plans.
Tools & Materials
- Mold-safe cleaning products(EPA-registered or vinegar-based cleaners; avoid mixing chemicals)
- Soap and water(Mild dish soap works well for initial wipe-downs)
- Spray bottle(For even application of cleaners)
- Nonporous scrub brush or sponge(For tiles, glass, metal surfaces)
- Protective gear (nitrile gloves, goggles, mask)(N95 or higher respirator preferred)
- Containment supplies (plastic sheeting, tape)(Helpful to limit spore spread in larger jobs)
- Dehumidifier or portable fans(Aids rapid drying after cleanup)
- Heavy-duty trash bags(Seal contaminated materials securely)
Steps
Estimated time: 3-6 hours
- 1
Identify moisture source and stop water
Begin by locating the moisture source (leaks, roof, pipes, or high humidity) and repair it. Without stopping the moisture, mold will keep returning even after cleanup. Document the fix and plan to monitor the area for rewetting.
Tip: Take photos of the source before and after repairs to track progress. - 2
Contain the area to prevent spread
Close off the affected zone using plastic sheeting and tape to minimize spore dispersion. If you’re working in a multi-room space, set up a simple containment corridor to protect other areas of the home.
Tip: Keep doors closed and avoid using HVAC during containment. - 3
Ventilate and prep the workspace
Open windows if conditions allow and run a fan directed outdoors to improve airflow. Put on PPE and prepare cleaning solutions before you begin scrubbing. Ventilation reduces inhalation risk and helps surfaces dry faster.
Tip: Never mix cleaning agents; follow product instructions. - 4
Clean nonporous surfaces first
Wipe nonporous surfaces with soap and water, then use a mold-safe cleaner on stubborn spots. Dry immediately with a clean towel; moisture left behind invites regrowth.
Tip: Use a microfiber cloth to trap spores rather than pushing them around. - 5
Assess porous materials and decide on removal
Porous materials soaked through with mold (drywall, insulation, carpet) often need removal and replacement to prevent recurrence. If you can salvage, treat with approved cleaners and dry thoroughly, but be prepared for material disposal.
Tip: Label and bag removed materials for disposal to avoid cross-contamination. - 6
Dry the area thoroughly
Run dehumidifiers and fans to reduce moisture. Aim for thorough drying; damp conditions foster mold growth and can remain invisible behind walls.
Tip: Check moisture with a meter if available. - 7
Inspect and re-clean as needed
Re-inspect the cleaned area to ensure no missed spots. If mold returns, broaden remediation or seek professional assessment.
Tip: Keep a log of areas cleaned and monitoring results. - 8
Document and monitor humidity long-term
Note moisture sources and install humidistat-based alerts if possible. Regular checks help catch rewetting before mold takes hold.
Tip: Set quarterly reminders to re-evaluate humidity and leaks.
FAQ
What are the first signs of hidden mold?
Initial indicators include a musty odor, damp patches, and visible discoloration in hidden areas like behind walls or under sinks. If you notice these signs, investigate moisture sources and consider a professional assessment if the problem persists.
Look for a musty smell or damp patches behind walls or under sinks; if it continues, check moisture sources and consider pro help.
Is bleach safe for mold cleanup?
Bleach can be effective on nonporous surfaces, but it is not a cure-all and should not be used on porous materials where mold has penetrated. Always follow label directions and ventilate the area.
Bleach helps on hard surfaces but isn't ideal for porous materials; follow label directions and keep the area ventilated.
Can I remove mold myself, or should I hire a pro?
Small, accessible mold patches can often be cleaned safely by homeowners using appropriate PPE and cleaners. Larger infestations, hidden mold behind walls, or persistent moisture issues should be handled by a licensed remediation professional.
You can manage small patches yourself if you wear PPE and follow safety steps; for bigger or hidden mold, call a pro.
How long does it take to dry after cleaning?
Drying time varies with room size, ventilation, and humidity. Use fans and a dehumidifier to speed up the process; expect several hours to days in damp spaces.
Drying depends on space and airflow; use a fan and dehumidifier to speed things up, and expect hours to days.
When should I call a professional?
Call a professional if the mold covers a large area, recurs after cleaning, or you suspect hidden mold behind walls or in HVAC systems. A pro can safely assess and remediate with proper containment and air filtration.
Call a professional if the area is large, recurs, or you suspect hidden mold; they can safely remediate.
Can mold exposure affect health?
Mold exposure can provoke allergic reactions, asthma symptoms, and respiratory irritation in sensitive individuals. If you notice worsening symptoms, consult a healthcare professional and consider IAQ testing.
Mold exposure can trigger allergies or breathing issues; seek medical advice if symptoms appear or worsen.
Watch Video
The Essentials
- Control moisture to prevent mold growth.
- Contain the area to stop spread of spores.
- Clean nonporous surfaces safely and dry thoroughly.
- Decide on removal vs. treatment for porous materials.
- Monitor humidity and re-inspect to prevent recurrence.