How to Remove Mold from a House: A Practical Guide
A practical, safe guide for homeowners on removing mold from a house, with step-by-step remediation, safety tips, and prevention strategies to protect health and property.

Learn how to remove mold from a house safely and effectively. This guide covers locating moisture sources, identifying common mold growth, selecting cleaning methods, and knowing when to involve a professional. Expect a practical, step‑by‑step approach, safety precautions, and post‑remediation checks to verify lasting results—empowering homeowners to protect their families.
What mold is and why it grows
Mold is a type of fungus that exists as tiny spores floating in the air. In homes, mold thrives where moisture remains—think leaks, condensation, and high humidity—on materials like wood, drywall, fabric, and dust. The Mold Removal Lab team found that even small patches can expand quickly if moisture isn’t controlled, and hidden mold behind walls or under floors often becomes evident only when you notice odors or experience allergy-like symptoms. If you’re wondering how to remove mold from a house, start with moisture control and surface cleaning to prevent regrowth. Understanding the basics helps you identify problems early and choose safer remediation methods.
Health and safety considerations
Safety first. Wear PPE (N95 mask, goggles, and gloves) and contain the area to prevent spores from spreading. Good ventilation helps, but never rely on fans alone to remove mold spores—containment is essential. The Mold Removal Lab analysis emphasizes keeping children and pets away during cleanup and drying, and using a damp, not soaking, cleaning approach on most surfaces. For any suspected toxic molds or large growth, involve a qualified professional to assess indoor air quality and humidity control strategies.
DIY vs pro remediation decision guide
Small, clearly visible patches on nonporous surfaces may be feasible for DIY remediation with proper safety measures. Larger infestations, mold behind walls, or growth on porous materials often require professional remediation to prevent cross-contamination and ensure thorough drying. The Mold Removal Lab Team recommends evaluating area size, location, and moisture sources before deciding. If in doubt, start with containment and a basic cleaning plan and consult a pro if growth returns after initial cleanup.
Preparing your space for remediation
Before you start, fix leaks and improve drainage to stop ongoing moisture. Close off the room, seal doors with plastic, and turn off HVAC to prevent spores from circulating. Remove loose items and washable textiles from the area, and lay down disposable coverings. Ensure you have a safe exit for waste and a place to dispose of contaminated materials. Preparation minimizes the chance of recontamination and makes the cleanup quicker and safer.
Cleaning and remediation methods by surface
Nonporous surfaces (glass, metal, tile) can typically be cleaned with soap and water, then treated with a disinfectant like a 3% hydrogen peroxide solution or white vinegar. Porous materials (drywall, insulation) may need to be removed and replaced if growth is extensive. For fabric and porous textiles, washable items can be laundered on hot cycles; non-washables should be sealed in bags for disposal. Bleach is not always recommended on porous materials due to texture and residual odor; always test a small area first and follow product safety guidelines. The goal is to physically remove spores and dry the area thoroughly.
Common mistakes to avoid
Avoid treating mold with household bleach on porous materials, which may not reach embedded spores. Don’t skip containment or ventilation, and never mix cleaners (bleach with ammonia or other cleaners creates toxic gases). Don’t ignore hidden growth behind walls or under flooring; mold can return if moisture isn’t addressed. Never delay remediation—ongoing moisture is the primary driver of regrowth, and repeated exposure can worsen health symptoms.
When to test and verify remediation
Wait until the area is completely dry and odor-free before testing. Visual checks plus moisture meters help confirm dryness. If mold returns or new growth appears after cleaning, reassess moisture sources and consider professional testing or indoor air quality assessment. Regular monitoring helps catch issues early and prevent recurrence.
Prevention and long-term maintenance
After cleanup, establish moisture control: fix leaks promptly, ensure proper drainage, use dehumidifiers in damp spaces, and improve ventilation in bathrooms and kitchens. Regular inspections of roofs, plumbing, and basements prevent surprises. The Mold Removal Lab team recommends adopting a maintenance plan that includes seasonal humidity checks and quick responses to any signs of moisture or musty odors.
Tools & Materials
- N95 respirator or P100 respirator(For effective filtration of mold spores during cleaning.)
- Protective gloves (nitrile or rubber)(Long sleeves recommended; avoid skin contact.)
- Safety goggles or face shield(Protect eyes from splashes and spores.)
- Disposable coveralls(Keeps contaminants off clothing and skin.)
- Plastic sheeting for containment(Create a contained work zone to prevent spread.)
- Scissors or utility knife(Cut plastic sheeting for containment and access.)
- Bucket, sponge, and microfiber cloths(For cleaning and wipe-downs.)
- Spray bottle(Hold cleaners and water for application.)
- Mild detergent or soap(Gentle cleaners suitable for most surfaces.)
- White vinegar (5% acidity) or hydrogen peroxide (3%)(Alternatives to bleach for surface treatment.)
- Disinfectant appropriate for mold cleanup(Follow label directions.)
- Bleach (optional, for nonporous surfaces only)(Use with caution; never mix with ammonia or acids.)
- Spray-and-wipe rags or disposable wipes(Used for cleaning and disposal.)
- Paper towels or rags for drying(Dry surfaces thoroughly after cleaning.)
- Trash bags (heavy-duty, labeled for cleanup waste)(Seal and dispose of contaminated materials.)
- HEPA vacuum (with appropriate filter)(Optional for clean-up after containment.)
Steps
Estimated time: Total time: 3-6 hours
- 1
Identify moisture sources and stop leaks
Survey the area for leaks, condensation, and high humidity. Repair plumbing, roof leaks, or drainage issues to stop new mold growth. Document sources so you can address root causes after cleanup.
Tip: Fix moisture first; without it, mold will keep returning. - 2
Set up containment and put on PPE
Cover vents, seal off the room with plastic sheeting, and wear your PPE kit before touching any mold. This minimizes exposure and prevents cross-contamination to other areas.
Tip: Double-check seals and avoid bringing tools in from outside without cleaning. - 3
Isolate the area and disable HVAC
Turn off the HVAC and seal the door to prevent spores from spreading through air ducts. If possible, run a portable air purifier outside the containment to capture airborne particles.
Tip: Don’t rely on fans alone; containment is essential. - 4
Assess extent of visible mold
Inspect all surfaces for visible mold growth and note locations. Photograph areas for records and future reference. Decide whether cleaning, removal, or replacement of materials is needed.
Tip: Hidden mold behind walls may require professional evaluation. - 5
Clean nonporous surfaces
Wash nonporous surfaces with soap and water, then apply an appropriate disinfectant like hydrogen peroxide or vinegar. Wipe dry with a clean cloth to prevent moisture rebound.
Tip: Always test a small area first to ensure no surface damage. - 6
Handle porous materials
Porous materials with growth (drywall, insulation) may need removal. If you can’t fully eliminate mold from these materials, plan for safe disposal and replacement.
Tip: Follow local regulations for disposal of contaminated materials. - 7
Dry the area thoroughly and monitor
Use dehumidifiers and fans to dry thoroughly. Recheck after 24–48 hours to confirm humidity targets are met and no new growth appears.
Tip: Moisture control is ongoing; monitor humidity regularly. - 8
Restore and implement prevention
Replace removed materials, repaint with mold-resistant products if applicable, and install moisture-control measures like better ventilation and sump pump checks.
Tip: Create a long-term maintenance plan to minimize future issues.
FAQ
Is all mold dangerous, and should I panic if I see it?
Most household mold is not immediately dangerous, but some types can cause health issues, especially for sensitive individuals. Treat any mold growth seriously and address moisture promptly. If you have persistent symptoms or large growth, consult a professional.
Most mold isn’t immediately dangerous, but you should treat it seriously and address moisture. Consider a pro for large or persistent growth.
Can I remove mold myself, and when should I hire a professional?
Small, clearly visible growth on nonporous surfaces is often doable for DIY cleanup with proper safety. Large areas, hidden growth behind walls, or mold on porous materials should involve a professional to ensure thorough remediation and air quality management.
You can start small, but call a pro for large or hidden growth.
What tools and PPE do I need for mold cleanup?
Essential PPE includes an N95 respirator, protective goggles, gloves, and disposable coveralls. Tools include detergent, brushes, sponges, plastic containment, and a disposal plan for contaminated materials.
You’ll need protective gear and cleaning tools to keep you safe and clean up mold properly.
How long does mold remediation take?
Time depends on the extent and location of the growth, moisture control, and materials involved. DIY projects can take several hours, while professional remediation may extend over a day or more.
It varies, but plan for several hours to a day or more depending on the extent.
How can I prevent mold after cleanup?
Keep humidity low (ideally under 60%), fix leaks quickly, improve ventilation, and regularly inspect for condensation. A proactive maintenance plan helps prevent recurrence.
Keep humidity in check, fix leaks fast, and ventilate spaces to prevent mold from returning.
When should I test for mold after cleanup?
Test or re-check when the area is completely dry and there’s no visible growth. Home tests can be done, or a professional mold inspection can confirm air quality improvements.
Test after drying and cleaning to confirm the mold is gone or under control.
The Essentials
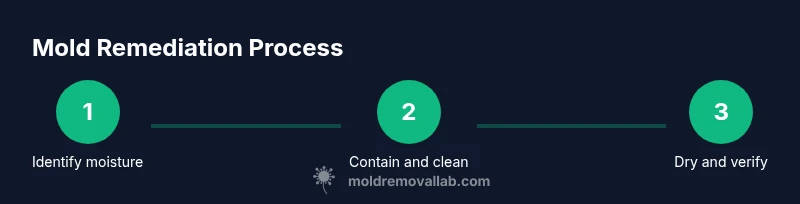
- Identify and fix moisture sources before cleaning.
- Contain the work area to prevent cross-contamination.
- Use surface-appropriate cleaning methods and dry thoroughly.
- Evaluate after cleanup to confirm remediation success.
- Establish a prevention plan to minimize future mold growth.