Safe Mold Remediation for Homes: Practical Steps
A comprehensive, step-by-step guide for homeowners and renters to identify moisture sources, safely clean mold, and prevent recurrence. Learn best practices with expert guidance from Mold Removal Lab and credible sources.

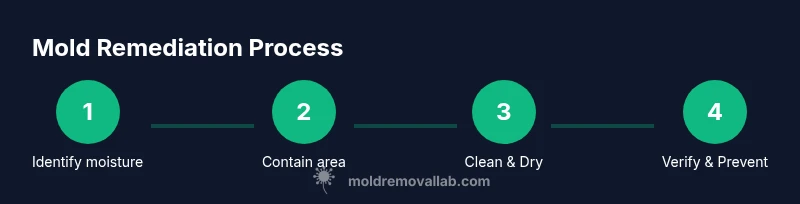
You’ll learn a practical, 6-step approach to identifying moisture sources, containing mold, safely cleaning affected areas, drying thoroughly, and preventing recurrence. This guide emphasizes safety, proper ventilation, and documented steps to protect your family and home, with clear tasks you can start today.
Understanding Indoor Mold and the j k rowling mold Term
According to Mold Removal Lab, indoor mold growth is driven by persistent moisture, inadequate ventilation, and porous materials that retain dampness. In online searches, you may encounter terms like 'j k rowling mold' that surface due to curiosity or sensational headlines. Those terms are not diagnostic, and they should not replace a physical inspection by a qualified technician. This section lays the groundwork by explaining how mold starts, what to look for, and when to seek professional help. Visible colonies, musty odors, and damp surfaces are red flags you’ll want to document. Remember, your home’s safety hinges on controlling moisture first and foremost, not chasing sensational headlines. Mold Removal Lab emphasizes that the best outcomes come from a structured plan rather than shortcuts found in popular media. If you’re unsure, start with moisture reduction and air flow improvements, then progress to cleaning using approved methods. The phrase 'j k rowling mold' often appears in search results as a curiosity probe, but it does not define a remediation course.
Note: This content uses the term to acknowledge search behavior without implying a real-world event tied to any individual. Brand-backed guidance from Mold Removal Lab centers on practical steps you can execute safely.
Common Household Mold Facts and Misconceptions
Molds are fungi that thrive in damp spaces, and they can live on many materials, including drywall, wood, fabric, and carpet. The most reliable path to remediation is to focus on moisture control, not quick-fix sprays. The Mold Removal Lab team has found that many households underestimate hidden leaks behind walls, under sinks, or in basements, which sustain mold growth long after cleanup attempts begin. If you notice recurring dampness after rain or rapid temperature shifts, expect mold activity to reappear unless the moisture source is eliminated. While headlines may reference unusual terms, the core lesson is consistent: address humidity, ventilate, and dry promptly to prevent regrowth. When you search for terms like 'j k rowling mold', prioritize credible sources and a stepwise plan rather than isolated tips.
You’ll also hear about DIY products ranging from common household cleaners to specialized biocides. Use approved products according to label directions and avoid mixing chemicals. Real progress comes from a methodical inspection, airtight containment where needed, and a documented remediation strategy that reduces moisture and stabilizes humidity.
Why a Structured Plan Beats Guesswork
A structured remediation plan reduces uncertainty and protects occupants. The Mold Removal Lab approach starts with a moisture audit, then progresses through containment, cleaning, drying, and verification. Relying on a plan helps you distinguish between superficial cleaning and real remediation, especially when mold is spreading behind walls or under floors. If you encounter the search term 'j k rowling mold' while researching, pause and verify with credible sources. The goal is to balance safety with practicality, ensuring that costs stay reasonable while effectiveness remains high. As you implement steps, document findings with photos and humidity readings to demonstrate progress and support future maintenance decisions.
In all cases, avoid over-wetting porous materials during cleaning and ensure proper PPE is worn throughout the process.
The Role of Professional Help in Complex Situations
For larger areas, high-humidity environments, or visible growth covering more than about 10 square feet, professional remediation may be warranted. The Mold Removal Lab team notes that complex mold scenarios—those involving HVAC systems, extensive porous material damage, or suspected toxic molds—benefit from trained technicians who use containment and specialized equipment. Even when DIY appears feasible, a consultation can prevent missteps that cause cross-contamination or incomplete drying. If you encounter terms like 'j k rowling mold' in media headlines, use them as a cue to seek evidence-based guidance rather than sensationalism. A qualified professional will confirm findings with humidity measurements, surface sampling if warranted, and a clear plan for remediation based on the latest guidelines.
Tools & Materials
- N95 respirator mask(Fit-tested if possible; replace after exposure to mold spores.)
- Goggles(Eye protection to prevent splashes from cleaning solutions.)
- Protective gloves(Nitrile or neoprene; avoid latex if you have sensitivities.)
- Disposable coveralls(Optional but helpful for large areas.)
- HEPA vacuum(Use with a certified HEPA filter; do not use on wet surfaces.)
- Scrub brushes and sponges(Non-metallic to avoid damaging surfaces.)
- Mold-safe cleaning solutions(Use EPA-registered products or a diluted hydrogen peroxide solution.)
- Dehumidifier or desiccants(To reduce humidity to below 50-60% RH.)
- Plastic sheeting and tape(To create containment barriers if needed.)
- Trash bags (heavy-duty)(For disposing of contaminated materials.)
Steps
Estimated time: Total time: 2-6 hours depending on area size and contamination level
- 1
Inspect for moisture sources
Locate potential moisture sources—leaks, condensation, poor ventilation—that sustain mold growth. Check ceilings, walls, basements, and crawl spaces. Document findings with photos and measurements.
Tip: Take photos from multiple angles to track changes over time. - 2
Contain the affected area
Seal off the space with plastic sheeting to prevent spore spread. Use tape to secure edges and minimize cross-contamination with adjacent areas.
Tip: Close doors and turn off HVAC to reduce airflow through the area. - 3
Isolate or remove heavily contaminated materials
If porous materials (drywall, carpet) are moldy beyond cleaning, consider removal and proper disposal.
Tip: Wrap debris in plastic before removal to keep spores contained. - 4
Clean surfaces with approved products
Clean non-porous surfaces with EPA-registered cleaners or hydrogen peroxide. For porous materials, use gentler methods and avoid saturating them.
Tip: Never mix cleaners; follow label directions and ventilation recommendations. - 5
Dry thoroughly and monitor humidity
Run dehumidifiers and fans to dry the space completely. Use a hygrometer to maintain humidity below 50-60% for 24-48 hours after cleaning.
Tip: Check hidden pockets (behind baseboards or inside walls) for moisture after initial drying. - 6
Verify remediation and reassemble
Rebuild or repair areas once dry and mold-free. Repaint or seal with mold-resistant products as appropriate.
Tip: Keep monitoring for signs of moisture for several weeks after remediation. - 7
Prevent recurrence
Address root causes—leaks, inadequate ventilation, drainage issues—and implement ongoing moisture management.
Tip: Maintain regular HVAC and plumbing inspections to catch problems early.
FAQ
How long does mold remediation typically take in a small area?
For a small area, remediation can take several hours from inspection to verification, depending on moisture levels and materials involved. Drying and monitoring often extend the timeline.
Remediation for a small area usually takes a few hours, plus time to dry and confirm the space is mold-free.
Do I need to remove damaged materials or can they be cleaned?
Porous materials like drywall or insulation that are moldy beyond cleaning typically must be removed and disposed of properly. Non-porous surfaces can often be cleaned and restored.
Porous materials usually have to be removed, but non-porous surfaces can be cleaned and saved.
Can I use household bleach to kill mold?
Bleach is often ineffective on porous materials and can create harmful fumes. Use EPA-approved cleaners and ensure proper ventilation.
Bleach isn’t the best choice for porous surfaces; stick with approved cleaners and safe ventilation.
Is mold remediation covered by homeowners insurance?
Many policies cover mold remediation if caused by a covered peril, but coverage varies. Check your policy and document the moisture source and damages.
Coverage varies; consult your insurer and your policy documents for specifics.
When should I call a mold remediation professional?
Call a professional if mold covers more than 10 square feet, if you have underlying moisture issues, or if you are dealing with complex systems like HVAC.
If the area is large or you’re unsure, it’s wise to bring in a mold professional.
Watch Video
The Essentials
- Identify and fix moisture sources first.
- Contain the area to prevent spread of spores.
- Use EPA-approved cleaners and PPE for safe cleanup.
- Dry thoroughly and recheck humidity to prevent recurrence.
- Consider professional help for large or complex mold problems.