Mold Removal and Restoration: A Practical Guide
Comprehensive, actionable steps for safe mold removal and restoration, plus safety tips, tools, and maintenance to protect your home from future moisture-driven growth.

Goal: safely remove mold and restore the affected area without repeated contamination. You should follow a structured plan: contain the area, wear PPE, identify moisture sources, clean with approved methods, dry thoroughly, and verify results. For most homes, DIY is suitable for minor mold, while extensive growth requires a pro remediation approach.
What mold removal and restoration mean
Mold removal and restoration are two linked phases in returning a home to a safe, healthy condition. Mold removal focuses on eliminating visible mold and spores from affected materials, while restoration repairs structural damage, reintroduces finished surfaces, and restores comfort. According to Mold Removal Lab, understanding these phases helps homeowners plan effectively, budget accurately, and minimize exposure during cleanup. This distinction matters because some materials cannot be fully restored once mold penetrates porous substrates. In those cases, replacement may be necessary to prevent future growth. The goal is not just cleanliness, but a stable indoor environment free from recurring moisture-driven mold.
Remember: mold can hide behind walls and in insulation. A thorough assessment often reveals moisture sources (leaks, humidity, condensation) that must be addressed before any cleaning begins. Effective restoration combines cleaning with targeted repairs—repainting, drywall replacement, or flooring replacement—to return the space to its pre-mold condition while preventing relapse.
The moisture-mold relationship
Mold thrives where moisture persists. Humidity above 50-60% in occupied spaces, leaky roofs, plumbing leaks, and poor ventilation create ideal conditions for growth. The first step in any mold removal and restoration project is moisture control: locate and fix leaks, dry out damp materials, and improve air flow. Without reducing moisture, cleaned areas are likely to regrow mold spores within days or weeks. For homeowners, this means that remediation should always start with water management. A mold-safe environment relies on continuous moisture management, not just a one-time cleanup.
In occupied homes, you may notice musty odors, visible spots, or staining indicating hidden mold. Using a moisture meter or a dehumidifier can help quantify humidity, but the best approach combines professional assessment with ongoing maintenance. Mold remediation is most successful when moisture sources are eliminated and space is kept dry during and after restoration.
DIY vs professional remediation: when to call in help
Small, contained mold growth on non-porous surfaces (like glass or tile) can often be cleaned safely by homeowners with proper PPE and cleaning solutions. But porous materials (drywall, carpet backing, wood) that have absorbed water or extended mold growth typically require professional intervention. If mold covers more than a few square feet, if it reappears after cleaning, or if you suspect hidden growth behind walls, contacting a licensed mold remediation contractor is prudent. Professional teams can contain the area, test moisture levels, and ensure proper disposal of contaminated materials. The aim is thorough removal and comprehensive drying to prevent relapse. Mold Removal Lab emphasizes that deciding between DIY and pro remediation depends on extent, materials, and health considerations.
Safety gear, containment, and PPE
Personal protective equipment (PPE) is essential during mold remediation. Use an N95 or P100 respirator, protective goggles, gloves, and a coverall to minimize exposure. Set up plastic containment barriers to prevent spore spread to other rooms, and seal off HVAC ducts in the affected zone to avoid cross-contamination. Never mix cleaning agents; use separate products as directed by manufacturers. Prioritize safety: if you experience dizziness, headaches, or throat irritation, stop work and reassess conditions or contact a professional.
Containment also includes removing contaminated materials carefully, bagging them in sealed plastic, and transporting them for hazardous waste disposal. Proper containment protects you and your home while improving outcomes for the mold removal and restoration process.
Cleaning methods and tools
Choose cleaning agents appropriate to the material involved. For non-porous surfaces, a detergent solution or specialized mold cleaners can be effective. White vinegar or hydrogen peroxide are common alternatives for light to moderate growth, while chlorine bleach is not always advised—especially on porous materials where it may not fully remove mold or could damage the substrate. Always follow label directions and air out the space during and after cleaning. For porous materials that cannot be salvaged, disposal and replacement are safer options. Consider using a HEPA-filtered vacuum for cleanup and ensure proper disposal of contaminated waste.
This section outlines practical steps and common products used in mold removal and restoration, with an emphasis on safety and minimizing disturbance to the surrounding areas. By applying correct techniques, homeowners can effectively reduce mold presence without introducing new risks.
Drying, dehumidification, and moisture control
Drying is critical after cleaning. Use dehumidifiers and high-volume air movers to achieve target relative humidity below 50%. Increase ventilation by opening windows when outdoor air quality is acceptable. Monitor progress with a moisture meter and recheck after 24-48 hours to confirm dryness. If moisture returns or dampness persists, revisit water sources and adjust remediation plans accordingly. Effective drying reduces the chance of mold regrowth and supports long-term restoration success.
Maintaining indoor humidity at optimal levels not only accelerates drying but also supports healthier indoor air quality. A well-ventilated space with controlled moisture is less hospitable to mold growth and more comfortable for occupants.
Rebuilding and restoration considerations
Restoration after mold removal should restore function and aesthetics while ensuring long-term mold resistance. When replacing materials, choose mold-resistant options where appropriate, such as moisture-resistant drywall in damp areas, mold-resistant paints, and properly sealed flooring. After reconstruction, ensure that new materials are installed with attention to moisture barriers, vapour retarders, and proper sealing. This phase should also include a final inspection to verify there are no lingering signs of moisture or mold. If needed, consult a professional to evaluate structural changes that may have influenced moisture dynamics in the space.
Documentation and verification: how to confirm success
Documentation is crucial for tracking remediation progress and communicating with insurers or landlords. Document moisture readings, photos before and after remediation, and notes on materials replaced. Conduct a post-remediation inspection to confirm the absence of visible mold, lingering odors, or moisture, and consider third-party testing if growth is suspected behind walls. Ongoing monitoring of humidity and routine maintenance reduces the likelihood of recurrence. A thorough record supports accountability and ensures the space remains safe for occupants.
Tools & Materials
- N95 or P100 respirator(Ensure proper fit; replace if damaged or soiled)
- Protective goggles(Wrap-around type preferred for splashes)
- Chemical-resistant gloves(Nitrile or neoprene; avoid latex if allergies)
- Coveralls or disposable clothing(Long sleeves and pants; boot covers optional)
- HEPA vacuum(HEPA-rated; do not use on wet surfaces)
- Dehumidifier(Aim for 30-50% relative humidity)
- Fans with cautionary setup(Use to circulate air while containing spores; do not blow into clean areas)
- Plastic sheeting and tape(Create containment zones and cover belongings)
- Mild detergent or approved cleaner(Avoid ammonia-based products with bleach)
- White vinegar / Hydrogen peroxide(Effective for some surface treatments; follow label directions)
Steps
Estimated time: 2-8 hours
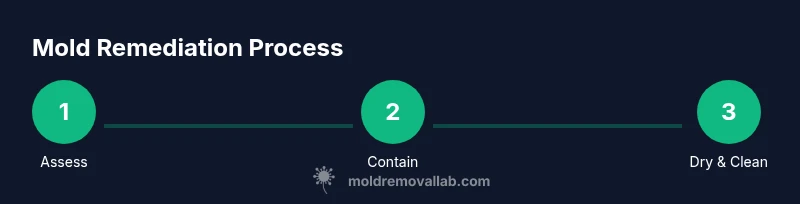
- 1
Assess extent and plan remediation
Survey the area to determine how far mold has spread and which materials are affected. Identify moisture sources and potential health considerations. Develop a remediation plan outlining containment, cleaning methods, drying strategies, and restoration needs.
Tip: Document the area with photos to support decisions and contractor communication. - 2
Contain area and establish barriers
Seal off the affected zone with plastic sheeting; close doors and seal HVAC vents to prevent spores from migrating. Post warning signs and restrict access until cleanup completes. This step minimizes secondary exposure and keeps the work focused.
Tip: Mark containment boundaries with tape for clarity to visitors and helpers. - 3
Identify and fix moisture sources
Locate leaks, condensation issues, or humidity sources and repair them before cleaning. Without addressing moisture, mold can return even after cleanup. Re-check after repairs to ensure moisture levels remain stable.
Tip: Consider professional help for complex plumbing or roof leaks. - 4
Clean and disinfect affected surfaces
Clean non-porous surfaces with an appropriate cleaning solution. For porous materials that are salvageable, use approved methods or remove and replace. Avoid sanding moldy drywall in-place to minimize dust dispersion.
Tip: Work from clean to dirty areas to prevent cross-contamination. - 5
Dry spaces thoroughly
Run dehumidifiers and fans to reduce moisture in the air and materials. Monitor humidity and ensure no damp pockets remain behind walls or insulation. Catching lingering moisture early prevents regrowth.
Tip: Aim for interior RH under 50%; check moisture meters in several spots. - 6
Verify cleanup and plan restoration
Reassess for visible mold and odors. Decide on replacement versus restoration for affected materials. Restore aesthetics and function with mold-resistant materials where appropriate, then document results.
Tip: Keep receipts and notes for homeowner records and insurance.
FAQ
Is mold dangerous to health?
Mold exposure can trigger allergic reactions, coughing, and asthma symptoms for some people. People with allergies or immunocompromised conditions may experience more intense reactions. Reducing exposure and addressing moisture lessen health risks.
Mold exposure may cause allergy-like symptoms in some people, especially those with asthma or sensitivities. Reducing moisture and cleaning up mold reduces health risk.
How long does remediation take?
Remediation duration depends on the area size, materials involved, and moisture levels. Small jobs can be completed in a day; larger projects may require multiple days and follow-up drying.
It varies by size and materials, from a day for small jobs to several days for larger ones.
Can I remove mold myself?
You can handle minor mold on non-porous surfaces with proper PPE and guidance. Larger growth, porous materials, or hidden mold behind walls should be addressed by professionals.
For small, non-porous spots, DIY is possible with PPE. For bigger or hidden mold, hire a pro.
Should I test for mold after cleanup?
If you still notice odors or see signs of moisture, hire a mold inspector for post-remediation verification. Routine cleaning and moisture control often suffice for homes without ongoing moisture issues.
Consider a professional post-remediation test if odors persist or you’re unsure.
What should I do with damaged materials?
Porous materials with mold growth should be removed and disposed of safely. Non-porous surfaces can often be cleaned and saved. Replacing damaged materials reduces relapse risk.
Remove porous materials with mold and clean or replace non-porous ones.
Is bleach effective for mold cleanup?
Bleach can kill surface mold on non-porous surfaces but may not reach mold within porous materials. Use appropriate cleaners and avoid mixing with other chemicals.
Bleach works on hard non-porous surfaces but isn’t a universal fix and can be unsafe on porous materials.
Watch Video
The Essentials
- Identify moisture sources before cleaning
- Contain the area to limit spread
- Choose appropriate cleaning methods by material
- Dry thoroughly to prevent recurrence
- Document results for records and future prevention