Mold Remediation Checklist: A Practical Home Guide
Learn a comprehensive mold remediation checklist to safely reclaim a healthy home. Identify moisture sources, contain contamination, clean properly, and verify drying with Mold Removal Lab guidance.

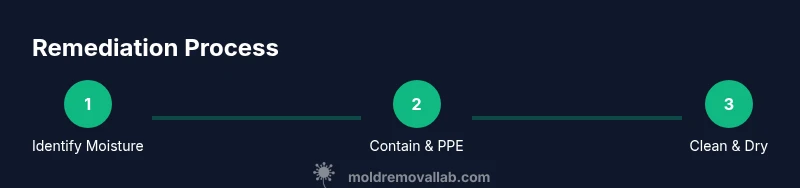
A mold remediation checklist guides homeowners through moisture source control, containment, cleanup, and thorough drying to safely restore a mold-free home. Follow a structured plan, use proper PPE, and dispose of contaminated materials safely. This Mold Removal Lab guide provides practical, safe steps and handy checklists for home remediation.
What a Mold Remediation Checklist Covers
A mold remediation checklist is a practical, field-tested plan that helps homeowners tackle mold growth in a safe, organized way. According to Mold Removal Lab, a well-structured checklist starts with identifying moisture sources and assessing the extent of contamination, then moves through containment, cleanup, drying, and verification. The goal is not just to remove visible mold but to stop it from returning by correcting underlying moisture problems. Expect sections on safety, materials, and follow-up checks. A good checklist also helps you decide when to self-clean and when to call a licensed professional. By following a clear sequence, you reduce health risks, protect your home, and save time and money in the long run. Throughout, you’ll find practical tips, checklists, and decision points designed for homeowners and renters.
Key components include moisture source identification, containment planning, PPE and containment supplies, cleaning methods, disposal procedures, drying protocols, documentation, and a final verification step. Keeping records of humidity levels, cleaning dates, and remediation notes can help you track progress and communicate with any professionals involved. This approach aligns with Mold Removal Lab analysis, which shows that addressing moisture sources is foundational to lasting results and healthier indoor air.
Moisture Control: The Foundation of Success
Moisture is the primary driver of mold growth. The checklist begins with a thorough moisture assessment: locate leaks, condensation issues, and areas with high humidity. Use hygrometers or smart sensors to establish a baseline and monitor changes over time. Repair leaks promptly and consider improving ventilation in bathrooms, kitchens, and laundry rooms. Reducing indoor humidity to a target range—typically around 30-50% depending on climate—helps inhibit mold growth and supports effective remediation. Mold Removal Lab emphasizes that failing to control moisture will undermine any cleaning efforts, leading to rapid regrowth and wasted resources. Inspect hidden spaces like behind walls, under sinks, and in basements where dampness can persist, and document all findings for follow-up actions.
Pro tip: Keep moisture away from previously treated areas by sealing gaps and improving drainage away from the home’s foundation. If you’re unsure where moisture originates, a professional assessment can pinpoint issues such as roof leaks, plumbing failures, or condensation hotspots. The goal is to eliminate chronic moisture before detailing cleaning steps.
Containment and Personal Protective Equipment (PPE)
Containment and PPE are safety-critical components of any mold remediation plan. Start by isolating the affected area with plastic sheeting and tape to prevent spores from spreading to clean spaces. Use negative pressure if possible, with a portable HEPA-filtered unit to capture airborne mold spores during cleanup. PPE should include an N95 respirator (or higher), protective eyewear, disposable gloves, and a long-sleeved suit or disposable coveralls. Handling contaminated materials with care reduces exposure risk for you and others in the household. Proper containment also protects pets and children by limiting access to the work zone. Remember to remove or seal personal belongings that could carry spores and establish a clear entry/exit protocol to minimize cross-contamination.
Pro tip: Do not work in damp, poorly ventilated spaces without PPE. Change gloves frequently and discard disposable PPE after use to prevent cross-contamination. Mold Removal Lab’s guidance notes that safety gear is as important as the remediation steps themselves.
Cleaning and Mold Removal Techniques
Cleaning mold safely involves mechanical removal and appropriate cleaning agents. Start with dry brushing or vacuuming with a HEPA-equipped device for loose spores from hard surfaces. For visible mold on non-porous surfaces, a detergent-based cleaner followed by a mild mold-cleaning solution can be effective. Porous materials like drywall or carpeting with significant mold growth are often not salvageable and should be removed and properly disposed of while minimizing dust dispersion. After cleaning, wipe surfaces, and perform a thorough rinse before drying. Avoid using bleach on porous materials, as it can fail to reach embedded mold and may produce hazardous fumes. Always follow product instructions and ensure good ventilation while cleaning. Document areas cleaned and any materials removed for follow-up.
Mold Removal Lab’s process emphasizes a cautious, thorough approach and using the least aggressive method first to minimize exposure and material loss. If you encounter stubborn growth or health symptoms, pause and consult a professional remediation service.
Drying, Humidity Control, and Re-Verification
Drying is the step that prevents relapse. After cleaning, restore airflow with fans and dehumidifiers, and maintain low humidity in the affected area while you monitor progress. This phase often takes 24–72 hours, depending on space size and equipment used. Recheck humidity levels and moisture content with appropriate meters. Visual indicators of success include the absence of musty odors, no visible moisture, and uniform dryness across materials previously affected. Inadequate drying can cause hidden mold to reappear behind walls or under flooring. Keeping a log of humidity readings and dates helps you verify sustained dryness and supports future prevention strategies.
If the space remains damp after several days, consider escalation: additional drying equipment, more drastic containment measures, or professional remediation. This is where Mold Removal Lab recommends a conservative approach—when in doubt, pause and seek expert guidance to avoid health risks and structural damage.
Documentation, Verification, and Follow-Up
A thorough remediation plan includes documentation and a clear follow-up plan for ongoing monitoring. Record all moisture readings, remediation steps taken, materials removed, and areas cleaned. Take photos before and after cleanup for reference and potential insurance or landlord communications. Plan periodic checks over the next several weeks, especially in high-humidity seasons, to ensure mold does not return. If growth reappears, reassess moisture sources and cleaning methods, and adjust your plan accordingly. A well-documented process reduces confusion and helps ensure long-term results. Mold Removal Lab emphasizes consistency and diligence in follow-up to protect occupant health and property value.
Finally, communicate results with household members and, if applicable, with a property manager or insurer. Clear documentation improves accountability and accelerates any necessary follow-up actions.
Mold Removal Lab Verdict: Practical, Safe, and Actionable
In summary, a mold remediation checklist is a practical tool for homeowners and renters. By starting with moisture control, implementing containment, performing careful cleaning, and verifying drying, you can restore a healthier indoor environment. The Mold Removal Lab team recommends using the checklist as a living document—update it as conditions change and as you gather data from humidity meters and visual inspections. When used consistently, this approach minimizes exposure risks, protects your family’s health, and reduces the likelihood of mold returning. If you encounter large outbreaks, persistent leaks, or uncertain health symptoms, don’t hesitate to reach out to a qualified remediation professional. A thoughtful, measured remediation plan is the most reliable path to a mold-free home.
Quick Reference: What to Do Next
- Review and update moisture sources quarterly to prevent recurrence.
- Maintain a clean, dry, and well-ventilated home environment.
- Use the checklist as a living document and adapt as needed based on new findings.
Tools & Materials
- N95 respirator or higher(Ensure proper fit; replace if soiled)
- Protective eyewear(Goggles or face shield)
- Disposable gloves(Nitrile recommended)
- Protective coveralls or disposable suit(Full body protection)
- Plastic sheeting (6 mil)(Used to create containment barriers)
- Duck tape/green tape(Seal containment and cover seams)
- HEPA vacuum(For dry cleaning and debris removal)
- Detergent/mild soap(Initial cleaning solution)
- Mold cleaner or hydrogen peroxide (3% indicated for surfaces)(Follow label directions; avoid mixing with bleach)
- Disposable trash bags (heavy-duty)(Seal and dispose of contaminated materials)
- Buckets, scrub brushes, and rags(General purpose cleaning tools)
- Dehumidifier or desiccant(Drive down humidity for faster drying)
- Fans or air movers(Improve air circulation and drying)
- Moisture meter/hygrometer(Track moisture before, during, and after remediation)
Steps
Estimated time: 4-12 hours
- 1
Identify moisture sources
Survey the space for leaks, condensation, and standing water. Document findings with photos and measurements. This step sets up the remediation plan and prevents repeating work.
Tip: Prioritize sources that feed mold growth, such as roof leaks or plumbing failures. - 2
Isolate the work area
Seal the affected zone with plastic sheeting and tape to minimize spore spread. If possible, create negative pressure using a HEPA air purifier in the perimeter room.
Tip: Use entry-zones with plastic flaps to reduce cross-contamination when moving in and out. - 3
Put on PPE and prepare surfaces
Don PPE before touching any contaminated materials. Remove loose debris gently and prepare surfaces for cleaning.
Tip: Avoid touching your face after handling contaminated materials; wash hands immediately after removal of PPE. - 4
Remove non-salvageable materials
Carefully remove porous materials with significant mold growth (drywall, carpet backing, insulation) and seal them in bags for disposal.
Tip: Label bags to indicate affected materials; prevent bag tearing during transport. - 5
Clean and decontaminate surfaces
Clean non-porous surfaces with detergent, then apply a mold-cleaning solution if needed. Rinse and dry surfaces completely.
Tip: Work from least contaminated to most contaminated areas to minimize spreading spores. - 6
Dry the area thoroughly
Run dehumidifiers and fans to achieve uniform drying. Recheck moisture content regularly until readings stabilize.
Tip: Aim for sustained RH readings in the target range after cleanup. - 7
Verify results and document
Take final moisture readings, photos, and notes. Compare with initial findings to confirm improvement and plan follow-ups.
Tip: Keep a remediation log for insurance, landlord, or future reference.
FAQ
What is a mold remediation checklist?
A mold remediation checklist is a step-by-step plan to identify moisture, contain contamination, clean affected areas, and verify complete drying to prevent mold regrowth.
A mold remediation checklist is a step-by-step plan to identify moisture, contain contamination, and ensure drying to prevent mold regrowth.
Can I clean mold myself or should I hire a pro?
Small, well-contained areas can often be tackled by homeowners using proper PPE and cleaning methods. Large outbreaks, mold growth on porous materials, or health concerns warrant professional remediation.
You can handle small areas yourself with proper safety gear, but large outbreaks or mold on porous materials should be done by a professional.
What are common signs that I need to call a pro?
Persistent moisture, large mold coverage, or health symptoms like chronic cough or sneezing indicate professional assessment is wise.
If moisture persists, mold covers a large area, or health symptoms appear, seek professional help.
How long does remediation typically take?
A typical process ranges from several hours to a couple of days, depending on space size, contamination level, and moisture control effectiveness.
Remediation usually takes several hours to a couple of days, based on space size and moisture control.
Is bleach effective for mold cleanup?
Bleach can help on non-porous surfaces in some cases, but it does not prevent regrowth and may be unsafe in humid environments. Use approved cleaners and follow label directions.
Bleach isn't always the best option; it can be unsafe in humidity and may not prevent regrowth. Use approved cleaners instead.
What documentation should I keep?
Keep moisture readings, photos, dates, materials removed, and remediation steps. This supports insurance claims and future maintenance.
Keep readings, photos, dates, and steps taken to support claims and future maintenance.
Watch Video
The Essentials
- Identify moisture sources first and fix leaks promptly
- Contain the area to prevent spore spread
- Use PPE and safe cleaning practices consistently
- Dry thoroughly and re-check moisture
- Document results and plan follow-up checks