Mold Near AC Vent: Practical Home Remediation Guide
Learn how to identify, contain, and safely remediate mold near your AC vent. This educational guide from Mold Removal Lab covers moisture sources, safe cleaning methods, and prevention tips for homeowners and renters.

According to Mold Removal Lab, you will learn how to identify mold near ac vent, assess moisture sources, and begin safe remediation. This quick answer outlines essential steps, protective gear, containment practices, and when to call a professional to prevent spread, protect occupants, and reduce health risks. You’ll also learn how to document findings for informed decisions.
Understanding Why Mold Appears Near AC Vents
Mold near ac vent occurs when moisture and warmth combine in or around the air handling system. Condensation on cooling coils, leaks in ductwork, or humidity buildup in crawl spaces can create a hospitable environment for mold growth. As warm indoor air meets cool surfaces, water vapor condenses on duct surfaces or on metal, creating microdroplets that feed mold growth. In many homes, the first sign is a musty odor or visible staining along the ductwork or near the vent grille.
The Mold Removal Lab Team notes that HVAC systems can distribute mold spores throughout a home, especially when the return or supply ducts travel through damp areas. This means addressing just the visible mold is not enough; you must stop the moisture cycle at its source and ensure proper cleaning of affected surfaces. Common sources include: leaky condensate lines, poorly insulated ducts, and high indoor humidity (relative humidity above 50-60%). If you notice persistent moisture after cleaning or if you have asthma or allergies, consider professional help. Always check for hidden mold behind insulation or in wall cavities, where moisture can linger unnoticed.
A simple moisture check can start with a hygrometer reading and visual inspection of the area around the vent and adjacent walls. If you find staining, peeling paint, or a damp feeling, treat this as a moisture problem and proceed with containment and drying steps.
Safety First: Gear, Ventilation, and Containment
Safety is the foundation of any mold remediation around an AC vent. Before you touch anything, put on appropriate PPE and minimize exposure in the living space. Wear an NIOSH-approved respirator or P100 mask, non-porous gloves, and eye protection. Create a containment zone using plastic sheeting to prevent spores from spreading through the home. Use tape to seal doorways and vents, and keep other occupants and pets away during the work.
Ventilate the area as you work, but avoid blasting air from the HVAC system into other rooms. If possible, turn off the HVAC to prevent contamination and avoid circulating spores. Keep a moisture-absorbing device nearby to reduce humidity, and have trash bags ready for disposal of contaminated materials. This approach minimizes risk and makes cleanup more predictable. The Mold Removal Lab Team emphasizes that containment and PPE are not optional; they are essential for health and safety during remediation.
Inspecting for Moisture Sources Around the AC System
Effective remediation starts with finding where moisture is entering the system. Check condensate lines for drips or leaks, inspect duct joints for gaps, and review insulation around the coil and ducts. Poor insulation can create condensation on cold surfaces, feeding mold growth behind walls or in ceiling plenum spaces. Look for water staining on drywall, insulation mold, and damp ceiling tiles near the vent.
According to Mold Removal Lab, persistent moisture requires a systematic plan: repair leaks, insulate where needed, and ensure proper drainage around the unit. After repairs, recheck the area for dampness over 24-72 hours. If dampness recurs, professional evaluation may be warranted because hidden moisture behind walls or in the attic can sustain mold growth even after visible signs are addressed. Document findings with photos and measurements to guide further action.
Cleaning, Drying, and Mold Removal Methods
Surface cleaning should target non-porous surfaces first with detergent and water, followed by a clean rinse and thorough drying. For porous materials, consider replacing or sealing with mold-inhibiting products rather than attempting deep cleaning. Avoid aggressive scrubbing on porous substrates, which can release spores into the air. After cleaning, use a HEPA-equipped vacuum to capture residual spores and thoroughly dry the area using fans and a dehumidifier until moisture readings normalize.
Bleach is sometimes suggested for hard, non-porous surfaces, but it is not a universal solution and is not recommended for porous materials because it can fail to eradicate deeply embedded mold. Do not mix any cleaners, especially ammonia with bleach, due to toxic fumes. Documented guidance from the Mold Removal Lab Team highlights the importance of addressing the moisture source first, then performing targeted cleaning, and finally ensuring dryness before removing containment. If contamination extends into insulation or crawl spaces, consider professional remediation to avoid recontamination of living areas.
When to Hire a Pro and What to Expect
Not all mold scenarios are safe or practical to handle alone. If mold is widespread, behind walls, inside ductwork, or if occupants have severe allergies or asthma, professional remediation is advised. A licensed remediator will assess moisture sources, clean affected structures, and perform duct cleaning if needed. They will also verify that the area is dry and free of residual spores before reintroducing air into the space. The Mold Removal Lab Team notes that escalating to a pro is not a failure but a prudent step when health risks or structural damage may be involved.
Tools & Materials
- N95 respirator or better(NIOSH-approved; replace if damp or soiled)
- Non-porous gloves(Chemical-resistant preferred)
- Safety goggles or protective eyewear(Wraparound style recommended)
- Disposable coveralls or clothing protection(Optional but helpful for larger jobs)
- Plastic sheeting for containment(6–10 mil thick; tape for sealing)
- Tape (packaging or painter’s tape)(To seal containment and seal openings)
- HEPA vacuum(For clean-up and final vacuuming of spores)
- Detergent or EPA-approved mold cleaner(Non-corrosive; follow label directions)
- Disinfectant (mold-safe)(Use only on appropriate surfaces as directed)
- Dehumidifier or fans(Promotes rapid drying; place away from moisture sources)
- Sealed waste bags(Double-bag contaminated materials for disposal)
- Moisture meter/hygrometer(Helpful to monitor humidity levels)
Steps
Estimated time: 2-6 hours (actual time depends on area size, moisture level, and access to affected materials)
- 1
Assess area and equip PPE
Put on the recommended PPE and inspect the space around the AC vent for visible signs of mold, moisture, or water damage. Ensure occupants are out of the area and HVAC is turned off to prevent spread. This step establishes safety and a clear work zone.
Tip: Do a quick visual check of returns, supply ducts, and any nearby ceilings for dampness before proceeding. - 2
Set up containment
Seal off the affected area with plastic sheeting, creating a simple containment zone to minimize cross-contamination. Use tape to seal doors and vents, and post a warning sign if others may enter.
Tip: Keep a dedicated entrance to avoid tracking mold to other parts of the home. - 3
Identify and repair moisture source
Trace the moisture path to fix leaks, condensation lines, or insulation gaps. Repairing the root cause is critical to preventing recurrence and future mold growth.
Tip: If the source is unknown or behind walls, pause remediation and seek professional guidance. - 4
Clean non-porous surfaces
Wash non-porous surfaces (metal, glass, PVC) with detergent and water, then rinse and dry completely. Use a HEPA vacuum on dry surfaces to capture loose spores.
Tip: Do not mix cleaners; test a small area first to ensure no surface damage. - 5
Treat and dry porous materials
Porous materials (drywall, insulation) may require removal and replacement. If you must treat instead, use mold-inhibiting products and ensure thorough drying after cleaning.
Tip: Disposal of contaminated porous materials should be in sealed bags and handled according to local regulations. - 6
Monitor and prevent future growth
Continue to monitor humidity levels around the vent and maintain proper ventilation. Reassess after 24–72 hours and again after a drying period to confirm mold remediation success.
Tip: Consider installing a dehumidifier or improving airflow to maintain RH below 50-60%.
FAQ
Is mold near AC vents dangerous to my health?
Mold exposure can trigger allergies, asthma symptoms, and respiratory irritation, especially for sensitive individuals. Health risks vary by extent of exposure and individual susceptibility. If symptoms persist, seek medical advice and reduce exposure by fixing moisture and cleaning the area.
Mold around vents can affect health, especially for sensitive people. Reduce exposure and fix moisture, then clean thoroughly. Seek medical advice if symptoms persist.
Can I clean mold near an AC vent myself?
Small, non-porous surfaces may be cleaned safely with detergent and water followed by drying. Porous materials or large areas behind walls are better handled by professionals. When in doubt, consult a pro to avoid spreading spores.
You can clean small non-porous areas yourself, but larger or porous areas should be handled by a pro.
What are signs moisture is entering the AC vent area?
Look for persistent condensation, water stains, peeling paint, musty odor, or damp drywall near vents. If moisture recurs after cleaning, there may be an ongoing source that needs repair.
Watch for condensation, stains, or damp walls near vents; recurring moisture means a repair is needed.
How can I prevent mold growth around AC vents?
Keep humidity low (ideally under 50-60%), ensure proper duct insulation, and maintain the HVAC system with regular cleaning. Use vent covers and seal gaps to limit moisture buildup.
Lower humidity, insulate ducts well, and keep your HVAC clean to prevent mold growth.
Should I replace ductwork if mold is behind the vent?
If mold penetrates ductwork or the insulation behind it is moldy, replacement by a professional is often recommended to prevent recontamination. A remediation pro will assess and decide the best course.
Ductwork behind mold often needs professional assessment and possible replacement.
How long does it take to dry after remediation?
Drying times vary with room size, airflow, and humidity. A well-ventilated space may dry in hours, but larger jobs can take longer. Monitor with a hygrometer and recheck moisture levels.
Drying times depend on space and airflow; check moisture levels to confirm drying.
Watch Video
The Essentials
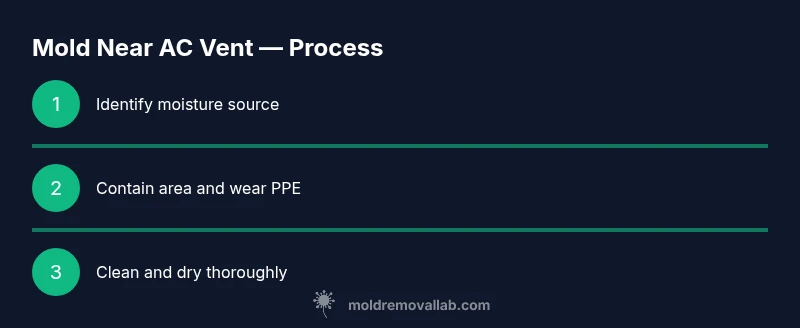
- Identify and address the moisture source first
- Contain the area to prevent cross-contamination
- Choose cleaning methods based on surface material
- Dry thoroughly and monitor humidity to prevent recurrence
- Know when to escalate to professional remediation