AC vent mold: Practical guide for homeowners
Identify, prevent, and safely remove ac vent mold. Practical, step-by-step guidance for homeowners and renters from Mold Removal Lab to protect indoor air.

This guide helps homeowners identify, prevent, and remediate ac vent mold safely. You’ll learn how moisture drives growth, what steps to take, and when to call a pro. Clear, action-oriented steps reduce exposure and protect indoor air quality.
Understanding AC vent mold
AC vent mold is mold growth that thrives in the moist, warm environment of HVAC ducts, registers, and nearby insulation. Moisture from condensation, leaky ducts, or high humidity creates ideal conditions for spores to settle and multiply. This guide frames a practical approach to identification, containment, cleaning, and prevention. According to Mold Removal Lab, recognizing moisture sources early is key to stopping growth and protecting indoor air quality. The keyword ac vent mold pops up throughout this guide to emphasize where the issue most often starts and how homeowners can respond quickly and safely.
Common mold types found in ducts and vents
In HVAC systems, multiple mold genera can grow behind grills and within ductwork. The most commonly encountered ones include Aspergillus and Cladosporium, which can cause allergy-like symptoms in sensitive individuals. Molds in ducts might not always be visible, but you can spot damp insulation, musty odors, or stained surfaces near vents. When addressing ac vent mold, accurate identification helps determine the cleaning approach, containment, and whether material replacement is necessary. Mold Removal Lab emphasizes avoiding overconfidence—some mold growth requires professional assessment.
How moisture and humidity drive growth in HVAC ducts
Mold needs consistent moisture to grow. In air conditioning systems, condensation on cold surfaces, leaks, or poor drainage raises ambient humidity inside ductwork. When humidity stays steadily high in the occupied space, mold spores can germinate on damp surfaces over time. Addressing ac vent mold starts with eliminating the moisture source: repair leaks, improve insulation, and ensure proper drainage. Proper airflow and filtration also reduce stagnant air that encourages mold proliferation, a point highlighted by the Mold Removal Lab team.
Quick checks before remediation
Before you begin cleaning, perform a visual inspection for obvious signs: staining, a musty odor, and damp insulation around supply or return vents. Use a moisture meter if available to gauge humidity inside ducts and around registers. If you notice extensive damage or active water intrusion, pause and plan a professional assessment. This section helps homeowners gauge scope for their ac vent mold project and decide whether DIY remediation is appropriate.
Cleaning protocols for nonporous surfaces and porous materials
Nonporous metal ducts and plastic components can often be cleaned with an EPA-registered mold cleaner or a hydrogen peroxide solution (3%). Apply, wait a few minutes, then scrub with a microfiber cloth or brush. Porous materials like fiberglass insulation or ductboard that are visibly moldy usually need removal and replacement rather than cleaning. Always wear PPE, seal the work area, and avoid dispersing spores. The goal is to reduce viable mold to safe levels without spreading contamination.
Drying, sealing, and preventing recurrence
After cleaning, thoroughly dry all surfaces using towels, fans, or a dehumidifier. Maintain low humidity to slow or stop new mold growth. Consider sealing minor leaks and ensuring duct joints are airtight to prevent condensation. Regularly replacing air filters and ensuring proper airflow reduces moisture buildup. This proactive maintenance aligns with the Mold Removal Lab approach to long-term indoor air quality.
When to call a professional for ac vent mold
If there is persistent moisture, significant mold growth on porous materials, or contamination of multiple air channels, a licensed mold remediation specialist should handle the job. A pro can perform accurate containment, air filtration, and post-remediation testing to verify results. Early professional input can prevent further damage and ensure compliance with local codes, especially for complex systems.
DIY prevention checks for ongoing maintenance
Set a routine: inspect registers for moisture, monitor indoor humidity with a sensor, and replace HVAC filters every 1-3 months. Keep outdoor condensate lines clear and fix leaks promptly. Small actions now prevent brownish stains or odor from returning, and they protect your family’s health. If odors persist, consider a duct cleaning or mold inspection to confirm ac vent mold is resolved.
Practical note from Mold Removal Lab
The Mold Removal Lab team recommends treating ac vent mold as a moisture problem first and a mold problem second. By correcting humidity sources, improving drainage, and maintaining clean airflow, you dramatically reduce recurrence risk. The approach emphasizes safety, documentation, and gradual remediation to protect indoor air quality for your household.
Final checklist and next steps
Create a simple remediation plan with a list of tasks, responsible person, and a timeline. Document observations, repairs, and humidity readings for future reference. Share results with your insurer or a qualified contractor if you suspect broader system issues. This final section consolidates what you’ve learned into a practical action plan for ac vent mold.
Tools & Materials
- Nitrile gloves(Size as needed; chemical-resistant gloves recommended)
- NIOSH-approved respirator (rated for particulates)(Fit test if possible)
- Safety goggles or face shield(Protect eyes from spores)
- Disposable coveralls or old clothing(Keeps mold off skin and clothes)
- HEPA-rated vacuum(Use with vacuum attachment to reduce spores)
- Microfiber cloths(Lint-free cleaning and wipe-downs)
- Mold cleaner or EPA-registered sanitizer(Follow label directions)
- Hydrogen peroxide 3% (optional)(Alternative cleaning agent)
- White vinegar (optional)(Mildly antimicrobial; do not mix with bleach)
- Plastic sheeting and tape(Seal off area to contain spores)
- Moisture meter or hygrometer(Optional but helpful)
- Dehumidifier or fans(Accelerates drying process)
Steps
Estimated time: 2-6 hours
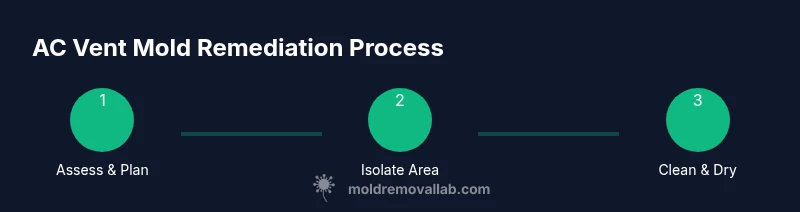
- 1
Assess safety and scope
Inspect the area for visible mold, moisture sources, and access paths. Decide whether DIY remediation is appropriate based on extent and materials involved. Document findings for reference.
Tip: Take photos from multiple angles to track progress. - 2
Isolate the work area
Seal off the affected space with plastic sheeting to prevent mold spores from spreading to other rooms. Use tape to secure seams and avoid gaps.
Tip: Turn off HVAC or redirect airflow away from the work zone. - 3
Protect yourself and prepare cleaning area
Don PPE before touching suspect materials. Cover floors and nearby surfaces to catch dust and debris. Set up a limited work zone for containment.
Tip: Work from clean to dirty areas to keep contamination low. - 4
Remove or treat affected materials
If insulation or ductboard is moldy beyond cleaning, remove and dispose of it in sealed bags. Retain non-porous components if safely cleanable.
Tip: Do not rip out large sections without planning; missteps can spread spores. - 5
Clean and disinfect surfaces
Wipe surfaces with an EPA-registered cleaner or 3% hydrogen peroxide. Allow contact time per label before wiping clean. Vacuum with HEPA after to capture remaining spores.
Tip: Never mix cleaners; avoid ammonia and bleach combinations. - 6
Dry everything completely
Ventilate the area and use dehumidifiers to bring humidity down to safe levels. Drying may take several hours to a day depending on moisture load.
Tip: Check behind panels and insulation for hidden moisture. - 7
Restore and monitor
Replace removed materials with mold-resistant options or seal joints for tighter ductwork. Recheck humidity and mold indicators after 24-72 hours.
Tip: Keep an eye on odors or mustiness that may indicate re-growth.
FAQ
Is ac vent mold dangerous to breathe?
Mold exposure can cause allergy symptoms, asthma flares, and irritation. The risk depends on mold type, exposure duration, and individual sensitivity. If you have health concerns, reduce exposure and seek professional advice.
Mold in vents can affect air quality and health, especially if you have allergies or asthma.
Can I remove mold from ducts myself?
Small, nonporous surfaces may be cleaned with appropriate cleaners, but porous materials or extensive growth usually require professional remediation. Do not disturb large colonies or damaged insulation.
Small areas may be cleaned safely, but large growths need a pro.
What are signs mold is growing in HVAC ducts?
Musty odor near vents, visible staining on ducts, condensation, and increased allergy symptoms are common indicators of ac vent mold growth. If in doubt, test and inspect further.
Look for musty smells and visible stains around vents.
How can I prevent mold in HVAC systems?
Maintain indoor humidity below a comfortable range, fix leaks promptly, replace filters regularly, and ensure proper drainage from condensate lines. Regular maintenance reduces mold risk.
Keep humidity low and fix leaks to prevent mold growth.
Should I use bleach to clean mold in ducts?
Bleach is not recommended for porous duct materials and can create harmful fumes. Use EPA-registered cleaners or hydrogen peroxide on non-porous surfaces, following label directions.
Bleach isn’t ideal for ducts; use appropriate cleaners.
When should I call a mold remediation professional?
If mold covers large areas, involves duct insulation, or recurs after cleaning, hire a licensed contractor to assess containment, ventilation, and post-remediation testing.
Call a pro for large or persistent mold growth.
Watch Video
The Essentials
- Identify moisture sources before remediation.
- Use proper PPE to stay safe.
- Dry space thoroughly within 24-72 hours.
- Call a pro for extensive mold or porous material damage.
- Monitor humidity to prevent recurrence.