Mold on Metal: A Practical Step-by-Step Guide
Learn safe, effective steps to remove mold from metal surfaces, prevent recurrence, and maintain a healthy home. Safety gear, tools, cleaning methods, moisture control, and maintenance tips included.

You will learn to safely remove mold from metal surfaces and prevent regrowth. The key requirements are safety gear, ventilation, non-porous cleaners, and thorough drying. The process involves containment, cleaning, disinfection, and moisture control to keep metal surfaces mold-free. This guide focuses on metal, where mold growth is often driven by lingering moisture and organic residues. You'll find practical steps, tool lists, and safety notes suitable for homeowners and renters.
Understanding mold on metal and why it happens
Mold on metal surfaces is not caused by the metal itself; rather, it grows where organic matter—dust, grease, skin oils, or residue from previous use—accumulates and moisture persists. Metal is non-porous, which means mold doesn’t take root in the metal pores the way it does in wood or drywall. However, when environmental conditions stay damp and dirty films linger, mold spores can cling to the surface and form visible colonies. According to Mold Removal Lab, proper moisture control is the most effective way to prevent mold on metal. In real homes, metal fixtures in kitchens, basements, garages, and utility rooms are common sites where condensation and high humidity enable mold growth on residues. The key takeaway: remove the moisture and clean the organic films to stop mold in its tracks. The Mold Removal Lab team emphasizes that ongoing moisture control and routine cleaning are the long-term cures for mold on metal.
Safety first: PPE and workspace setup
Before tackling any mold cleanup on metal, prioritize safety. Wear nitrile or latex gloves, a fitted N95 respirator, and eye protection to guard against mold spores and cleaning chemicals. Set up a contained workspace by closing doors, sealing vents if feasible, and directing airflow away from other living areas with a portable fan on a safe, standoff distance. Keep children and pets away during cleanup. If anyone in the household has respiratory sensitivities or allergies, consider postponing work until humidity is reduced and the area is well-ventilated. Always test cleaners on a small metal patch to avoid discoloration or damage. Mold Removal Lab’s guidance notes that PPE and proper ventilation dramatically reduce exposure risk during remediation.
Tools and cleaners for metal mold cleanup
Having the right tools makes the job safer and faster. Essential items include a sturdy brush, microfiber cloths, disposable wipes, a spray bottle of cleaning solution, and a non-porous scrub pad. For cleaners, a 3–5% hydrogen peroxide solution or a household bleach solution (1:10 bleach to water) works on many metals, followed by a water rinse. White vinegar can be useful as a mild booster, though it is not a disinfectant against all spores. A commercial mold cleaner labeled safe for metal is also acceptable. Always work in small sections to prevent spreading spores to clean areas, and wear a dedicated set of cleaning cloths to avoid cross-contamination. Dispose of used wipes in sealed bags. Keep a timer handy to ensure proper contact time for cleaners.
Inspecting mold extent and testing
Not all black or green spots on metal indicate active mold growth—some may be staining or mineral deposits. Start with a visual inspection and note the extent of visible colonies. If there is significant mold or a musty odor, or if you suspect hidden growth under coatings, consider professional testing or use a moisture meter to identify persistent damp zones. Mold Removal Lab notes that testing is rarely required for small, well-contained cases and that remediation should focus on moisture reduction and thorough cleaning. If you’re renting, document the area and communicate with the landlord if recurring mold is observed.
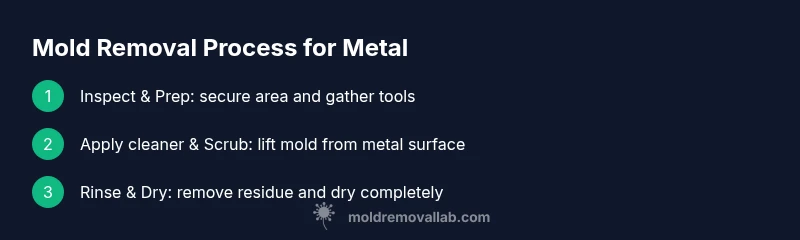
Cleaning process: removing mold from metal surfaces
Begin by isolating the area and applying cleaner to the affected metal surface. Allow for the recommended contact time, then scrub with a stiff-bristle brush to break up colonies. Wipe away residue with microfiber cloths, repeating as needed. For tough stains, reapply cleaner and scrub in a different direction to lift spores. Rinse the surface with clean water and dry it completely with a clean towel. Avoid saturating metal fixtures or components that could rust or corrode. If using bleach, ensure good ventilation and never mix with ammonia; this creates dangerous gases. After cleaning, inspect for any remaining spots and treat again if necessary.
Drying and dehumidification to prevent recurrence
Mold needs moisture to survive, so drying is critical. Use a dehumidifier or fan to maintain low humidity levels in the treated area for at least 24–48 hours, depending on ambient conditions. Wipe and dry any drips from adjacent surfaces to prevent new condensation. If the metal is part of an appliance or a mechanical component, ensure connections are dry and reassemble only once all parts are fully dry. Continuous moisture control—like running a dehumidifier in humid climates—will dramatically reduce chances of mold returning.
Preventing future mold on metal: maintenance tips
Prevention begins with routine cleaning and moisture management. Clean metal surfaces regularly to remove dust and oils that can feed mold, especially in kitchens, basements, or garages. Promise yourself to fix leaks, seal openings where water can collect, and improve ventilation with exhaust fans or air purifiers. If the metal is near a window or in a damp area, periodically check for condensation and wipe it away promptly. Consider applying a light protective coating or sealant on non-scratch metal surfaces to reduce the chance of residue buildup that mold can feed on. The key principle is to keep metal surfaces dry and clean.
Common myths and misconceptions about mold on metal
Some people believe metal itself can “poison” mold or that mold on metal is a sign of structural decay. In reality, mold growth depends on moisture and organic residues, not the metal material. Another myth is that mold on metal is permanent or untreatable; with proper cleaning, disinfection, and drying, mold can be removed from metal surfaces. Finally, many assume that bleach is always the best solution; while effective in many cases, it can damage certain metal finishes, so always test first and choose a cleaner appropriate for the metal type. Knowledge and careful application are the best defenses against mold.
When to call a professional: thresholds and safety
If mold covers a large area, if you notice recurring moisture after cleaning, or if the mold smell persists after remediation, it’s wise to call a professional. Professionals can assess hidden growth behind coatings, structural components, or within HVAC systems where metal surfaces are involved. If you have health conditions or you’re dealing with black mold or toxic molds, seek professional remediation services immediately. The Mold Removal Lab team recommends escalating to a pro when safe DIY cleanup becomes impractical or risk-laden.
Tools & Materials
- Nitrile gloves(Protect hands from mold and cleaners)
- N95 or P100 respirator(Guard lungs from spores)
- Safety goggles(Eye protection against splashes)
- Hard-bristle scrub brush(Effective on metal without scratching)
- Non-abrasive cloths(Wipe and dry surfaces)
- Spray bottles (3-5% hydrogen peroxide or 1:10 bleach solution)(Disinfect surfaces)
- White vinegar (optional)(Mild antimicrobial boost)
- Trash bags (heavy-duty)(Contain contaminated waste)
- Drying equipment (fan or dehumidifier)(Ensure complete drying)
- Moisture meter (optional)(Identify hidden damp zones)
Steps
Estimated time: 60-90 minutes
- 1
Prepare safety gear and workspace
Put on PPE, seal the area, and set up ventilation to pull air away from living spaces. This minimizes exposure to mold spores and chemical cleaners. If possible, remap the area to prevent cross-contamination.
Tip: Always double-check PPE fit before starting; a loose mask reduces protection. - 2
Contain area and identify extent
Close doors, cover vents, and use plastic sheeting to limit containment. Visually assess the mold spread on metal surfaces and behind accessible crevices where moisture hides. Mark hotspots for targeted cleaning.
Tip: Record photos for reference in case of future maintenance checks. - 3
Pre-clean loose debris
Brush off loose dust and debris from metal surfaces with a dry brush before applying any liquids. This reduces the spread of spores and improves cleaner contact efficiency.
Tip: Avoid damp brushing to prevent splashing mold spores. - 4
Apply cleaning solution and scrub
Spray the chosen cleaner on the metal surface and let it sit for the recommended contact time. Scrub with a stiff-bristle brush in a consistent pattern to lift colonies from the surface.
Tip: Work in small sections to maintain even moisture control. - 5
Rinse and dry thoroughly
Rinse with clean water to remove cleaner residue, then dry completely with a clean towel or air-dry in a fan-assisted area. Check that no moisture remains behind any joints or gaps.
Tip: Drying is the most critical step to prevent regrowth; don’t skip it. - 6
Prevent future growth
Address the moisture source by repairing leaks, improving ventilation, and maintaining humidity below 60%. Regular cleaning helps keep surfaces mold-free over time.
Tip: Set a reminder to check humidity levels monthly in damp spaces.
FAQ
Can mold grow on metal even if the metal is clean and dry?
Mold can grow on metal if there is lingering moisture and organic residue; dry metal alone is not a guarantee against growth. Address any damp areas to prevent regrowth.
Yes. If moisture and residue are present, mold can grow on metal; keep surfaces dry and clean to prevent it.
What household cleaners are safe to use on metal?
Hydrogen peroxide, dilute bleach, and white vinegar are common options, but you should test on a small area first. Some metals may corrode with harsh chemicals, so choose cleaners compatible with the metal type.
Hydrogen peroxide or a mild bleach solution can work, but always test first and ventilate the area.
Do I need professional testing for metal mold?
For small, contained metal spots with no visible moisture issues, DIY cleanup is usually sufficient. If mold recurs, or if you suspect broader contamination, contact a professional for testing and remediation.
Usually not, unless it keeps coming back or you suspect hidden growth—then a pro can assess further.
How long does it take to dry after cleaning mold from metal?
Drying times vary with humidity and airflow, but aim for thorough drying within 24–48 hours with dehumidification and airflow.
Most surfaces dry within a day or two with proper airflow and a dehumidifier.
When should I call a professional for mold on metal?
Call a professional if the mold covers a large area, recurs after cleaning, or you have health concerns or complex equipment involved.
Call a pro if the mold is widespread or keeps returning, or if health risks are present.
Watch Video
The Essentials
- Mold on metal is moisture-driven; dry and clean thoroughly.
- Always use proper PPE and ventilate to minimize exposure.
- Choose metal-compatible cleaners and test first.
- Drying and moisture control prevent recurrence.
- Call a pro when mold covers large areas or recurs after DIY cleanup.