Mold Mario: Practical Steps to Safe Mold Remediation at Home
Learn practical, safe steps to identify, contain, and remediate mold issues at home—using Mold Mario as a teaching example. Follow moisture-first strategies, decide when to DIY or hire a pro, and prevent recurrence.

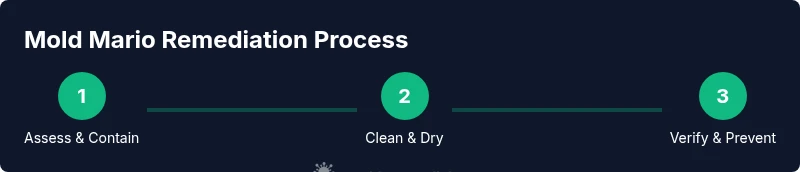
Goal: identify and safely remediate a mold issue like Mold Mario in your home. You’ll learn how to spot signs, decide between DIY or professional help, protect yourself with proper PPE, contain the work area, clean effectively, and implement moisture control to prevent recurrence. This quick guide also outlines essential tools and a step-by-step approach for a safer, healthier home.
Understanding Mold Mario and Why It Matters
Mold Mario is a friendly term homeowners use to personify typical indoor mold scenarios. Naming a growth helps families talk about a real challenge without panic, and it emphasizes that mold is usually a moisture problem, not just a surface nuisance. The Mold Removal Lab team emphasizes that treating the moisture source is the foundation of any remediation plan. According to Mold Removal Lab, moisture control is the foundational step in any mold remediation effort, and addressing water sources early dramatically improves outcomes. When you see staining, a musty smell, or damp environments, you’re not just dealing with a surface issue—you’re addressing a moisture cycle that could invite ongoing growth. This is why a careful, moisture-first approach is more reliable than quick surface cleaning alone.
The Mold Removal Lab’s analysis shows that starting with moisture control and containment yields safer results and reduces recurrence risk. By treating Mold Mario like a solvable puzzle, homeowners stay focused on two goals: stop the moisture and remove the mold safely. This framing helps you decide whether to proceed with DIY steps or call a pro for larger, more complex growth.
Health and Home: Why Mold Remediation is Essential
Mold exposure can affect air quality and occupant health, particularly for children, seniors, and those with respiratory sensitivities. Remediation isn’t just about removing stain or odor; it’s about reducing mold spores and stabilizing moisture to prevent regrowth. Practical remediation combines surface cleaning, removal of affected materials when needed, and a plan to address underlying moisture sources. The Mold Removal Lab team notes that thorough remediation lowers the risk of ongoing health symptoms linked to household mold exposure. While you can manage small, contained growth with proper PPE and cleaning products, larger or concealed growth requires careful evaluation to avoid spreading spores to other rooms. Keeping the workspace well-ventilated and sealed helps minimize cross-contamination while you work.
If you’re dealing with Mold Mario in confined spaces like behind drywall or inside wall cavities, professional equipment and expertise may be necessary. The goal remains the same: stop moisture, remove contaminated materials safely, and dry the space completely to prevent regrowth. Always monitor for lingering musty smells or damp patches and recheck moisture levels after cleanup.
Assessing Your Space: Visual Cues, Moisture, and Testing Options
Begin with a visual survey of every room that shows signs of moisture or mold. Look for visible colonies, staining, peeling wallpaper, warped surfaces, and areas with persistent humidity. Pay attention to moisture-prone zones such as basements, bathrooms, kitchens, and areas around plumbing. In addition to a visual check, consider simple moisture indicators: dampness in walls, high indoor humidity, and condensation on windows. If you suspect Mold Mario behind walls, you may need to perform non-destructive testing or consult professionals who can perform air or surface sampling. The goal is to determine extent, identify hidden sources, and decide on the remediation scope. Document findings with photos before you begin, which helps track progress and provides evidence if you need to involve a pro later.
Mold Removal Lab analysis emphasizes a moisture-first assessment: identifying the water source, evaluating humidity levels, and planning containment. If the area shows significant mold growth or if you’re dealing with structural materials, involve a professional. For smaller, contained growth, a careful DIY approach may be appropriate with appropriate PPE and cleaning protocols.
DIY vs Pro Remediation: Making the Right Choice
DIY remediation can be effective for small, clearly contained mold growth when you address the moisture source and follow proper safety procedures. It’s essential to know your limits: if mold covers a large area, if growth is in insulation or HVAC components, or if you have health risks, professional remediation is the safer option. Pro remediators use specialized containment, cleaning agents, and equipment to ensure complete removal and proper disposal of contaminated materials. The Mold Removal Lab team recommends starting with a risk assessment: is the moisture problem resolved, can you safely access the area, and do you have the necessary PPE and cleaning supplies? If in doubt, contact a certified remediator who can scope the project and provide a written remediation plan.
Remember that in many cases, the biggest payoff comes from stopping the moisture cycle first, not just scrubbing visible mold. A pro can also help with post-remediation verification testing and guidance on preventing recurrence, which is often overlooked in DIY efforts.
Containment and Personal Safety: PPE and Procedures
Containment minimizes the chance of mold spores drifting into adjacent rooms. Use plastic sheeting to seal off the work area, doors, and vents. Begin with PPE: an appropriately fitted respirator (N95 or better), disposable gloves, and eye protection. Turn off HVAC systems in the affected zone if safe to do so to reduce airflow carrying spores. Create a one-way workflow: dirty work on one side and clean work on the other, and dispose of contaminated materials in sealed bags. Good lighting helps you spot hidden mold and ensures you don’t miss spots during cleaning. If you’re cleaning in damp or moldy basement areas, consider dehumidification and a fan placed to exhaust outside the home to manage moisture more effectively.
The containment strategy and PPE are not optional extras; they’re essential for protecting you and preventing the spread of mold to other rooms. When you’re finished, carefully remove PPE in a designated area and wash exposed skin and clothing separately from other laundry to avoid cross-contamination.
Cleaning Methods That Work: Substances and Techniques
Use cleaning agents appropriate for the material you’re cleaning. For non-porous surfaces like metal, glass, and some plastics, a detergent solution followed by a disinfectant can be effective. For porous materials such as drywall, insulation, or fabrics, removal and disposal of contaminated material may be necessary to prevent regrowth. Avoid mixing cleaners; never combine bleach with ammonia or other cleaners, which can create toxic gases. For mild surface cleaning, a water-detergent solution is often sufficient; for disinfection, choose products approved for mold control and follow label directions. When in doubt, start with the least aggressive, proven method and escalate only if needed. Document the process with photos and note any areas requiring re-cleaning or replacement of materials.
Mold Mario is a reminder that remediation is often about repeated, careful steps rather than a single “quick fix.” Consistency in cleaning and moisture control yields the best long-term results.
Drying, Moisture Control, and Re-occupancy
Drying is a critical and often overlooked step. After cleaning, remove damp materials, set up dehumidifiers, and use fans to promote air movement away from the work zone. Monitor moisture levels using a hygrometer if available, and ensure humidity remains controlled during the drying process. Do not reoccupy the space until surfaces are completely dry and the area is free of musty odors. Once dry, recheck for any hidden moisture and perform a final visual inspection to confirm there are no remaining mold colonies or damp patches. Inspection and documentation at this stage help you avoid a premature re-occupancy that could lead to regrowth.
Prevention After Remediation: Keeping Mold Mario Gone for Good
Prevention hinges on ongoing moisture control and regular housekeeping habits. Fix leaks promptly, improve ventilation in damp rooms, and monitor humidity levels in problem areas. Use exhaust fans in bathrooms and kitchens, and consider a dehumidifier in basements or crawlspaces if humidity tends to linger. Keep surfaces clean and dry, repair any structural damage promptly, and maintain a routine of periodic inspections to catch issues early. By combining moisture management with proper cleaning and containment, you reduce the likelihood of Mold Mario returning and create a healthier living environment for your household.
Monitoring and Reassessment: When to Recheck
Mold remediation is not always a one-and-done process. Periodic reassessment ensures you catch regrowth early. After remediation, schedule a follow-up check a few weeks later to confirm that moisture levels are stable and no new signs of mold appear. If you notice new staining, musty odors, or dampness, reassess the space and consider additional remediation or professional consultation. Keeping a simple log of moisture incidents, cleaning activities, and remediation results helps you stay proactive and reduces the chance of recurrence.
Tools & Materials
- N95 respirator(Fit-tested if possible; ensure proper seal.)
- Disposable gloves (nitrile)(Change between rooms to avoid cross-contamination.)
- Goggles or safety glasses(Eye protection with side shields.)
- Plastic sheeting (6 mil or heavier)(Seal off the work area to limit spread.)
- HEPA vacuum cleaner(Used for dry dusting and debris after removal.)
- Detergent and clean water(For cleaning non-porous surfaces.)
- Disinfectant approved for mold control(Use only on appropriate surfaces; follow label.)
- Heavy-duty trash bags(Seal and dispose of contaminated materials.)
- Moisture meter or hygrometer(Helpful for tracking humidity changes.)
- Towels or rags(For drying surfaces after cleaning.)
- Flashlight(Inspect corners and hidden spaces.)
Steps
Estimated time: 4-8 hours
- 1
Identify moisture source and isolate area
Scan for active leaks, condensation, or water intrusion. Stop the moisture source where possible and seal the area to prevent spores from spreading during cleanup. Document findings with photos.
Tip: Take photos from multiple angles before starting; this helps plan containment and documents the remediation path. - 2
Set up containment and PPE
Hang plastic sheeting to create a one-way flow; assign clean and dirty zones. Put on an N95 respirator, gloves, and eye protection before touching any contaminated surfaces.
Tip: Seal seams with tape and use a dedicated pair of footwear or disposable boot covers to avoid tracking mold elsewhere. - 3
Remove or seal contaminated porous materials
If materials are saturated and contaminated (drywall, insulation), remove and seal them for disposal. If materials are non-porous, proceed with cleaning alternatives.
Tip: Avoid tearing or grinding porous materials; bag and seal them carefully to prevent spore release. - 4
Clean and disinfect non-porous surfaces
Wipe surfaces with detergent solutions, then apply an approved mold disinfectant. Rinse and dry thoroughly before re-occupying.
Tip: Work from top to bottom and from clean to dirty areas to minimize cross-contamination. - 5
Dry the space completely
Run dehumidifiers and fans to promote airflow, aiming for a completely dry environment before reoccupation.
Tip: Monitor humidity; if humidity remains high after cleaning, extend drying time and recheck for hidden moisture. - 6
Inspect, document, and plan follow-up
Perform a final visual check and take photos. Plan a follow-up assessment to confirm no regrowth and to ensure moisture sources are resolved.
Tip: Keep a remediation log including dates, methods used, and humidity readings if available.
FAQ
What is Mold Mario, and why is it used here?
Mold Mario is a fictional teaching example used to illustrate common mold scenarios in homes and to help homeowners focus on moisture control and safe remediation steps.
Mold Mario is a teaching example to help you understand typical mold growth and how to address it safely.
When should I call a professional remediator?
Call a professional when mold covers a large area, when growth is behind walls or HVAC components, or if you have health concerns or uncertain moisture sources. A pro can scope the project and provide a plan and clearance testing.
Call a professional if the mold is widespread or hard to reach; they can scope, treat, and verify the results.
Is bleach effective for mold cleanup?
Bleach can help on non-porous surfaces but is not always effective on porous materials. It can also create fumes; always follow label directions and avoid mixing with other cleaners.
Bleach isn’t always the best solution, especially on porous materials; use it where appropriate and safe.
How long does remediation take?
Remediation duration depends on the extent of growth and moisture issues. Many projects fit within a few hours to a couple of days, depending on diagnostics, containment, and drying needs.
It varies, but expect several hours to a couple of days depending on scope and moisture control.
Can mold return after remediation?
Yes, mold can return if moisture sources aren’t addressed or if new leaks occur. Ongoing maintenance and moisture control are crucial for long-term success.
Mold can come back if moisture isn’t controlled; ongoing checks are important.
Should I test for mold after remediation?
Post-remediation testing is not always required, but it can be helpful in verifying that mold levels are back to normal, especially after large or persistent growth.
Post-remediation testing can confirm success, especially for larger cases.
Watch Video
The Essentials
- Identify moisture sources before cleaning.
- Contain the area to prevent spread of spores.
- Choose DIY or pro remediation based on scope and safety.
- Dry completely and recheck to prevent recurrence.
- Document remediation steps for future reference.