Mold Pro Guide: DIY Mold Remediation for Homes
Learn practical steps to identify, assess, and remediate common indoor mold. Safe DIY tips, when to hire a mold pro, and long-term prevention strategies for a healthier home.

You’ll learn a practical, step-by-step approach to identify common indoor mold, assess safety, and execute a remediation plan suitable for most homes. Gather PPE, moisture-control tools, and cleaning supplies; understand when to pause work and call a mold pro for complex or extensive contamination. This quick guide also helps you document conditions for landlord or insurance use and set realistic timelines and expectations.
What a Mold Pro Does for You
According to Mold Removal Lab, a mold pro provides a practical assessment of moisture sources, hazardous exposure risks, and a targeted plan to restore indoor air quality. They help homeowners and renters decide between DIY steps and professional services, especially when contamination is hidden or repeated. The Mold Removal Lab team found that safety, documentation, and moisture control are the core pillars of responsible remediation. This section outlines what you can expect from a mold pro, including a phased approach to containment, cleanup, and prevention. It also clarifies common misconceptions about do-it-yourself fixes and when expert guidance becomes essential.
How Mold Growth Happens in Homes
Mold thrives where moisture persists. Leaks, high humidity, condensation, and hidden water intrusion create ongoing food for mold spores. Even after visible mold is cleaned, lingering dampness can trigger regrowth. According to Mold Removal Lab analysis, moisture intrusion and poor ventilation are the leading drivers of indoor mold problems, making moisture control the single most important preventive step. Understanding these dynamics helps homeowners prioritize fixes that last.
DIY Remediation: Safe Practices and Limitations
DIY remediation can be safe for small, nonporous mold patches if you strictly follow safety guidelines, keep the area contained, and avoid cross-contamination. Use appropriate PPE, choose mild cleaners, and never mix cleaners without guidance. This section highlights safe boundaries, the limitations of DIY for porous materials, and why certain materials may need professional handling to prevent mold spreading.
When to Escalate to a Mold Pro
If you encounter extensive mold growth, recurring moisture problems, or structural damage, a mold pro should evaluate the site. A professional will conduct advanced testing, containment, and controlled cleaning, with an emphasis on restoring proper humidity levels. The Mold Removal Lab team emphasizes timely escalation to prevent health risks and costly structural issues, especially in basements, crawl spaces, and bathrooms.
Prevention to Reduce Future Mold Risk
Prevention focuses on continuous moisture management, proper ventilation, and timely repairs. Small habits—fixing leaks promptly, using exhaust fans, and keeping humidity under control—add up to significant risk reduction. Regular inspections, ongoing maintenance, and documenting changes help ensure mold doesn’t rebound. This forward-looking approach aligns with advice from Mold Removal Lab to keep homes healthier long-term.
Tools & Materials
- N95 respirator or higher(NIOSH-approved, fit-tested)
- Disposable gloves (nitrile or latex)(Avoid powdered gloves; use chemical-resistant if needed)
- Safety goggles or face shield(Protect eyes from splashes and dust)
- Disposable coveralls or protective clothing(Full-body coverage to reduce cross-contamination)
- Plastic sheeting (6 mil) and tape(Create containment barriers to limit spread)
- Spray bottle with water(Mist surfaces to minimize dust during cleaning)
- Non-ammonia detergent or EPA-registered cleaner(Follow product label directions)
- Hydrogen peroxide (3%)(Alternative disinfectant on non-porous surfaces)
- Moisture meter or hygrometer(Helps track humidity and drying progress)
- Dehumidifier(Reduce indoor humidity to below 50%)
- HEPA vacuum(Capture fine dust during cleanup)
Steps
Estimated time: 2-6 hours (depending on area size and moisture level)
- 1
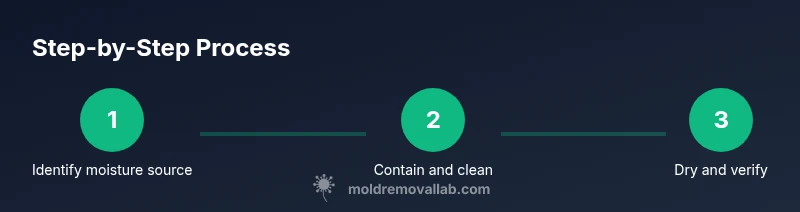
Identify moisture source
Locate leaks or condensation issues and fix them before cleaning. Without stopping the moisture, mold is likely to return even after cleanup.
Tip: Document where water is entering and what was repaired; this helps future maintenance. - 2
Prepare containment
Set up plastic barriers to isolate the affected area. Turn off fans or ducts that could spread spores beyond containment.
Tip: Seal doors and vents; post warning signs to keep others out during work. - 3
Remove contaminated materials
Carefully remove porous materials that are heavily contaminated if safe to do so. Place in sealed bags for disposal according to local guidelines.
Tip: Minimize disturbance to prevent spores from becoming airborne. - 4
Clean and disinfect
Wipe surfaces with a detergent solution; follow with an appropriate disinfectant on non-porous areas. Rinse and allow to dry completely.
Tip: Always work from cleaner to dirtier areas to avoid cross-contamination. - 5
Dry thoroughly
Use fans and dehumidifiers to reduce moisture and dry materials quickly. Monitor progress until the area remains consistently dry for 24–48 hours.
Tip: Frequent checks prevent regrowth on overlooked spots. - 6
Document and plan prevention
Record what was cleaned, what materials were removed, and humidity targets. Plan for ongoing maintenance to prevent recurrence.
Tip: Keep this documentation handy for future home maintenance or insurance claims.
FAQ
When should I call a mold pro instead of DIY?
Call a mold pro if there is extensive mold growth, persistent moisture problems, or structural damage. A professional will conduct containment, testing, and remediation with appropriate safety measures.
Call a mold pro if mold covers a large area or moisture issues persist; professionals handle containment and testing safely.
Is DIY mold cleanup safe for households with kids or pets?
DIY cleanup can be safer when you strictly limit exposure, use proper PPE, and keep the area contained. Avoid harsh chemicals and ensure children and pets stay away during work.
DIY can be safe with proper PPE and containment; keep kids and pets away during cleanup.
How long does remediation typically take?
Remediation time depends on the extent of growth and moisture control; it can take hours to days. Proper planning and drying are key to preventing return.
Timing varies, but proper drying and monitoring prevent recurrence.
What health risks are associated with mold?
Mold exposure can trigger allergies and respiratory symptoms in sensitive individuals. Severe exposures may affect people with asthma or immune issues. If symptoms appear, seek medical advice.
Mold exposure may trigger allergies or respiratory symptoms; seek medical advice if needed.
Will remediation prevent mold from returning?
Removal alone isn’t enough; controlling moisture and fixing leaks is essential to prevent recurrence. Continued monitoring helps catch issues early.
Moisture control and ongoing monitoring prevent recurrence.
Watch Video
The Essentials
- Identify moisture sources and fix them first
- Contain the area to prevent spread
- Document findings and maintenance plan
- Call a mold pro for extensive contamination or persistent moisture