Easy Mold Remediation: A Practical Home Guide
Learn a practical, safety-first approach to easy mold remediation at home. This guide covers quick-start steps, moisture control, and long-term prevention to keep mold at bay.

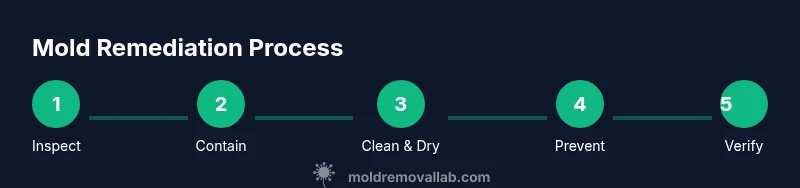
By following this guide, you will learn how to safely identify, clean, and prevent easy mold growth in your home. The plan emphasizes moisture control, proper PPE, and a simple, room-by-room remediation process you can start today. It also covers when to call a professional and how to verify your results.
Easy mold in homes: why it matters and how to tackle it
In many homes, easy mold starts where moisture and poor airflow meet, often in bathrooms, basements, or kitchens. The good news is that you can manage it with a practical, safety-first approach. According to Mold Removal Lab, the cornerstone of success is controlling moisture and acting quickly when you notice growth. This section helps you understand what you’re dealing with and sets the tone for a structured remediation plan. The goal is not to erase every trace of mold overnight, but to remove active growth, dry the area thoroughly, and prevent recurrence by fixing underlying moisture problems.
Common sources of moisture and mold growth in homes
Mold thrives where dampness persists. Typical culprits include leaky roofs, cracked pipes, high indoor humidity, and poor ventilation. In kitchens and bathrooms, condensation and water spills create micro-environments where mold can establish colonies quickly. Understanding these sources helps you prevent future outbreaks. Regularly inspecting plumbing, stopping leaks promptly, and using exhaust fans during showers or cooking are simple, effective steps to minimize moisture load and slow mold development.
Safety first: PPE, containment, and when to call a pro
Before you begin any cleanup, assemble the right gear and seal off the area to prevent spread. An N-95 respirator, protective goggles, gloves, and disposable coveralls protect you from spores. Use plastic sheeting to isolate the work zone and keep pets and children away. If the affected area is large, or if you have respiratory issues, consider hiring a professional. Even small patches can release unseen toxins if disturbed without proper containment.
DIY remediation: room-by-room, practical steps
Start with a room-by-room plan and tackle one space at a time. Begin with dry cleaning and soap solution, using a stiff brush on non-porous surfaces. Remove any porous material that cannot be cleaned, such as shredded drywall or contaminated insulation, and seal it for disposal. Wipe surfaces with detergent, rinse, and dry thoroughly. Avoid saturating surfaces; moisture left behind invites regrowth. If you don’t control moisture, mold will return.
Long-term prevention and maintenance to keep mold at bay
After removing visible growth, focus on preventing moisture buildup. Improve ventilation, install or run dehumidifiers in damp areas, and fix leaks promptly. Keep indoor humidity around 30-50% and monitor for condensation on windows. Regular inspections, quick cleanup of spills, and ongoing moisture management are your best defense against future outbreaks. Documenting changes helps you track progress and spot recurring problems early.
When to test and what to expect
If you’re unsure whether all mold has been removed, or if you notice lingering odors, testing can confirm. Begin with a simple surface check and use a moisture meter to verify dryness. Professional testing is recommended for large or hidden growth. Remember, testing is most valuable when paired with remediation and moisture control rather than used as a sole solution.
Quick-start mold remediation checklist
This concise checklist helps you kick off remediation quickly and safely. First, identify all moisture sources and stop leaks or spills at the source. Next, assemble PPE and lay out cleaning supplies, then seal off the room to contain spores. Clean non-porous surfaces with a soap-and-water solution, and remove porous materials if they are moldy beyond cleaning. Dry the area thoroughly using fans and a dehumidifier, and keep humidity below 50%. After you dry, inspect for any remaining mold growth and re-clean as needed. Finally, monitor the space for a few days to ensure there is no re-wetting or recurrence. If you see new growth or persistent odors, escalate to professional assessment.
Tools & Materials
- N-95 respirator mask(Ensure proper fit)
- Disposable gloves(Latex-free if possible)
- Safety goggles(Eye protection)
- Disposable coveralls(Or long sleeves and pants)
- Plastic sheeting(To seal off area)
- Painter's tape(Secure plastic sheeting)
- Detergent or dish soap(Mild cleaning solution)
- Spray bottle(For applying cleaning solution)
- Stiff brush and sponge(Non-porous surfaces)
- Bucket(Contain waste and rinse)
- Microfiber cloths(For wiping dry)
- Dehumidifier or fans(Used to accelerate drying)
- Moisture meter (optional)(Helps track dryness)
Steps
Estimated time: Total time: 2-6 hours (plus 24-72 hours of drying and monitoring)
- 1
Inspect the area and define the scope
Survey visible growth and identify moisture sources. Photograph the scene for reference and label affected materials. Determine whether cleanup is feasible in this room or if materials must be removed.
Tip: Take clear photos from multiple angles before starting. - 2
Protect yourself and seal off the space
Put on PPE, close doors, and use plastic sheeting to contain the area. Create a simple barrier to prevent spores from spreading to adjacent rooms.
Tip: Do not disrupt mold colonies until the area is sealed. - 3
Remove contaminated porous materials
Seal and dispose of porous materials that cannot be cleaned, such as drywall or insulation. Place them in sealed bags to minimize exposure.
Tip: Avoid tearing materials aggressively to limit spore release. - 4
Clean non-porous surfaces
Wash non-porous surfaces with soap and water, using a stiff brush for stubborn patches. Rinse and dry thoroughly to remove residual mold and moisture.
Tip: Do not oversoak surfaces; moisture invites regrowth. - 5
Disinfect and rinse (optional)
If desired, apply a mild disinfectant and rinse thoroughly. Allow surfaces to dry completely, as moisture is the primary driver of mold return.
Tip: Ventilate while using any cleaners. - 6
Dry the area and monitor
Run dehumidifiers or fans to speed up drying. Check moisture levels with a meter if available and re-clean any areas showing dampness.
Tip: Aim for moisture below 50% humidity. - 7
Restore and prevent recurrence
Replace removed materials with mold-resistant options where appropriate and address root moisture issues to prevent recurrence.
Tip: Consider professional assessment for hidden moisture.
FAQ
What is easy mold, and how dangerous is it?
Easy mold refers to common mold growth that can be addressed with basic cleanup when moisture is controlled. It is usually manageable with a safety-first DIY approach, though hidden mold behind walls may require professional evaluation.
Easy mold is common mold growth that you can often handle with basic cleanup, as long as moisture is controlled and safety steps are followed.
Can I do mold remediation myself, or should I hire a pro?
For small, surface-level growth, DIY remediation with proper PPE and containment is usually sufficient. If growth is extensive, involves porous materials, or there are health concerns, consider a professional assessment.
DIY can work for small spots, but large areas or tricky moisture issues are best left to professionals.
Is bleach effective for mold cleanup?
Bleach can kill surface-level mold on non-porous surfaces, but it is not a universal solution on porous materials. Use non-porous cleaners first and avoid mixing cleaners for safety.
Bleach may kill surface mold on non-porous surfaces, but it’s not always effective on porous materials.
When should I call a professional?
Call a professional if mold covers a large area, recurs after cleaning, or you have health concerns or structural moisture problems. They can perform a proper assessment and remediation.
Call a pro if you see widespread mold, reappearing growth, or complex moisture issues.
How long does remediation take?
DIY remediation can take a few hours to a day or two, depending on area size and moisture issues. Drying can continue for days after cleanup.
Most DIY jobs take a day or two, but drying may continue for several days.
What are signs of hidden mold?
Hidden mold shows up as persistent musty odors, damp walls, or staining behind panels. If you can’t access the area safely, professional inspection is advised.
Look for musty smells and damp areas—hidden mold often hides behind walls.
Watch Video
The Essentials
- Inspect moisture sources and address leaks promptly
- Wear PPE and seal the work area to prevent spread
- Clean and dry surfaces thoroughly to prevent regrowth
- Control indoor humidity to 30-50% long-term
- Document remediation steps for future reference