Mold Killer for Wood: Safe Wood Mold Removal Guide
Learn how to choose and use a mold killer for wood, protect your home, and prevent regrowth with practical steps, supplies, and safety tips.

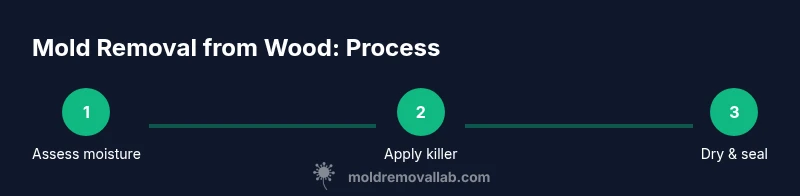
To remove mold from wood safely, use an approved mold killer for wood, apply according to label directions, then scrub and rinse as directed. Allow the wood to dry completely and re-check for any remaining growth within 24-48 hours. For ongoing prevention, address moisture and consider sealing the wood after treatment.
What is mold on wood and why it forms
Wood is porous and provides a nourishing surface for mold spores when moisture is present. Common triggers include roof leaks, condensation, and high indoor humidity. According to Mold Removal Lab, moisture control is the single most important factor in preventing regrowth. When you notice fuzzy patches, dark stains, or a musty odor on any wooden surface—floorboards, trim, panels, or furniture—start a careful remediation plan. This section explains how wood-specific mold killers work, and why choosing the right product matters more than you might think. A wood substrate can hold moisture even after a surface wipe, so thorough drying is essential. If the wood has finished surfaces, a gentler approach may be required to avoid finish damage. Early action reduces the chance of mold penetrating deeper into the grain or behind veneer, where it becomes harder to remove.
How to select a mold killer for wood
There are several category options for wood-safe mold killers. Look for products labeled for wood surfaces and wood finishes. Consumer safety notes: avoid bleach on bare or finished wood that is stained or sealed; instead, choose hydrogen peroxide-based cleaners, quaternary ammonium compounds, or plant-based antimicrobials that specify wood compatibility. Read labels for coverage, dwell time, and drying guidance. Conduct a patch test on an inconspicuous spot to verify that the wood’s color and finish remain intact. Based on Mold Removal Lab analysis, the most critical factor after selecting a product is ensuring you control moisture and dry the wood thoroughly after treatment. A good practice is to use a recommended kit that includes a cleaner, a scrub tool, and a moisture management plan. If you are unsure about wood species (softwood vs hardwood) or finish type, consult the product instructions or a pro before proceeding.
Safety and prep before treatment
Personal protective equipment protects you from chemical exposure and mold spores. Wear a disposable respirator, safety glasses, and gloves. Work in a well-ventilated area and keep children and pets away from the workspace. Remove as much surface dust as possible with a dry cloth before applying any cleaner, since mold spores cling to dust. Prepare the work area with plastic sheeting to catch drips and protect adjacent materials. If you are dealing with a large area or damp structural wood, consider using a dehumidifier or fans to reduce humidity before cleaning. Always fix the moisture source first: repairing leaks, improving ventilation, or adding insulation around problem spots will dramatically reduce the risk of regrowth.
Practical approach to applying a wood-safe mold killer
Test on a hidden patch to confirm colorfastness and finish compatibility. This ensures you won’t cause discoloration or damage before treating a visible area. Apply the product evenly, following label directions; avoid pooling. Gently scrub with a soft-bristle brush to remove visible growth; wipe away residue with a clean cloth. Allow the surface to dry thoroughly; wood pores can release moisture slowly, so plan for extended drying time in humid spaces.
Drying, sealing, and long-term prevention
Moisture is the enemy of wood mold even after cleaning. Use ventilation, dehumidification, and air movement to accelerate drying. Check daily for several days; if you see new growth, repeat treatment once the surface is fully dry. For porous wood, consider sealing with a breathable sealant to reduce moisture uptake, while noting that some finishes require sanding first. Finally, address the underlying moisture source such as leaks, condensation, or poor ventilation, since this is the best long-term prevention.
Authority sources
- https://www.epa.gov/mold
- https://www.cdc.gov/mold/index.html
- https://www.niehs.nih.gov/health/topics/agents/mold/index.cfm
Tools & Materials
- Mold killer for wood (wood-safe biocide)(Choose product labeled for wood surfaces; avoid solvents that can damage finishes)
- Spray bottle(Clear nozzle, preferably 1 liter capacity)
- Non-abrasive scrub brush(Soft bristles to avoid scratching wood)
- Nitrile gloves(Chemical resistant; long cuffs recommended)
- Safety goggles or face shield(Protect eyes from splashes)
- Respirator mask (P100 or N95) or equivalent(Use when working in poorly ventilated areas or with extensive growth)
- Plastic sheeting(Contain area and protect nearby items)
- Dehumidifier or fans(Facilitates faster drying, especially in humid spaces)
Steps
Estimated time: 2-4 hours of active work plus drying time
- 1
Prepare the area
Clear the space, protect nearby surfaces with plastic, and put on PPE. Ventilate as much as possible without exposing wood to direct heat.
Tip: Wear the respirator early to avoid inhaling any spores during initial dust removal. - 2
Test a small patch
Apply a small amount of the product to an inconspicuous area to confirm colorfastness and finish compatibility. Wait the labeled dwell time.
Tip: If discoloration occurs, stop and seek a wood-safe alternative. - 3
Apply mold killer
Spray or apply the killer evenly across the moldy area, following the label’s dwell time. Do not oversaturate as wood pores can trap moisture.
Tip: Avoid applying on heat sources or open flames. - 4
Scrub and remove
Gently scrub with a soft-bristle brush to remove visible mold; wipe away residue with a clean, damp cloth. Repeat if necessary.
Tip: Use clean rags to prevent cross-contamination. - 5
Dry thoroughly
Allow the wood to dry completely. Use fans or a dehumidifier to speed up the process, especially in humid rooms.
Tip: In damp spaces, drying may take 24-72 hours; plan accordingly. - 6
Seal or finish (optional)
If appropriate for the wood, apply a breathable sealant to reduce future moisture absorption. Ensure the surface is fully dry before sealing.
Tip: Skip sealing on unfinished porous wood until after full drying.
FAQ
Is mold on wood dangerous to health?
Mold on wood can contribute to allergy symptoms and asthma triggers; safety and moisture control are important. If the infestation is extensive or growth returns, seek professional help.
Mold on wood can affect health; manage moisture and watch for recurring growth. Seek professional help if needed.
Can I use bleach to kill mold on wood?
Bleach is not ideal for wood pores and can slow drying or damage finish. Use a wood-safe mold killer and follow with thorough drying.
Bleach isn't ideal for wood; use a wood-safe mold killer and dry thoroughly.
How long does wood take to dry after treatment?
Drying times depend on humidity and airflow; plan for 24-72 hours or longer in damp spaces, and boost ventilation.
Drying can take 1-3 days depending on humidity; ensure good airflow.
When should I call a professional?
If mold covers a large area, penetrates structural wood, or returns after treatment, contact a certified mold remediation professional.
Call a pro if mold is widespread or recurs after cleaning.
Do I need to seal wood after mold removal?
Sealing can help reduce moisture but should be compatible with the wood type and finish; ensure surfaces are fully dry first.
Sealing can help, but make sure wood is dry and compatibility is right.
Watch Video
The Essentials
- Test a patch first before full application
- Dry wood completely to prevent regrowth
- Follow label directions exactly
- Address moisture sources to keep wood mold-free