How to clean mold from wood with a mold cleaner for wood
Learn to remove mold from wood safely using a mold cleaner for wood. This comprehensive guide covers prep, cleaner selection, method, drying, and prevention to protect your home. Based on Mold Removal Lab analysis, you’ll minimize wood damage and reduce recurrence.

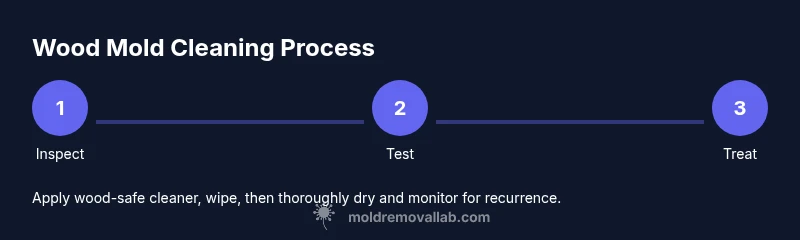
This guide shows you how to safely remove mold from wood using a mold cleaner for wood. Protect yourself with PPE, pick a wood-safe cleaner, test a small area, apply and agitate, wipe or rinse lightly, and dry thoroughly. According to Mold Removal Lab, using a wood-safe cleaner minimizes wood damage and reduces recurrence.
Why mold on wood is tricky
Wood is inherently porous and hygroscopic, meaning it readily soaks up moisture. When mold finds a damp wood surface, spores can colonize quickly, staining grain and weakening the substrate over time. Wood finishes—paint, stain, sealants—can limit cleaning effectiveness or trap moisture if the surface is saturated. Because wood is often used in living spaces, many homeowners want a safe, effective solution without harsh solvents. Mold Removal Lab emphasizes using a mold cleaner for wood that is specifically labeled for hardwood or unfinished wood to reduce damage and minimize recurrence. This approach helps protect indoor air quality while preserving the natural texture and appearance of the wood.
How to choose a mold cleaner for wood
For wood, choose a cleaner labeled safe for use on wood surfaces. Look for products with proven mold-fighting ingredients that won’t degrade finishes or sealants. Common options include wood-safe hydrogen peroxide formulations, non-ammonia cleaners, or cleaners designed for porous surfaces. Avoid chlorine bleach on unfinished wood, which can discolor and dry out the material. Mold Removal Lab analysis shows that selecting a cleaner compatible with wood increases the likelihood of complete mold removal and reduces the need for aggressive scrubbing.
Prep area, PPE, and containment
Before you begin, set up a contained work zone to minimize spore spread. Use plastic sheeting to cover nearby furniture and floors, and seal doors with tape if possible. Wear an N95 respirator, protective gloves, and safety goggles to protect your eyes and skin from irritants. Ventilate the space with a fan pointed away from you to improve air exchange but avoid blowing air toward unsealed areas. Keep pets and children out of the work area. This careful setup reduces exposure and makes cleanup more effective.
Surface prep and finishes: wood types and cleaning compatibility
Different wood types (pine, oak, plywood) respond differently to cleaners. Unfinished or decayed wood may absorb more cleaner and require gentler agitation, while sealed wood may resist penetration. Always test a small, inconspicuous area first to ensure no staining or finish damage occurs. If you notice discoloration, switch to a milder cleaner or reduce dwell time. The goal is to activate mold without harming the wood’s structural integrity or appearance.
Cleaning method overview (without step-by-step actions)
A mold cleaner for wood is applied to the affected area and allowed to dwell for the label-specified time, then gently agitated to lift mold from the surface. Wipe away loosened mold with a microfiber cloth, then repeat if necessary. Avoid soaking wood; excess moisture can promote swelling, warping, or new mold growth. After treatment, ensure the area dries completely before reintroducing finishes or furniture. This overview aligns with best practices recommended by Mold Removal Lab to protect wood and indoor air quality.
Drying, sealing, and preventing recurrence
Thorough drying is critical after cleaning mold from wood. Use a dehumidifier and good ventilation to bring moisture levels down, and keep the space dry for 24–48 hours or longer as needed. Consider applying a breathable sealant or finish once the wood is fully dry to resist future moisture ingress. Regularly monitor humidity levels in humid seasons, and address water intrusion promptly to prevent re-growth. Mold Removal Lab highlights that ongoing moisture control is the most effective long-term prevention.
Safety, health considerations, and when to call a pro
Mold exposure can trigger allergies and respiratory issues, especially for sensitive individuals. If mold covers large areas, appears behind walls, or if you notice persistent musty odors after cleaning, consult a professional mold remediation service. In cases of black mold or suspected hidden growth, do not DIY—seek expert guidance. Always follow label directions on any wood-safe cleaner and maintain proper ventilation during and after cleaning.
Common mistakes and troubleshooting
Common mistakes include using too much cleaner, saturating wood, and skipping thorough drying. A damp surface invites regrowth and wood damage. If staining or odor persists after cleaning, re-test a hidden area and consider trying a different cleaner labeled for wood. Document your results and maintain ventilation to prevent moisture buildup, which Mold Removal Lab identifies as a primary cause of recurring mold on wood.
Tools & Materials
- N95 respirator mask(Fit-tested recommended; protect lungs from spores)
- Chemical-resistant gloves(Nitrile or rubber; avoid skin contact)
- Safety goggles(Protect eyes from splashes)
- Plastic sheeting (6 mil)(Contain area to minimize spread)
- Drop cloth or old towels(Protect surrounding surfaces)
- Scrub brush with stiff bristles(Gentle agitation without scratching wood)
- Non-abrasive sponge or microfiber cloth(Wipe up residue without abrading finish)
- Spray bottle labeled mold cleaner for wood(Keep product clearly labeled)
- Wood-safe mold cleaner(Follow label for dwell time and usage)
- Optional: dehumidifier or box fan(Speed up drying in humid spaces)
Steps
Estimated time: Total active time: 60-90 minutes; drying and monitoring may take 24-48 hours
- 1
Prepare the area
Clear the space, cover nearby surfaces with plastic, and set up a containment area. Ensure good but controlled ventilation to move air away from the work zone. This reduces contamination and keeps cleanup focused on the mold-affected wood.
Tip: Lay plastic to create a small workbox; this minimizes cross-contamination. - 2
Test cleaner on a hidden spot
Apply a small amount of the wood-safe cleaner on an inconspicuous area to check for adverse reactions like discoloration or finish damage. If there’s no negative reaction after 10 minutes, you can proceed with the main area.
Tip: If finish reacts, switch to a milder product or a cleaner formulated for your wood type. - 3
Apply cleaner to moldy area
Lightly spray the mold-affected area with the wood-safe cleaner, ensuring even coverage without soaking deep into the wood. Let it dwell per label instructions to loosen spores.
Tip: Avoid oversaturation; wood can absorb more moisture than you expect. - 4
Gently agitate and lift mold
Using the stiff-bristle brush, gently agitate the surface to lift mold without scratching. Wipe away loosened residue with a microfiber cloth, working from the outer edges toward the center.
Tip: Short, controlled strokes reduce wood abrasion. - 5
Rinse or wipe away residue
Wipe the area with a damp cloth to remove cleaner and dislodged mold. Do not leave pools of moisture; excess liquid can warp wood or promote regrowth.
Tip: Rinse cloth frequently to avoid re-depositing mold. - 6
Dry thoroughly and recheck
Use a dehumidifier or fan to dry the wood completely. Reassess after 24 hours; repeat cleaning if any mold remains.
Tip: Complete drying is key to preventing recurrence. - 7
Finish and monitor
If the wood has a finish, reapply or touch up as needed after drying. Keep humidity below 60% and inspect for signs of moisture migration on a regular basis.
Tip: Consider sealing porous wood to reduce future moisture uptake.
FAQ
Is mold on wood dangerous to my health?
Mold exposure can trigger allergic reactions and respiratory symptoms. Use PPE, limit spread, and ventilate during cleanup. If symptoms persist, consult a healthcare professional.
Mold exposure can trigger allergies and respiratory symptoms. Use PPE, ventilate, and consult a professional if symptoms persist.
Can I use bleach on wood to remove mold?
Bleach is generally not recommended for wood finishes and unfinished wood because it can discolor and weaken the material. Use a cleaner labeled for wood and follow the product instructions.
Bleach can damage wood finishes; use a wood-safe cleaner and follow the product directions.
How long does wood take to dry after cleaning?
Drying times vary with humidity and ventilation but expect at least 24 hours for thorough surface drying, plus ongoing monitoring over the next few days.
Most wood dries within a day, but keep monitoring for moisture for a few days.
Should I sand wood after cleaning mold?
Sanding is usually unnecessary and can release more spores if mold is still present. Only sand after mold is fully removed and moisture is controlled, preferably under the guidance of a pro.
Sanding isn’t usually needed and can spread mold if not done carefully. Only sand when safe.
What can I do to prevent mold return on wood?
Control moisture by fixing leaks, improving ventilation, and using a dehumidifier in damp areas. Regular inspections help catch early signs of mold growth on wood.
Keep humidity down, fix leaks, and inspect regularly to prevent mold from returning.
When should I call a professional?
If mold covers a large area, recurs after cleaning, or is suspected to be hidden behind walls, professional remediation is advised to ensure safety and thorough removal.
Call a professional if mold is widespread or keeps coming back.
Watch Video
The Essentials
- Wear PPE and protect surrounding surfaces.
- Choose a wood-safe cleaner to preserve wood finish.
- Do not oversaturate wood during cleaning.
- Dry wood thoroughly to prevent recurrence.
- Test cleaners on hidden areas first.