How to Kill Black Mold on Wood: A Homeowner's Step-by-Step Guide
Learn proven, safe methods to kill black mold on wood surfaces. This comprehensive, DIY-friendly guide covers moisture control, cleaning, sealing, and prevention—grounded in Mold Removal Lab analysis for 2026.

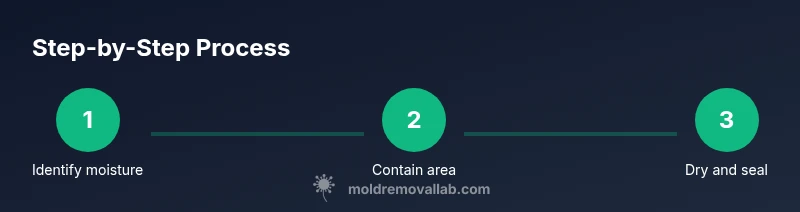
To kill black mold on wood, start by stopping moisture and isolating the area. Clean the surface with soap and water or a hydrogen peroxide solution, dry completely, and seal the wood with a mold-resistant finish. For porous wood or large growth, call a professional remediation service. Protect yourself with PPE and ventilate the space.
Understanding Black Mold on Wood
Black mold on wood is a common sign of moisture problems. Before you act, you should understand that the spores can become airborne and pose health risks, particularly for people with allergies or asthma. The question many homeowners ask is: how do you kill black mold on wood? The short answer is: you address moisture, clean thoroughly, and treat the wood with a mold-inhibiting finish. Mold can penetrate into wood fibers, so you must both clean surface mold and address the underlying moisture for long-term success. This guide focuses on practical, safe strategies for typical residential wood surfaces, emphasizing prevention and responsible cleanup. According to Mold Removal Lab, the most successful outcomes start with identifying the leak or humidity source and stopping it before remediation begins.
Safety First: PPE and Ventilation
Mold remediation, even on wood, requires proper personal protective equipment (PPE) and good ventilation. The right gear reduces exposure to spores that may irritate the skin, eyes, or lungs. At minimum, wear an N95 respirator, nitrile gloves, and splash goggles. If you are cleaning a large area or you have a history of mold allergies or asthma, consider a disposable coverall and ensure the room has air movement with a small fan directed away from occupied spaces. Always work in a well-ventilated area and avoid disturbing the mold more than necessary to minimize spore spread. These precautions align with Mold Removal Lab practices for safer remediation.
Assessing the Damage: When to Call a Pro
Not all mold situations are DIY-friendly. If wood is structurally compromised, warping, or if the growth covers a substantial area, professional remediation is advised. The Mold Removal Lab analysis emphasizes that extensive growth often means hidden moisture and deeper wood damage that needs specialized equipment and containment. In homes with pets, children, or compromised occupants, err on the side of caution and request a professional assessment. Early, cautious action typically prevents costly repairs later on.
Tools and Materials You’ll Need
A well-chosen toolkit makes mold cleanup safer and more effective. Basic PPE should include an N95 respirator, disposable gloves, eye protection, and a coverall if you're working in a larger area. Essential cleaning supplies include mild dish soap, a spray bottle, a soft-bristle brush, plastic sheeting, painter's tape, and a sturdy dehumidifier or fans for moisture control. For wood-treated remediation or penetrating mold, consider a hydrogen peroxide solution and a mold-resistant primer or sealant for post-cleanup protection. Keep trash bags handy for disposing contaminated materials. This kit supports a safer, more thorough cleanup process.
Cleaning Methods: Soap, Water, and Hydrogen Peroxide
Start with a soap-and-water solution to remove surface residues. For mold on non-porous wood, a hydrogen peroxide solution can help kill surface spores. Gently scrub with a soft-bristle brush, then rinse and dry thoroughly. Avoid aggressive sanding that may create micro-splinters and release more spores. If mold persists after cleaning, apply a second treatment, allowing the wood to dry completely between applications. Ventilate the area during and after cleaning to speed up drying and minimize fumes.
Handling Porous Wood: Borate Treatments and Sealers
Wood that is porous or has been deeply penetrated by mold often benefits from a borate-based treatment, which can inhibit future mold growth and help stabilize the wood. After treatment and drying, apply a mold-resistant primer or sealant to reduce future moisture absorption. If the wood continues to show signs of mold after treatment, replacement or more extensive remediation may be necessary. Always follow product directions and test a small area first to verify compatibility with existing finishes.
Drying and Moisture Control: Dehumidifiers and Ventilation
Mold doesn’t just disappear when you clean it; it returns if moisture remains. Use dehumidifiers and fans to bring indoor humidity levels down and promote rapid drying. Open windows if outdoor conditions are safe and run airflow across the cleaned surfaces. For structural wood or areas prone to dampness, consider installing longer-term moisture remediation strategies, like fixing leaks, improving ventilation, or sealing air leaks around doors and windows. Consistent moisture control is the best defense against future outbreaks.
Repairing and Replacing Wood Sections
If mold has damaged wood so deeply that cleaning cannot restore structural integrity, replacement is necessary. Remove affected sections carefully, preserving surrounding materials when possible. Treat adjacent wood with preventive measures, and reseal or repaint to block future moisture ingress. For finishes, choose products with mold-resistant properties and compatible primers. Document moisture sources and maintain ongoing humidity monitoring to protect newly installed wood.
Prevention and Monitoring: Keep Mold at Bay
Preventing mold requires ongoing moisture management and proactive monitoring. Repair leaks promptly, fix condensation problems, and keep indoor humidity below common indoor thresholds. Regularly inspect wood in vulnerable areas such as basements, bathrooms, and kitchens. Use moisture meters if available and schedule seasonal checks to catch issues early. By maintaining a moisture-conscious routine, you reduce the chance of reoccurrence and protect your wood surfaces over time.
Common Mistakes to Avoid
Avoid relying on bleach for wood mold remediation, especially on porous wood, as it can fail to penetrate and may produce harmful fumes. Don’t sand aggressively; it can spread mold spores or push them deeper into the wood. Do not mix cleaners or use ammonia-based products with bleach. Finally, don’t skip moisture control; the best cleanup effort is worthless if the moisture problem persists.
The Mold Removal Lab Verdict: Practical Next Steps
The Mold Removal Lab team emphasizes practical humidity control and conservative remediation when possible. Start by locating and fixing leaks, then clean, dry, and seal wood surfaces using approved products. For persistent mold, consult a professional with a focus on wood remediation to avoid structural damage and preserve property value. The team recommends documenting process steps and scheduling follow-up checks to ensure lasting results.
Tools & Materials
- N95 respirator(Filter mold spores; ensure a proper fit)
- Disposable gloves (nitrile)(Protect hands from mold and cleaners)
- Safety goggles(Eye protection against splashes and spores)
- Plastic sheeting(Contain the area to prevent spread)
- Painter's tape(Seal off the work area)
- Soft-bristle brush(Gently scrub mold without damaging wood)
- Dish soap or mild detergent(Initial surface cleaning)
- Spray bottle(Apply cleaners evenly)
- Hydrogen peroxide solution(Mold-killing surface treatment)
- Borate wood treatment(Optional fungicidal treatment for porous wood)
- Mold-resistant primer/sealant(Post-cleanup protection against moisture)
- Dehumidifier or fans(Speed up drying and humidity control)
- Trash bags(Contain and dispose of contaminated materials)
Steps
Estimated time: 4-8 hours
- 1
Identify moisture source
Inspect for leaks, condensation, or hidden moisture. Fix the root cause before cleaning to prevent re-growth.
Tip: Document leaks with photos for follow-up repairs. - 2
Contain the area
Seal off the workspace with plastic to limit mold dispersal and protect other areas.
Tip: Label containment boundaries clearly. - 3
Put on PPE
Don an N95 mask, gloves, and eye protection to minimize exposure to mold spores.
Tip: Avoid touching your face during handling. - 4
Pre-clean surface
Wipe loose mold with a mild soap solution and remove loose material before deeper treatment.
Tip: Do not rinse toward uninfected areas. - 5
Apply cleaner
Apply hydrogen peroxide to moldy areas and let it sit briefly before scrubbing.
Tip: Work from the outer edge inward to prevent spreading. - 6
Repeat cleaning
If mold persists, reapply cleaner and scrub again until visually clean.
Tip: Do not over-wet the wood surface. - 7
Treat porous wood
If wood is porous, apply a borate treatment after cleaning and drying.
Tip: Follow product directions and test inconspicuous areas first. - 8
Seal and protect
Apply a mold-resistant primer or sealant to reduce future moisture absorption.
Tip: Choose products compatible with existing finishes. - 9
Dry thoroughly
Use dehumidifiers and ventilation to achieve complete dryness before restoration.
Tip: Aim for consistently low humidity after cleanup.
FAQ
Is black mold on wood dangerous to health?
Yes, mold can affect breathing and trigger allergies. If you have persistent symptoms, limit exposure and consult a professional. Ventilate well during cleanup and wear PPE.
Yes, mold can affect health, especially for those with allergies. Ventilate the area and wear proper PPE during cleanup.
Can I kill black mold on wood with bleach?
Bleach is not recommended for porous wood, as it may not reach embedded mold and can damage finishes. Use soap, hydrogen peroxide, and sealing instead.
Bleach isn’t ideal for porous wood; use gentler cleaners and sealants instead.
When should I replace mold-damaged wood?
If wood is severely warped, rotted, or structural, replacement is safer than remediation. Assess integrity and consult a pro for structural wood.
If the wood is warped or rotted, replacement is usually the best option.
How can I prevent black mold from returning on wood?
Control moisture, fix leaks promptly, improve ventilation, and maintain humidity at reasonable levels. Regular inspections help catch issues early.
Keep moisture in check and inspect regularly to prevent mold from returning.
Do I need professional help for large mold growth on wood?
Yes, large or persistent growth, especially in structural wood, often requires professional remediation to ensure safety and effectiveness.
For extensive growth, professional remediation is usually the best approach.
What if I can smell a musty odor after cleanup?
A lingering odor can indicate residual moisture or hidden mold. Reassess the area for hidden moisture sources and consider a follow-up cleanup.
If you still smell mold, recheck for hidden moisture and mold you might have missed.
Watch Video
The Essentials
- Identify and fix moisture sources first
- Use PPE and proper ventilation during cleanup
- Clean surfaces, then treat and seal wood surfaces
- Dry thoroughly and monitor humidity to prevent recurrence
- Consider professional help for extensive mold on wood