Mold Ice Removal: A Practical Guide for Homeowners
Learn to identify and safely remove mold ice from your home with a step-by-step remediation plan. This expert guide from Mold Removal Lab covers detection, cleaning, prevention, and safety practices for homeowners and renters.

This guide helps you identify mold ice, isolate the affected area, and follow a safe, step-by-step remediation plan to minimize mold spread. You’ll need basic PPE, ventilation, disposable towels, a clean bucket, and approved cleaners. By following the steps here, you’ll reduce health risks and prevent recurrence while protecting your living space.
What is mold ice and why it matters
Mold ice refers to mold growth that forms on cooler surfaces where moisture condenses, often creating a distinct, icy-looking film or frost-like patches. In many homes, mold ice develops when there is persistent moisture from leaks, high humidity, or condensation on cold walls, windows, or pipes. The term underscores the moisture-driven nature of this mold growth, which can spread spores if disturbed. According to Mold Removal Lab, recognizing mold ice early is crucial because early intervention reduces the risk of airborne spores, minimizes damage to building materials, and lowers long-term remediation costs. Homeowners should treat mold ice as a mold problem that requires careful handling, not a cosmetic issue. A calm, methodical response preserves indoor air quality and protects family health while you repair the underlying moisture source.
In practical terms, mold ice is a warning sign that your indoor environment sustains elevated humidity or leaks. If you notice a musty smell, damp patches, or a chilly draft accompanying frosty-looking growth, treat it as mold ice and begin a controlled cleanup plan. This is particularly important in kitchens, bathrooms, basements, and crawl spaces where moisture is most likely to accumulate. Early action reduces the chance of resinous residues or hidden growth behind drywall, where problems compound and containment becomes harder. Mold Removal Lab emphasizes that understanding the form and location of mold ice informs your remediation strategy and helps you choose the right cleaning agents and containment steps.
Remember: safety first. Wear appropriate PPE, ventilate the space, and avoid disturbing the material aggressively. A cautious approach lowers the risk of releasing spores into living areas and keeps your remediation compliant with health guidelines.
How mold ice forms in homes
Mold ice forms when indoor humidity rises beyond the surface’s ability to dry, leading to condensation on cool building materials. Common culprits include poor ventilation, unvented bathrooms, leaky plumbing, roof leaks, and damp basements. When warm indoor air meets cold walls, moisture condenses, creating a microenvironment where mold spores can settle and begin to colonize. Over time, this process can produce visible patches and a frosty appearance that resembles ice, hence the name mold ice. The most important intervention is addressing the moisture source first; otherwise, cleaning efforts will be undermined by repeated dampness.
As moisture persists, microorganisms exploit the hydrated surface, producing biofilms that are harder to remove. Mold ice often hides behind baseboards, under ceilings, or within wall cavities where leaks exist. In such cases, a simple wipe-down will not suffice; you need a targeted remediation plan that includes containment and thorough drying. Mold Removal Lab’s guidance stresses that accurate moisture assessment—via hygrometers or moisture meters—and a targeted repair plan are essential to stop mold growth at its source rather than chasing symptoms. By understanding how mold ice assembles, you can design an effective fix that reduces future moisture buildup and promotes long-term dryness.
Health risks and safety considerations
Exposure to mold ice can affect air quality and trigger allergic reactions or respiratory irritation in sensitive individuals. People with asthma, COPD, or compromised immune systems may experience worsened symptoms from mold spores. It’s essential to approach cleanup with proper PPE: a fit-tested respirator or N95 mask, gloves, eye protection, and disposable coveralls. Work in a well-ventilated area to minimize inhalation exposure, and consider using a HEPA-filtered vacuum for remediation tasks. Do not attempt aggressive demolition or sanding without professional guidance, as disturbing mold behind walls can release spores into living spaces. If you notice persistent headaches, coughing, or throat irritation during cleanup, pause and reassess ventilation and containment before proceeding.
Mold ice cleanup should prioritize reducing spore release. Keep children and pets away during cleanup, and avoid using strong solvents in enclosed spaces, which can irritate airways and react unpredictably with mold substrates. After the area is dry, monitor for any lingering odors or damp patches, which may indicate lingering moisture issues. The Mold Removal Lab team recommends documenting moisture readings and remediation steps to support a safe re-occupancy decision and to plan future moisture control measures.
Tools, PPE, and materials for mold ice remediation
Before starting, gather essential tools and materials to ensure a controlled cleanup. PPE should include a respirator rated for particulates, chemical-resistant gloves, eye protection, and disposable coveralls. Use a dedicated cleaning kit with a mild detergent, a non-ammonia cleaner, and a disinfectant approved for mold. A PPE-compatible disposal bag helps contain contaminated materials. You’ll also need moisture meters or hygrometers to verify dryness, a HEPA vacuum for cleanup, microfiber cloths or disposable towels, plastic sheeting for containment, and a dedicated bucket for rinse water. For surfaces that tolerate it, a hydrogen peroxide or white vinegar solution can be effective, but avoid mixing cleaners that can release harmful gases. Finally, ensure you have access to a fan or dehumidifier to drive drying once cleaning is complete.
Mold Removal Lab emphasizes selecting cleaners that are safe for your specific materials and following label directions. If you encounter porous materials like drywall or insulation with visible mold that cannot be cleaned, you should consider removal and replacement to prevent regrowth. Always label and store cleaning agents separately from consumer items to reduce risk of accidental exposure.
Step-by-step remediation workflow overview
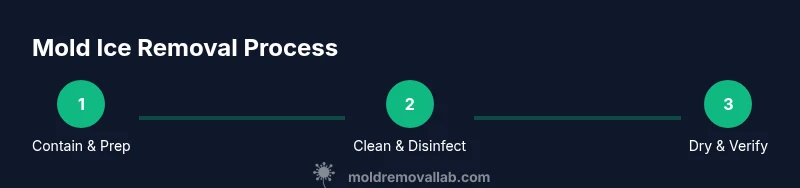
Remediation for mold ice follows a structured workflow that emphasizes containment, cleaning, and drying. Start by isolating the affected area with plastic sheeting and sealing off doorways, vents, and HVAC returns to prevent spores from traveling to other rooms. Next, don PPE and carefully remove any contaminated materials that cannot be saved. Clean surfaces with a mild detergent or cleaner, rinse, and then apply an appropriate disinfectant suitable for mold. After cleaning, thoroughly dry the space using fans and a dehumidifier, continuing to monitor moisture levels until they stay consistently below the established safe threshold. Finally, inspect for hidden moisture pockets and re-test after several days to confirm that mold ice has not returned.
It’s important to avoid heavy scrubbing or aggressive scraping on delicate surfaces, which can release more spores. Instead, work slowly and from the outer edges of the affected area toward the center to contain any debris. If visible contamination spreads beyond the easily accessible area or into HVAC components, consider calling a licensed professional to prevent cross-contamination and ensure proper remediation.
Drying, verification, and moisture control
Drying is a critical step after cleaning mold ice. Rapid evaporation can lead to cracking of substrates and residual moisture pockets, which encourage regrowth. Use high-capacity dehumidifiers in the affected zone and ensure adequate air exchange without spreading spores to other rooms. Re-check moisture levels at multiple points and after 24-48 hours of drying. If readings remain above recommended levels, extend drying time or address hidden moisture sources, such as leaks behind walls or under flooring. Once the space remains dry for several days, consider a light cleaning pass and re-introduction of normal use with continued moisture management.
To prevent future mold ice outbreaks, improve ventilation, fix leaks promptly, and maintain steady indoor humidity levels. Consider using exhaust fans in bathrooms and kitchens and installing a dehumidifier in damp spaces. Regular inspections of potential problem areas—such as basements, crawl spaces, and around windows—are essential for long-term prevention. Mold Removal Lab notes that proactive maintenance and moisture control are the best defenses against mold ice returning.
Prevention and long-term maintenance
Prevention focuses on moisture control and monitoring. Maintain indoor humidity generally between 30-50% where feasible, using dehumidifiers or air conditioners during humid months. Repair leaks promptly and inspect roof lines, pipes, and windows for signs of moisture intrusion. Improve ventilation in bathrooms, kitchens, and laundry areas to reduce condensation buildup. Regularly service HVAC systems with sealed ducts to minimize mold transport. Use mold-resistant paints and sealants on high-risk surfaces, and consider moisture barriers in basements or crawl spaces. Finally, establish a DIY moisture log to track humidity, temperature, and any damp spots so you can intervene early if conditions change. Ongoing education and habit changes—like drying laundry outdoors when possible—help keep mold ice from returning and protect indoor air quality.
Authority sources
For authoritative guidance on mold and indoor air quality, refer to trusted government and educational resources:
- https://www.epa.gov/mold
- https://www.osha.gov/mold
- https://www.cdc.gov/mold/dampness_facts.html
These sources provide foundational information on moisture control, safe cleanup practices, and health considerations for mold-related exposures.
Tools & Materials
- Nitrile gloves(Use powder-free, chemical-resistant gloves)
- N95 respirator or respirator with P100 filters(Fit-tested where possible)
- Safety goggles or face shield(Protect eyes from droplets)
- Disposable coveralls(Ideal for containment)
- Plastic sheeting (6 mil or thicker)(Create containment barriers)
- HEPA vacuum cleaner(For dry cleanup and debris containment)
- Microfiber cloths and disposable towels(For cleaning and absorption)
- Mild detergent and disinfectant(Follow label directions; avoid ammonia with bleach)
- Spray bottle and moisture meters/hygrometers(To monitor humidity and dryness)
- Dehumidifier or fans(Promote drying and air movement)
Steps
Estimated time: 3-5 hours
- 1
Prepare and contain
Put on full PPE, close doors, and install plastic sheeting to seal off the affected zone from the rest of the home. This limits spore spread during cleanup and prevents cross-contamination.
Tip: Seal the area completely, including any gaps around doors and vents. - 2
Assess and remove contaminated materials
Identify porous materials that cannot be cleaned (drywall, insulation) and remove them for safe disposal. Bag materials in labeled, sealed bags to prevent debris escape.
Tip: Do not attempt to salvage saturated porous items; replacement is safer. - 3
Clean surfaces with detergent
Wipe all non-porous surfaces with mild detergent, rinse with clean water, and repeat. For some surfaces, apply a disinfectant following label directions to reduce microbial load.
Tip: Avoid mixing cleaners with ammonia or bleach; follow product instructions. - 4
Dry and verify
Use a dehumidifier or fans to dry the space. Monitor moisture with hygrometers at multiple points until readings stabilize below guidelines for several days.
Tip: Verify dry days after the area remains visibly dry and odor-free. - 5
Revisit and reassess
After drying, re-inspect for hidden moisture pockets and spore buildup. If uncertainty remains or growth reappears, call a professional remediation service.
Tip: Document readings and photos for reference.
FAQ
What is mold ice and is it dangerous?
Mold ice is mold growth that appears on cold surfaces where condensation occurs. It can release spores into the air, potentially causing respiratory irritation. Treating it promptly with containment, cleaning, and drying reduces health risks.
Mold ice is mold on cold surfaces caused by condensation. It can release spores, so containment and drying are important for safety.
Do I need to call a professional for mold ice?
For small, contained areas, careful cleaning with proper PPE and moisture control may suffice. If growth covers a large area, or if you have persistent moisture or HVAC involvement, contact a licensed professional for remediation.
Small areas can be cleaned with precautions, but large or ongoing mold ice issues usually require a pro.
Can I clean mold ice myself safely?
Yes, with appropriate PPE, proper containment, and verified dryness. Avoid aggressive scrubbing on porous materials and replace when contaminated. If unsure, seek professional guidance.
You can clean it yourself if you wear PPE and ensure drying, but replace porous materials and call a pro if needed.
What PPE is essential for mold ice cleanup?
Wear a respirator or N95, eye protection, gloves, and disposable coveralls. Use a HEPA vacuum for debris cleanup and ensure good ventilation during cleaning.
Use a respirator, eye protection, gloves, coveralls, and a HEPA vacuum during cleanup.
How long does it take to dry after remediation?
Drying times vary with space size and humidity. Expect several hours to days depending on airflow and moisture sources. Recheck moisture after drying before reoccupying.
Drying can take hours to days; recheck moisture before returning to the area.
Watch Video
The Essentials
- Identify mold ice early to prevent spread
- Contain the area to avoid cross-contamination
- Use proper PPE and follow label directions
- Dry thoroughly and verify moisture levels
- Plan for long-term moisture control to prevent recurrence