Mold in House: Practical Remediation Guide for Homeowners
A comprehensive, step-by-step guide from Mold Removal Lab on identifying, cleaning, and preventing mold in house. Learn safe practices, when to call pros, and how to protect your family from mold-related health risks.

You will identify mold in house, assess moisture drivers, and implement a safe remediation plan. This guide covers when DIY is appropriate, how to contain growth, essential safety steps, and how to prevent recurrence. If contamination is extensive or involves HVAC systems, consult Mold Removal Lab professionals.
Understanding mold in house
Mold in house is more than a cosmetic issue. It signals moisture problems that can degrade building materials and affect indoor air quality. Common indoor molds include Aspergillus and Cladosporium, and several species can trigger allergic reactions or respiratory symptoms. According to Mold Removal Lab analysis, moisture control remains the single most effective strategy to stop mold growth. This section explains how mold grows, where it often hides, and why fast action matters. You’ll learn to spot visible colonies and inspect hidden damp areas such as behind walls, under sinks, and in basements. The term mold in house will recur as you learn patterns, helping you recognize returns and gaps in your moisture management. Early detection saves time, reduces repair costs, and protects family health. In real homes, small patches can spread when humidity is persistent, so address both mold and its moisture source at the same time.
Understanding mold in house
Mold thrives where moisture lingers and organic materials provide nourishment. In homes, common culprits include leaky roofs, condensation on windows, plumbing leaks, and high indoor humidity. Mold releases spores that can travel through air currents and settle on cool surfaces. Those spores can be invisible to the naked eye, so a damp scent or visible staining should raise suspicion. This guide emphasizes the link between moisture and mold in house; without addressing the moisture source, cleanup efforts often fail. Mold Removal Lab recommends documenting the affected areas and prioritizing containment to prevent cross-contamination during cleanup. By understanding patterns, homeowners can act quickly and prevent larger, costlier problems later.
Understanding mold in house
For families with sensitive individuals, mold exposure may trigger coughing, throat irritation, sneezing, or asthma-like symptoms. People with allergies, immune suppression, or chronic lung conditions are especially at risk. Safety is non-negotiable: wear PPE, ventilate, and avoid disturbing mold growth unnecessarily. This section stresses that visible mold is only part of the problem—hidden growth behind walls or under flooring is common and deserves attention. Mold Removal Lab emphasizes that addressing moisture and improving ventilation are foundational steps in any mold remediation plan. The keyword mold in house helps frame the problem and anchors the reader in practical actions and long-term prevention. In short, controlling moisture is the fastest path to healthier indoor air.
Understanding mold in house
Mold growth often signals a broader issue: ongoing moisture. If you see staining on drywall, warped materials, or a persistent musty odor, treat it as a warning sign. A humid environment—common in kitchens, bathrooms, basements, and laundry rooms—can sustain mold even after surface cleaning. The Mold Removal Lab team recommends a structured approach: map the extent, isolate the area to limit spread, and begin moisture remediation first. By keeping a log of affected spaces and moisture sources, you’ll have a more precise remediation plan. Remember, mold in house is a symptom of moisture, not a standalone problem, so fix the plumbing, ventilation, and insulation alongside cleaning.
Understanding mold in house
For most homeowners, a practical goal is to prevent regrowth. That means combining surface cleaning with moisture mitigation, filtration, and ongoing monitoring. If you are dealing with large affected areas (greater than 10 square feet), porous materials, or musty odors that persist after cleaning, you should consider professional help. Mold Removal Lab's approach centers on safety, minimizing disruption, and reducing the risk of recontamination. By recognizing mold in house early and acting decisively, you can protect occupants and preserve home value. Continual moisture management remains the best defense against future growth.
Tools & Materials
- N95 respirator mask(Fit-tested if possible; replace if soiled or damaged)
- Protective gloves (nitrile or rubber)(Long cuffs preferred for splash protection)
- Goggles or face shield(Eye protection against splashes)
- Plastic sheeting (6-mil or thicker)(Create containment zones to limit spread)
- Disposable bags (heavy-duty)(For debris and contaminated materials)
- HEPA vacuum(Seal vents; avoid using ordinary vacuums)
- Detergent or household cleaner(Mild soap or detergent for initial cleaning)
- Mold-killing solution (bleach alternative or hydrogen peroxide)(Use according to label; never mix chemicals)
- Moisture meter or humidity gauge(Helpful to track progress and drying time)
- Dehumidifier or fans(Speed up drying; keep doors/windows vented)
Steps
Estimated time: Total: 4-6 hours for a small to moderate area; larger areas or extensive contamination may take 1-2 days with drying time between steps
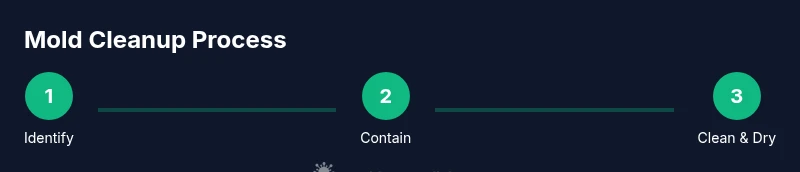
- 1
Identify affected areas
Survey your home to locate visible mold, staining, or musty odors. Mark spots on a floor plan if possible and note moisture sources such as leaks or condensation. This helps define the scope before you begin containment.
Tip: Document with photos from multiple angles; you’ll need them for insurance or remediation records. - 2
Contain the workspace
Close off the area with plastic sheeting to prevent spores from spreading to other rooms. Seal gaps at doors and vents; use tape to secure edges and avoid gaps.
Tip: Turn off HVAC in the area or run a portable HEPA unit to capture airborne spores during cleanup. - 3
Remove and clean affected materials
Wear PPE and carefully remove non-salvageable porous materials (insulation, drywall) as needed. Clean solid surfaces with detergent, then apply a mold-killing solution if appropriate. Place debris into sealed bags for disposal.
Tip: Do not dry brush or aggressively scrub; that can release more spores into the air. - 4
Dry the area thoroughly
Ventilate the space with fans and dehumidifiers until moisture readings stay consistently low. Ensure there is no lingering dampness behind walls by rechecking with a moisture meter after 24–48 hours.
Tip: Aim for indoor humidity below 50% where feasible to discourage regrowth. - 5
Sanitize and seal temporary openings
Wipe nonporous surfaces with a cleaner or diluted hydrogen peroxide. For materials that can be salvaged, apply a sealant or primer designed for mold prevention before repainting.
Tip: Never mix bleach with ammonia or other cleaners; it can create hazardous gases. - 6
Inspect and plan long-term prevention
Schedule a close inspection of the moisture sources (plumbing, roof, ventilation). Address root causes and install ventilation improvements if needed. Keep monitoring logs to prevent recurrence.
Tip: Maintain a regular dehumidification schedule in damp areas like bathrooms and basements.
FAQ
Is mold in house dangerous, and who is most at risk?
Yes. Mold can trigger allergic reactions and respiratory symptoms, especially for children, the elderly, and people with asthma or immune suppression. If you have a persistent exposure or symptoms, seek medical advice and consider professional remediation.
Mold can irritate the lungs and airways, especially for sensitive people. If symptoms persist, consult a clinician and consider professional help.
Can I remove mold in house myself, or should I hire a pro?
Small, non-porous areas with proper safety gear can often be cleaned by homeowners. Large, porous, or interconnected growth, or growth behind walls typically requires professional remediation to ensure complete removal and prevent recontamination.
Small areas can be cleaned safely if you have the right gear; bigger, hidden, or extensive growth should be handled by professionals.
What is the difference between cleaning and remediation?
Cleaning removes visible mold and surface contaminants. Remediation involves comprehensive removal of contaminated materials, moisture control, containment, and prevention strategies to stop re-growth.
Cleaning is surface level; remediation addresses moisture, containment, and root causes to prevent return.
How long does mold remediation take in most homes?
Duration varies with area size and moisture control needs. Small jobs may wrap in a day; larger or complex cases can extend to several days, especially if structural repairs are required.
Most typical jobs finish in a few days, depending on scope and drying time.
Should I use DIY mold test kits after cleanup?
Testing can confirm cleanup effectiveness, but it is not always necessary. Use accredited lab services if you have persistent symptoms or suspect hidden growth; rely on moisture control as the primary indicator of success.
Testing helps confirm cleanup if there’s doubt, but keeping humidity low is the key to prevention.
Watch Video
The Essentials
- Identify moisture sources before cleaning
- Contain the area to prevent spread
- Use PPE and proper cleaning agents
- Dry thoroughly and monitor humidity
- Address root causes to prevent recurrence