Mold on Hardwood Floor: A Practical Remediation Guide
Learn practical steps to identify, clean, and prevent mold on hardwood floors, with safety, moisture control, and prevention strategies for a healthier home.

You will identify moisture sources, safely remove surface mold, dry the area, and prevent future growth on a mold hardwood floor. This guide emphasizes PPE, containment, moisture control, and selecting appropriate cleaning methods. Expect a practical, staged approach that protects your home and health while reducing recurrence.
Understanding the mold hardwood floor problem
Mold on a hardwood floor is a common problem in homes with ongoing moisture issues. According to Mold Removal Lab, growth often starts where moisture lingers—whether from a spill that soaked into pores, a hidden leak, or persistently high humidity. Hardwood floors are porous and can absorb water beneath the surface, even when the visible finish looks intact. The result can be hidden mold behind baseboards or between boards, as well as surface staining that signals deeper problems. Recognizing that this is not just a cosmetic issue is crucial: moisture management is the foundation of any effective remediation. For many homeowners, the goal is to stop new moisture from entering and address the underlying source while protecting occupants from exposure to mold hardwood floor spores. This section explains the science behind wood-associated mold, how to spot early signs, and why timely action matters for health, aesthetics, and the long-term value of your floor.
Assessing extent and setting expectations
Before remediation begins, you must assess how far the mold has spread and what moisture sources are at work. Visual signs include staining, warping, or soft spots on boards, while hidden moisture often lurks beneath subfloors or behind trim. A moisture meter helps identify damp zones, especially in hardwood floor installations where moisture can migrate from beneath the surface. The Mold Removal Lab team notes that surface mold on a mold hardwood floor is not always the whole story; mold can hide behind baseboards, under cabinets, or in crawl spaces. Take measurements of affected areas, document with photos, and decide whether the wood is structurally sound. If wood is rotting, soft, or swollen, remediation may extend beyond cleaning to refinishing or partial replacement, which informs your timeline and budget.
Safety first: PPE, containment, and airflow control
Mold exposure can irritate eyes, skin, and lungs, so start with proper PPE and containment. Wear an N95 respirator, splash goggles, and disposable gloves; seal the work area with heavy-duty plastic to prevent spores from spreading. Use a HEPA vacuum for cleanup and avoid dry sanding, which aerosolizes mold. Create negative airflow by exhausting air outdoors with a portable fan if possible, and keep kids and pets out of the contamination zone. This safety-first approach protects you and others while reducing secondary contamination in the home. If you’re dealing with a mold hardwood floor, remember that containment is as important as cleanup to prevent spread.
Cleaning options and methods for hardwood floor
Cleaning mold from a wood floor depends on whether the wood is finished and how extensive the growth is. For light, surface mold on sealed boards, a gentle cleaner and microfiber cloth can remove deposits; for tougher spots, a mild soap solution or a wood-safe cleaner is appropriate. Hydrogen peroxide or white vinegar can be effective against certain molds, but always test a hidden area first to ensure no discoloration or damage to the finish. Avoid aggressive scrubbing that can scratch or dull the floor. After cleaning, dry the area thoroughly—mold on a mold hardwood floor tends to return if moisture remains. Recheck for moisture, odors, or dampness and address any persistent damp conditions before proceeding. If mold recurs or boards show signs of rot, plan for refinishing or replacement.
When to call a professional vs DIY
DIY remediation works well for small, isolated patches on intact, sealed wood when there is no visible rot. If mold covers larger areas or you suspect hidden growth behind trim, or if moisture sources persist (leaks, condensation, inadequate ventilation), it’s time to engage a professional mold remediation service. A qualified pro can perform a building science evaluation, contain the area properly, and address the root cause of moisture problems. While professional help costs more upfront, it reduces health risks and the chance of future damage to the mold hardwood floor and surrounding structure. Consider your comfort level, the extent of mold, and the presence of any underlying moisture when deciding.
Preventing future mold growth on wood floors
Prevention starts with consistent moisture control and better airflow. Repair leaks promptly, fix plumbing issues, seal vulnerable joints, and ensure subfloors and basements dry out after spills or floods. Use a dehumidifier or air conditioner to maintain comfortable indoor humidity and promote cross-ventilation through doors and windows when weather permits. Regular cleaning with a wood-safe product helps prevent biofilms and dust that mold feeds on. In climates with seasonal humidity swings, periodic moisture testing can catch trouble early. By maintaining a dry environment and addressing sources of moisture, you reduce the likelihood of recurring mold on hardwood floors.
Authority sources and further reading
For trusted, evidence-based guidance, consult federal and university resources. The Environmental Protection Agency (EPA) offers mold remediation guidance and moisture control strategies relevant to hardwood floors. The Centers for Disease Control and Prevention (CDC) provides information about health risks associated with damp indoor spaces and mold exposure. The Occupational Safety and Health Administration (OSHA) outlines worker safety standards when addressing mold and indoor air quality on job sites. These sources complement your practical steps and help you make informed remediation decisions for mold on hardwood floors.
Tools & Materials
- N95 respirator(Fit-tested or equivalent; replace if wet)
- Safety goggles(Wraparound style preferred)
- Disposable gloves(Latex-free; nitrile recommended)
- HEPA vacuum with attachments(Use for dry cleanup only)
- Microfiber cloths(Lint-free, reusable)
- Plastic sheeting(Seal off the area (6 mil or thicker))
- Spray bottle with mild cleaner(Wood-safe cleaner or soapy water)
- Wood-safe cleaner(Test first on inconspicuous area)
- Hydrogen peroxide or white vinegar(Test in hidden spot first)
- Dehumidifier(Keep air dry during remediation)
- Moisture meter(Identify damp zones beneath surface)
- Scrub brush(Soft-bristle to avoid scratching finish)
- Plastic bags(Seal and dispose contaminated materials)
- Fan with outdoor exhaust(Promote air exchange away from living spaces)
- Sandpaper or refinishing tools(Only if wood is damaged and needs refinishing)
Steps
Estimated time: 45-90 minutes (plus time for drying and any refinishing if needed)
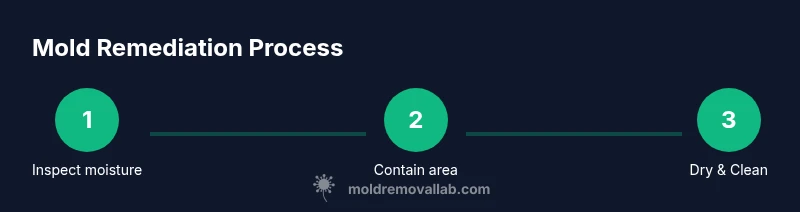
- 1
Inspect for moisture sources
Walk the space and look for leaks, condensation, or standing water. Note any damp spots under cabinets or along baseboards and check for warped boards. This step establishes why mold appeared on the mold hardwood floor and what must be fixed before cleaning.
Tip: Use a moisture meter on suspected boards to confirm dampness before proceeding. - 2
Contain the workspace
Close doors to the affected area and seal with plastic sheeting. Run a portable fan to vent air outside, but ensure the fan exhausts away from living areas. Containment prevents mold spores from migrating to other rooms.
Tip: Label the contained area to alert others and prevent unintentional entry. - 3
Protect yourself and others
Don PPE before touching any mold. If you encounter a lot of mold, pause and consider calling a pro. Avoid touching your face during cleanup and wash hands after removing PPE.
Tip: Change disposable gloves frequently to minimize cross-contamination. - 4
Dry the area
Run a dehumidifier and improve airflow to dry the surface promptly. Moisture must be reduced before any cleaning to prevent mold spread on the mold hardwood floor.
Tip: Aim for a dry surface with no visible moisture within 24–48 hours if possible. - 5
Clean visible mold
Wipe surfaces with a wood-safe cleaner or mild soap solution using a microfiber cloth. For stubborn spots, gently scrub with a soft brush, then rinse with a damp cloth and dry thoroughly. Do not use aggressive chemicals on unfinished wood.
Tip: Never use bleach on finished wood as it can discolor the surface. - 6
Assess wood condition
Check for staining, warping, or soft spots after cleaning. If the wood shows rot or significant damage, plan refinishing or replacement rather than continuing with surface cleaning.
Tip: Document damaged boards to guide replacement decisions. - 7
Address moisture sources
Repair leaks, fix condensation, and improve ventilation to prevent recurrence. This step targets the underlying reason mold grew on the mold hardwood floor.
Tip: Consider moisture barrier improvements under the floor if moisture remains a persistent issue.
FAQ
Is mold on hardwood floors dangerous to my health?
Health risks depend on exposure, duration, and the extent of contamination. Even small amounts can irritate sensitive individuals. Protect yourself during remediation, and seek professional help if you have respiratory or immune-compromised conditions.
Mold can irritate your airways, so protect yourself during cleanup and consult a professional if you have health concerns.
Can I DIY mold removal on a hardwood floor?
Yes for small, surface mold on sealed wood with no rot. If mold covers a large area, or you suspect hidden mold behind trim, or there is ongoing moisture, hire a professional.
DIY is okay for small, surface mold, but bigger problems call a professional.
Should I paint over mold on a wood floor?
Painting over mold is not a remediation. It may hide the problem temporarily and allow mold to continue growing beneath the finish. Clean, dry, and address moisture before considering any refinishing.
No—paint won’t solve the mold problem; address moisture and clean before refinishing.
What moisture level should I maintain after remediation?
Maintain a dry environment and promptly fix leaks. Rely on ventilation and, if needed, a dehumidifier to reduce the chance of mold returning on the mold hardwood floor.
Keep humidity low and fix leaks to prevent mold from coming back.
How long does remediation take for a typical small area?
A small, surface-only remediation can be completed in a day, depending on moisture control and drying time. Larger areas or damaged wood require more time and possible refinishing.
Most small jobs can be done in a day, with longer timelines if wood is damaged.
Can mold recur after cleaning hardwood floors?
Yes, if the underlying moisture problem isn’t resolved. Continued moisture, humidity, or leaks can lead to recurrence even after cleaning.
If you don’t fix the moisture, mold can come back after cleaning.
Watch Video
The Essentials
- Identify moisture sources before cleaning
- Use proper PPE and containment
- Choose wood-safe cleaning methods
- Address underlying moisture to prevent recurrence