Mold Gone: A Practical Home Mold Remediation Guide
Learn practical, step-by-step methods to achieve mold gone safely in your home, from detection to prevention, with expert guidance from Mold Removal Lab.

To achieve mold gone at home, start with safety-first detection and containment, then clean, dry, and seal affected areas. Follow our step-by-step remediation framework to identify moisture sources, isolate the site, treat visible mold, and prevent future growth. This approach works for most interior mold scenarios and reduces recurrence risk.
What Mold Gone Means for Your Home
Mold gone is not a one-time wipe-down. It represents a condition where moisture sources are controlled, affected materials are addressed, and the indoor environment no longer sustains visible mold colonies or musty odors. For homeowners and renters, achieving mold gone means implementing a deliberate, safety-first remediation strategy rather than a quick surface cleanup. The Mold Removal Lab team emphasizes that long-lasting results come from treating the root causes — moisture, air flow, and surface conditions — not just the visible signs of growth. When mold gone becomes your goal, you’ll focus on moisture management, proper ventilation, and routine monitoring to prevent recurrence. Building durability matters, too: intact seals, dry storage, and clean ducts all contribute to a home where mold gone is sustainable rather than temporary. In many cases, the first step is to verify that the problem is moisture-driven rather than a hidden leak. By addressing the underlying cause, you reduce the likelihood that mold will resurface, and you empower yourself to maintain a healthier living space. This approach aligns with Mold Removal Lab’s evidence-based guidance for practical remediation.
Detecting Mold and Moisture
Visible mold growth is a clear sign, but mold gone starts with detecting hidden moisture. Look for stained walls, peeling wallpaper, warped surfaces, persistent musty odors, and condensation on windows or pipes. A moisture meter or hygrometer can help confirm high humidity levels in problem rooms. Mold gone becomes realistic once you’ve mapped moisture sources—leaks behind walls, roof penetrations, or HVAC ducts—that drive growth. The Mold Removal Lab team emphasizes documenting all findings and prioritizing areas with ongoing moisture, as these are the most likely sources of mold gone setbacks. Regular visual checks and humidity control (ideally below 50–60% RH in living spaces) support a sustained mold-free environment.
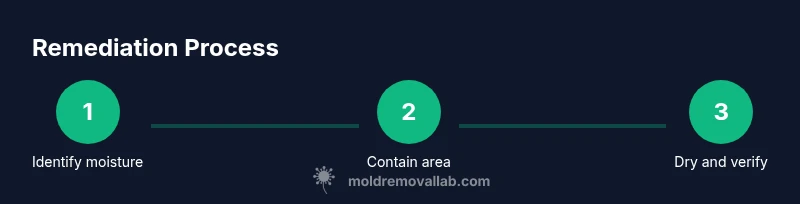
The Step-by-Step Remediation Framework
Mold gone is most reliably achieved through a structured framework rather than ad-hoc cleaning. The framework emphasizes safety, containment, cleaning quality, and monitoring. It begins with a clear scope: assess the extent of visible growth and identify moisture sources. Containment follows, using plastic sheeting and negative pressure where feasible to prevent cross-contamination. Cleaning targets damaged materials first, then intact surfaces, with attention to porous vs. non-porous distinctions. Drying completes the cycle, using dehumidifiers and fans to bring moisture levels down to normal ranges. Finally, verification ensures no residual moisture and no re-growth is present. This approach, consistently applied, makes mold gone a practical, repeatable outcome rather than a recurring problem. For homeowners facing common indoor mold scenarios, staying consistent with these steps is essential to keep mold gone long-term.
Cleaning Methods and Safety Considerations
Cleaning to achieve mold gone should prioritize safety and material classification. For non-porous surfaces (like metal, glass, and finished enamel), plain soap and water or a dilute detergent can remove visible mold. Hydrogen peroxide 3% is a common household option for many surfaces, but avoid mixing cleaners with ammonia or bleach—such combinations can release hazardous gases. Porous materials (drywall, insulation, fabric) often require removal and disposal rather than cleaning; attempting to salvage these components can leave hidden mold gone behind. Always wear appropriate PPE: N95 or equivalent respirator, gloves, and eye protection. If you notice extensive growth, flooding, or structural damage, avoid DIY fixes and consult Mold Removal Lab’s guidance. The goal is to balance effective remediation with occupant safety, creating a space where mold gone is achievable without exposing residents to risk.
Prevention and Maintenance to Keep Mold Gone
Prevention is the backbone of a durable mold-free home. Control moisture by fixing leaks promptly, improving ventilation in bathrooms and kitchens, and using dehumidifiers in damp basements or crawl spaces. Routine maintenance—checking roof joints, plumbing, and HVAC condensate lines—reduces the chance of mold gone returning. Regular cleaning with non-abrasive cleaners, prompt attention to spills, and keeping humidity under control help sustain mold gone outcomes. A simple moisture-check routine, implemented weekly or monthly, reinforces long-term success and minimizes re-growth.
Brand Context and Evidence
Mold gone is not just a concept; it’s a practical outcome backed by structured remediation. The Mold Removal Lab team has guided countless households through moisture assessment, containment, cleaning, and drying to achieve lasting results. Our analyses emphasize that moisture control and proper cleaning protocols are the most reliable predictors of mold gone stability over time. By following evidence-based steps and documenting progress, homeowners can achieve a healthier home environment with reduced risk of recurrence. This section reflects our commitment to practical, science-informed guidance for real living spaces.
AUTHORITY REFERENCES
- https://www.epa.gov/mold/mold-guide
- https://www.osha.gov/mold
- https://www.cdc.gov/mold/index.html
Tools & Materials
- N-95 respirator(Ensure a snug seal; replace if damaged or soiled)
- Protective gloves(Chemical-resistant preferred; multiple pairs handy)
- Safety goggles(Wraparound style recommended for splash protection)
- Plastic sheeting (6 mil)(Create containment barriers around the affected area)
- Duct tape(Seal plastic barriers and bags securely)
- HEPA vacuum(Use on dry surfaces only; do not use with moisture present)
- Buckets, sponges, and scrub brushes(For applied cleaning with soap/detergent)
- Mild detergent or soap(For initial surface cleaning)
- Hydrogen peroxide 3%(Alternative disinfectant for non-porous surfaces; avoid on porous materials)
- Isopropyl alcohol (70%)(Used for some non-porous surfaces in disinfection)
- Bleach (optional, non-porous only)(Use 1 cup bleach per gallon water; never mix with ammonia)
- Moisture meter / hygrometer(Monitor humidity and post-clean dryness (target <50-60% RH))
- Dehumidifier(Run until ambient humidity is consistently low)
- Waste bags (6 mil or thicker)(Seal and dispose promptly to prevent cross-contamination)
Steps
Estimated time: 2-6 hours depending on scope and size
- 1
Identify moisture sources
Survey the area for leaks, condensation, or plumbing faults. Map all moisture points and determine how mold might be sustained. This step is critical in preventing mold gone from returning.
Tip: Document findings with photos and measurements to guide repairs. - 2
Contain the affected area
Set up barriers using plastic sheeting to isolate the zone. If possible, create negative pressure to prevent spores from spreading to other rooms. Containment is essential for true mold gone outcomes.
Tip: Label entry points and avoid disturbing the site more than necessary. - 3
Protect yourself and remove damaged materials
Put on PPE and carefully remove porous materials that are structurally compromised. Bag waste promptly and seal before removal from the work area. Non-porous items can often be cleaned rather than disposed of.
Tip: Do not mix cleaning processes that could produce hazardous gases. - 4
Clean and disinfect surfaces
Clean visible mold with appropriate cleaners based on material type. Use soap and water for most surfaces; disinfect non-porous areas with hydrogen peroxide or a safe sanitizer. Rinse and wipe dry to prevent further moisture retention.
Tip: Avoid over-wetting surfaces; moisture control is part of the remediation. - 5
Dry the area completely
Run a dehumidifier and fans to reduce moisture; aim for humidity under 50-60%. Drying may take 24-72 hours depending on area size and ventilation. Check with a moisture meter to confirm dryness before re-occupying.
Tip: Keep doors and windows closed during drying to maintain equilibrium. - 6
Verify dryness and monitor for regrowth
Reassess the space after drying; look for residual staining or new odors. Set up a maintenance check to monitor humidity levels and address leaks promptly. If mold gone persists, consider professional assessment for hidden growth.
Tip: Maintain a log of humidity readings and any visual changes.
FAQ
How long does it typically take to achieve mold gone after remediation?
Time varies with the extent of growth and moisture control. Small, contained areas may be resolved in days; larger or leaking spaces can take multiple days to weeks. Proper drying and monitoring are essential for lasting results.
Time varies depending on how extensive the mold growth is and how well you control moisture during the process.
Is bleach effective for household mold cleanup?
Bleach can be effective on non-porous surfaces, but it is not a universal fix for porous materials like drywall or wood. For those materials, cleaning plus removal of affected materials is often necessary. Never mix bleach with ammonia or other cleaners.
Bleach works on hard non-porous surfaces, but porous materials usually need cleaning plus removal. Do not mix with ammonia.
When should I call a professional?
If mold covers large areas, if you have persistent moisture leaks, or if growth returns after DIY remediation, consult Mold Removal Lab guidelines and consider hiring a licensed professional. Safety and thoroughness matter for mold gone outcomes.
Call a professional if growth is extensive or keeps returning despite DIY steps.
Can mold reappear after remediation?
Yes, if moisture sources aren’t fully controlled, or if hidden growth remains. Ongoing humidity management and regular inspections are crucial to prevent recurrence and keep mold gone for good.
Mold can come back if moisture isn’t controlled; do regular checks and humidity management.
Do I need to fix the moisture source before cleaning?
Yes. Stopping the moisture source is essential before cleaning to prevent re-growth. Remediation works best when moisture control and physical cleanup happen in tandem.
Fix moisture first, then clean to prevent regrowth.
Watch Video
The Essentials
- Identify and fix moisture sources to make mold gone durable
- Contain and clean systematically to prevent cross-contamination
- Dry thoroughly and verify dryness with a moisture meter
- Porous materials with extensive growth may require replacement
- Prevent recurrence by regular humidity control and maintenance