How to Get Rid of Mold: A Practical Home Guide
Discover safe, proven methods to remove mold from kitchens, bathrooms, and basements. This Mold Removal Lab guide covers detection, containment, cleaning, drying, and prevention to protect your home.

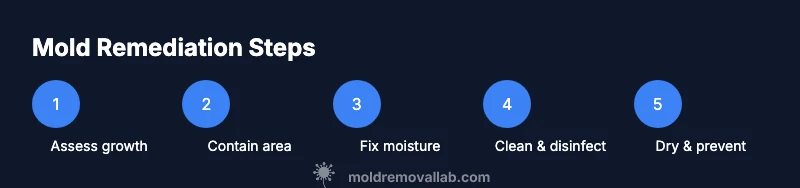
By following this how-to guide, you’ll learn practical, safe steps to get rid mold in your home. Start by identifying moisture sources, containment, and cleaning with appropriate cleaners, then drying thoroughly and applying prevention measures. This plan covers DIY remediation and clear signals for when to call a professional.
Why mold thrives in homes
Mold needs three things to grow: moisture, a food source (dust, skin cells, and other organic material), and the right temperature. In many homes, hidden leaks, high humidity, and poor ventilation create conditions that invite mold growth. According to Mold Removal Lab, moisture control is the single most important factor in preventing and reversing growth. By understanding these drivers, you can interrupt mold before it becomes a bigger problem. The goal when you ask, how to get rid mold, is to remove moisture, limit nutrients, and keep the space dry long enough for spores to die off or be outcompeted by dry air.
Health risks and the importance of a safe approach
Mold exposure can irritate eyes, nose, throat, and lungs, and may trigger allergic reactions in sensitive individuals. In homes with water damage or persistent dampness, residents may notice coughing, sneezing, or wheeze. While some molds are only a nuisance, others—like black mold—can pose greater health concerns. This guide emphasizes safety and proper containment to protect families, including children and pets.
Safety first: PPE and containment when you start
Before you begin, assemble protective gear: an properly fitted respirator, gloves, eye protection, and disposable coveralls if possible. Set up containment for the affected area using plastic sheeting and tape to prevent spores from drifting to other rooms. Adequate ventilation is important, but avoid uncontrolled airflow that can spread contamination. This article on how to get rid mold stresses safety to minimize risk while you remediate.
Find moisture sources and fix leaks
Locate any active leaks or standing water behind walls, ceilings, basements, or under sinks. Leaks can be obvious or hidden, so check pipes, HVAC connections, roof penetrations, and window seals. Repairing leaks promptly is essential; without moisture control, even thorough cleaning will be undermined by recurring mold growth. In many homes, moisture sources are the root cause of mold problems, and fixing them is the most effective first step.
Cleaning methods by surface type: porous vs non-porous
Non-porous surfaces (like glass, tile, and many metals) are easier to clean and disinfect. Porous materials (drywall, ceiling tiles, and plywood) often absorb mold and may require removal if deeply penetrated. Start with a detergent solution to remove visible growth, then apply an appropriate disinfectant on non-porous surfaces. For porous items, assess salvageability; if growth is embedded, replacement is often the safer option for long-term results. This distinction is central to doing how to get rid mold effectively.
Cleaning steps: detergents, disinfectants, and safe practices
Clean surfaces with a detergent solution to remove mold at the surface, then use a disinfectant suitable for the material. Never mix cleaners—bleach and ammonia or other cleaners can release toxic gases. Rinse thoroughly and dry promptly to prevent re-growth. Keep pets and children away from the work area, and never blast mold with high heat or dry ice, which can disperse spores. Follow label directions for contact time and safety.
Drying and preventing recurrence
After cleaning, drying is critical. Use fans and a dehumidifier to bring indoor humidity below 50%, ideally in the 30-50% range. If humidity spikes again, address the source quickly and re-clean the area. Consistent moisture control—the cornerstone of how to get rid mold—helps prevent reappearance and protects air quality.
When to call a professional and what to expect
If mold covers more than 10 square feet, or if it recurs after cleaning, professional remediation may be warranted. Professionals can assess hidden growth behind walls and HVAC ducts and ensure proper containment and disposal. A qualified mold remediation contractor should provide a written scope of work, a moisture-control plan, and post-remediation verification. This is an important consideration when you’re unsure how to get rid mold safely.
Maintenance plan to keep mold away long-term
Create a moisture-management plan: fix leaks promptly, reduce indoor humidity with dehumidifiers, improve ventilation in bathrooms and kitchens, and perform seasonal inspections. Regularly check basements, crawl spaces, and roofs for signs of water intrusion. Keeping a log of humidity readings and any new growth helps you stay ahead of mold problems and maintains a healthy home.
Tools & Materials
- N95 respirator or P100 mask(Fit-tested if possible; replace if damaged)
- Protective eyewear(Goggles or safety glasses)
- Chemical-resistant gloves(Nitrile or rubber)
- Disposable coveralls or old clothing(Long sleeves and pants; remove and launder after use)
- Plastic sheeting and tape(For area containment)
- Detergent or mold-cleaning solution(Non-ammonia cleaner preferred)
- Disinfectant suitable for surfaces (non-porous)(Follow label directions)
- Bleach (sodium hypochlorite) optional(Only for non-porous surfaces; do not mix with ammonia)
- Water and towels or microfiber cloths(For wiping and drying)
- Stiff-bristled brush(For stubborn stains on non-porous surfaces)
- HEPA vacuum or vacuum with high-efficiency filter(For cleanup after disposal)
- Dehumidifier or fans(Keep humidity below 50%)
- Moisture meter or hygrometer (optional)(Useful for tracking RH)
Steps
Estimated time: 6-12 hours
- 1
Assess mold growth and plan
Survey affected areas and document extent with photos. Create a simple map of moisture sources and potential spread paths to guide containment and cleaning. This initial assessment informs a safe, effective remediation plan.
Tip: Take before-and-after photos to verify progress and inform any professional intervention if needed. - 2
Put on PPE and set up containment
Don protective gear before touching any moldy surfaces. Erect plastic barriers to contain the area and prevent spores from drifting to clean areas. Ventilation is important, but avoid creating a wind tunnel that spreads spores.
Tip: Ensure a dedicated entry/exit to minimize cross-contamination. - 3
Identify and fix moisture source
Locate leaks, condensation, or high humidity areas contributing to mold. Repair what you find (pipes, roof, windows, HVAC). Stabilizing moisture is essential to prevent regrowth.
Tip: Document the repair with receipts and photos for future maintenance planning. - 4
Contain the area and isolate contaminated items
Seal off the affected zone with plastic sheeting. Remove or isolate porous materials if possible. This step reduces cross-contamination during cleaning.
Tip: Do not remove more material than necessary to contain the problem. - 5
Clean non-porous surfaces with detergent
Use a detergent solution to remove visible mold from hard, non-porous surfaces like tile or glass. Rinse and dry before applying a disinfectant. This reduces the immediate growing surface for mold.
Tip: Always follow product label directions for contact time and dilution. - 6
Disinfect non-porous surfaces
Apply an appropriate disinfectant to non-porous surfaces after cleaning. Allow contact time as directed on the label. Do not mix cleaners with ammonia or other agents.
Tip: Wear eye protection during disinfection to avoid splashes. - 7
Address porous materials
Porous materials (drywall, carpet, insulation) with embedded mold are often not salvageable. Remove and dispose of affected items safely. Consider professional disposal guidelines for larger jobs.
Tip: If salvage is possible, clean with repeated steps on a small test area first. - 8
Rinse and dry thoroughly
Rinse cleaned surfaces and remove excess moisture. Dry quickly using towels, fans, or a dehumidifier. Quick drying slows regrowth and limits spread.
Tip: Aim for humidity below 50% and ensure airflow reaches all cavities. - 9
Verify dryness and prevent recurrence
Recheck the area after 24-48 hours of drying. Reassess humidity and signs of regrowth. Implement long-term moisture controls like improved ventilation and regular inspections.
Tip: Keep a maintenance schedule to monitor humidity seasonally. - 10
Post-remediation evaluation and plan
If mold signs remain or reappear, escalate to a professional assessment. Create a moisture-control plan for ongoing prevention and record the remediation process for future reference.
Tip: A clear, written plan helps you track improvements and defend decisions with contractors.
FAQ
Can mold be completely eradicated from a home?
Mold can be removed from visible surfaces, but spores can remain in the environment. Ongoing moisture control is essential to prevent regrowth. Complete elimination often requires ongoing monitoring and, in some cases, professional remediation.
Mold can be removed from visible areas, but spores may linger; controlling moisture is key to preventing return.
Is bleach effective for removing mold?
Bleach can kill mold on non-porous surfaces, but it may not reach mold inside porous materials. For many surfaces, detergent cleaning followed by disinfection is more reliable for long-term results.
Bleach can kill surface mold on non-porous surfaces, but it may not reach mold inside porous materials.
What about mold hiding behind walls?
Hidden mold requires professional assessment in many cases. Do not aggressively tear into walls unless necessary and safe; professional tools can identify concealed growth without causing unnecessary damage.
Hidden mold behind walls often needs professional evaluation to confirm extent and avoid improper damage.
How long does remediation take for a typical home?
Time varies with extent. Small, isolated growth may resolve within a day or two, while larger or repeated infestations can take longer and require follow-up moisture control measures.
It depends on the extent; smaller jobs can finish quickly, larger ones take more time and moisture control.
When should I hire a professional?
If mold covers a large area (often more than 10 square feet), involves HVAC systems, or if moisture persists after cleaning, hire a professional for safe containment and thorough remediation.
If you see a large area or persistent moisture, it's wise to hire a professional.
Can mold affect health, and how should I respond?
Exposure can irritate eyes, nose, and throat, trigger allergies, or worsen asthma for some people. If you notice symptoms, leave the area, increase ventilation, and consult a doctor if needed.
Mold exposure can irritate you; seek medical advice if you have symptoms or health concerns.
The Essentials
- Identify and fix moisture sources first.
- Contain and clean safely with appropriate cleaners.
- Dry thoroughly to prevent regrowth and maintain air quality.
- Know when to hire a professional for larger or persistent problems.