Mold Get Rid Of: A Practical DIY Remediation Guide
Learn practical, home-safe methods to mold get rid of effectively. This step-by-step guide covers moisture control, safe cleaning, and prevention to protect your family and keep indoor air healthy.

Mold get rid of safely starts with stopping moisture, isolating the affected area, and following a structured cleaning plan using EPA-approved products. This guide provides actionable steps that homeowners can use to reduce growth, dry the space, and prevent recurrence. Always wear proper PPE and know when to call a professional for large or hidden mold.
What mold is and why it’s a concern
Mold is a broad family of fungi that thrives where moisture and organic material meet. When you want to mold get rid of it, you must address both the visible patches and the hidden moisture sources fueling growth. According to Mold Removal Lab analysis, remediation succeeds when you identify moisture drivers—leaks, condensation, or poor ventilation—and then apply targeted cleaning, drying, and prevention steps. Exposure to mold can affect indoor air quality and trigger allergic reactions, coughing, or asthma symptoms, especially for children, pets, or people with sensitivities. This guide offers practical, home-safe strategies aligned with widely accepted remediation principles. The aim is to reduce moisture, clean effectively, and prevent regrowth, while recognizing when to escalate to professional help. By following these steps, homeowners can create healthier living spaces without unnecessary risk.
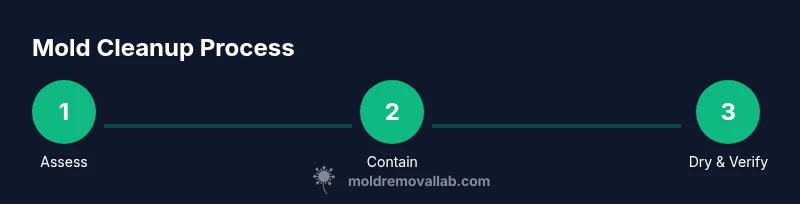
Assessing your space safely
Before touching any mold, map the area, identify moisture sources, and prepare your safety gear. Start with a quick walk-through to locate all visible growth and suspect damp zones like bathrooms, basements, or kitchens. Wear a properly fitted respirator or mask, eye protection, gloves, and long sleeves to minimize exposure. Ventilate the space as much as possible and work in short sessions to reduce airborne spores. If you have persistent moisture or large areas of growth, seek professional evaluation. Based on Mold Removal Lab research, the best results come from a staged approach: stop the moisture source, contain the area, and then clean in controlled sessions to avoid spreading spores. Use plastic sheeting to seal off doors and vents, run a dehumidifier or fans to move moisture out, and avoid disturbing strong mold colonies. Keep pets and children away during the process.
Clean-up strategies: DIY vs. professional
Homeowners frequently ask if they can clean mold themselves. The answer depends on the extent of growth, the surface involved, and occupant health. For small, non-porous areas with limited growth, a careful DIY approach can be effective when you follow safety protocols and use approved cleaners. For porous materials (drywall, wood, fabric) or larger areas, professional remediation is often advisable because spores can penetrate beyond visible patches. DIY methods include removing moldy non-porous materials, thorough cleaning with EPA-recommended cleaners, and careful drying. However, DIY cleanup does not remove moisture problems or guarantee complete removal of hidden colonies and may require re-treatment. The Mold Removal Lab Team emphasizes that hidden cavities often harbor regrowth if moisture remains. When in doubt, schedule a professional assessment to avoid long-term damage or health risks.
Step-by-Step remediation plan (home DIY) – overview
The following steps outline a practical plan homeowners can follow to get mold under control. The focus is on safety, moisture control, and verifiable drying. Remember: if the area is large, or if mold has penetrated into insulation or walls, professional remediation may be the safer and more effective option. Always verify that the underlying moisture problem is fixed before sealing and restoring.
Maintaining mold-free spaces: prevention
Prevention is easier than cleanup. After remediation, focus on moisture control, ventilation, and routine checks. Use exhaust fans in bathrooms and kitchens, fix leaks promptly, and keep indoor humidity balanced by using dehumidifiers in damp climates. Regularly inspect areas prone to dampness such as basements, crawl spaces, and under sinks. Clean and dry spots exposed to water within a day or two, and consider mold-resistant paints in high-risk zones. The goal is to turn off the conditions mold loves: lingering moisture and porous materials. With consistent maintenance, you can significantly reduce the risk of recurring growth and protect indoor air quality.
When to call a pro and what to expect
Not all mold requires professional remediation, but large or structurally compromised areas or growth on porous materials warrants expert help. Signs to escalate include growth larger than a small patch, growth behind walls, or repeated moisture problems that recur after cleaning. A professional will perform a guided assessment, containment, specialized cleaning, and post-remediation verification. Expect an initial inspection, a defined scope and cost estimate, and a remediation plan that includes containment measures, cleaning methods, drying strategies, and post-remediation monitoring.
Tools & Materials
- N95 or P100 respirator(Ensure proper fit; replace if damaged)
- Chemical-resistant gloves(Long sleeves and eye protection recommended)
- Goggles or safety glasses(Protect eyes from spores and cleaners)
- Disposable coveralls(Optional for larger jobs to protect clothing)
- Plastic sheeting (6 mil or thicker)(Seal off the area and vents)
- Duct tape or painter’s tape(Create containment seams)
- HEPA-filter vacuum(Use only for dry cleanup)
- Detergent or soap(Initial cleaning agent)
- EPA-registered mold cleaner(Follow label directions)
- Disinfectant (optional)(Use only as recommended)
- Dehumidifier or fans(Promote rapid drying)
- Moisture meter or humidity gauge(Verify dryness)
- Trash bags (heavy-duty)(Seal moldy debris securely)
Steps
Estimated time: 2-6 hours
- 1
Assess scope and plan
Survey all affected areas and identify moisture sources. Decide whether DIY cleanup is feasible or a professional is needed based on area size, material type, and occupant health. Document starting conditions and establish a containment plan.
Tip: Start with a small test patch to confirm chosen cleaners are effective on the surface. - 2
Gather PPE and materials
Put on the respirator, eye protection, gloves, and protective clothing. Arrange plastic containment, cleaning agents, and disposal bags nearby to minimize movement during cleanup.
Tip: Perform a quick PPE check before entering the work area. - 3
Isolate the area
Seal doors, vents, and other openings with plastic sheeting to prevent spores from spreading. If possible, block access to the space from the rest of the home.
Tip: Turn off HVAC to avoid circulating spores through ducts. - 4
Remove porous, moldy materials
Carefully remove drywall, insulation, or fabric that shows mold growth or is structurally compromised. Place contaminated materials in sealed bags for disposal.
Tip: Double-bag large items and label bags clearly. - 5
Clean non-porous surfaces
Scrub hard, non-porous surfaces with detergent, rinse, and apply an EPA-approved cleaner or disinfectant per label directions. Avoid mixing cleaners unless the label permits it.
Tip: Work from clean to dirty areas to prevent cross-contamination. - 6
Dry the area thoroughly
Run a dehumidifier and fans to remove moisture. Monitor posted moisture levels until the area remains dry for a sustained period.
Tip: Continue drying for several hours after visible dampness is gone. - 7
Restore and monitor
Repair damaged materials and repaint if needed. Schedule a follow-up check to ensure moisture does not return and mold does not reappear.
Tip: Keep an eye on previous problem zones after weather changes. - 8
Document and preventive maintenance
Record dates, findings, and actions. Implement ongoing maintenance: fix leaks, ventilate damp areas, and perform routine inspections.
Tip: Set seasonal reminders to inspect problem areas.
FAQ
Can bleach get rid of mold on porous surfaces?
Bleach is generally not effective for mold on porous materials like drywall or wood because it cannot reach deeply embedded spores. It may help on non-porous surfaces, but focus on moisture control and proper cleaning instead.
Bleach rarely works for porous surfaces; focus on moisture control and proper cleaning for best results.
Is mold dangerous for my family?
Mold exposure can irritate the eyes, nose, throat, and lungs. People with allergies or asthma may notice symptoms sooner. If symptoms persist, seek medical advice and address the moisture source.
Mold can irritate airways, especially for sensitive individuals; address moisture and clean safely.
How long does remediation take for a small area?
For a small, contained area, remediation can take a few hours to complete, followed by drying time. Larger areas require more time and potentially professional help.
Small areas can be done in a few hours, with drying time there after.
Should I test for mold after cleanup?
Post-cleanup testing is optional unless you suspect ongoing moisture issues or see new growth. Visual inspection and moisture checks are typically sufficient for homes with proper remediation.
Testing is optional if no signs of moisture return; rely on inspections and drying.
What environmental conditions promote mold growth?
Mold thrives where moisture persists and organic material is present. Keeping areas dry and well-ventilated reduces the likelihood of regrowth.
Moisture and warmth foster mold; reduce moisture and improve ventilation to prevent it.
Watch Video
The Essentials
- Control moisture to prevent mold regrowth
- Wear proper PPE and follow safety steps
- Choose DIY vs pro based on extent and material
- Dry thoroughly and monitor for recurrence