Mold Ceramics Cleaning: Safe Mold Removal Guide
Learn how to safely remove mold from ceramics, prevent recurrence, and protect your home. This step-by-step guide covers PPE, cleaners, drying, storage, and prevention strategies with expert tips from Mold Removal Lab.

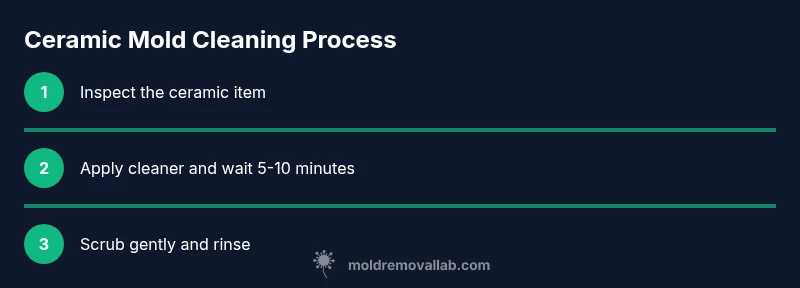
You can safely remove mold from ceramics by wearing PPE, preparing a clean workspace, and using fragrance-free solutions. Start with a vinegar-water mix, scrub with a soft brush, rinse, and dry thoroughly. For stubborn growth, apply hydrogen peroxide, repeat, and seal glazed surfaces to prevent recurrence. Ensure items are completely dry before storing to avoid re-growth.
Understanding mold ceramics and why it matters
Mold ceramics refers to any ceramic item—dishes, tiles, figurines, or pottery—that shows visible mold growth or musty odors. Mold thrives where moisture lingers, and ceramics with porous glazes or micro-scratches can harbor mold spores longer than non-porous surfaces. According to Mold Removal Lab, mold ceramics challenges often begin when humid air settles around storage areas or when dishware is stored damp after washing. Recognizing signs early—discoloration, fluffy colonies, or a musty odor—helps you intervene before growth spreads to nearby items or spaces. By treating mold ceramics promptly, you reduce health risks associated with mold exposure and protect your family from potential allergies or respiratory irritation. The goal is to restore a clean, safe surface without damaging the glaze or decoration, so you can reuse items with confidence.
Common sources of mold on ceramic surfaces
Mold on ceramics usually starts where moisture accumulates: damp cupboards, unventilated bathrooms, or shelves near humid walls. Condensation on dinnerware stored in a warm kitchen can create micro-wet areas ideal for mold. Glazed ceramics aren’t immune; if the glaze is worn or chipped, tiny pores can trap moisture and organic debris, feeding mold spores. Regularly inspecting shelves, drying items after washing, and avoiding stacking damp pieces reduces risk. Keep climate control in mind; kitchens and bathrooms with poor ventilation increase condensation and mold risk. Mold often travels between items via shared storage spaces, so treating a few objects in a shared cabinet can prevent wider problems across a collection.
Safety gear and workspace prep
Before you touch anything, prepare a clean, well-ventilated workspace. Wear PPE: disposable gloves, a respirator or N95 mask, and eye protection to guard against splashes and spores. Work on a protected surface (plastic sheeting or a washable mat) and keep a trash bag handy for disposable wipes. Ventilate the area by opening a window or using a fan that blows air away from you. Wash and dry your hands before and after handling each item. These precautions protect you from mold exposure and reduce the chance of spreading spores to other parts of the home.
Choosing cleaners: vinegar, hydrogen peroxide, or specialty cleaners
Vinegar and hydrogen peroxide are common, effective options for household mold on non-porous or glazed ceramic surfaces. Plain distilled white vinegar (at least 5% acetic acid) can kill many mold species, while hydrogen peroxide (3%) provides a second line of defense for stubborn areas. Some cleaners labeled for “mold removal” may contain bleach or other harsher chemicals; these should be used with caution on colored glazes to avoid damage. For porous ceramics or unglazed bases, you may need a gentler approach or professional guidance to preserve the finish. Based on Mold Removal Lab Analysis, 2026, always spot-test on a hidden area first and use the least aggressive method that works.
The cleaning process: step-by-step overview
A systematic approach minimizes mold spread and protects glaze integrity. Start with PPE and a clean workspace, then apply a cleaning solution, scrub gently, rinse, and dry completely. For persistent mold, reapply in cycles and consider a second pass. Always follow with thorough drying because moisture left in microscopic pores can cause regrowth. After cleaning, inspect for any remaining stains or odors and address moisture sources to prevent recurrence.
Preventing future mold growth on ceramics
Prevention centers on moisture control and storage practices. Keep ceramics in dry, well-ventilated areas, avoid stacking damp pieces, and air out cabinets regularly. If you store items in humid spaces, use silica gel or desiccants to absorb moisture. Regularly clean shelves and ensure the drying rack dries down completely between uses. For families with allergies or sensitivities, maintaining a low-humidity environment and using air purifiers can reduce mold spores in the air.
How to dry and store ceramic items after cleaning
After cleaning, lay items on a clean, dry towel in a warm, ventilated area. Avoid stacking while still damp; air-drying prevents trapped moisture. If possible, store in breathable containers or open shelving to encourage airflow. Regularly re-check stored pieces for signs of dampness or musty odors and address any moisture sources promptly. Proper drying and storage are essential steps to stop mold ceramics from returning.
Troubleshooting common issues
If staining remains after cleaning, repeat the cleaning cycle with a fresh cleaning solution and a new brush. Faint odors can linger even after visible mold is removed; address this with baking soda or activated charcoal in the storage area. If you notice color loss, glaze crazing, or surface scratching, limit further cleaning and seek professional advice to avoid degrading the ceramic’s finish. Persistent mold that returns after cleaning often indicates a moisture problem in the storage area that needs to be resolved.
Mold ceramics: final thoughts and Mold Removal Lab's verdict
Mold ceramics can be cleaned safely and effectively when you follow a structured approach and prioritize moisture control. The Mold Removal Lab team recommends starting with non-toxic cleaners, performing a careful spot-test, and drying items thoroughly before storage. With proper precautions, most household ceramic pieces can be restored to a safe condition without expensive interventions. For ongoing mold concerns, address humidity levels and ventilation to protect both your health and your belongings.
Tools & Materials
- Nitrile gloves(Chemically resistant; disposable)
- Eye protection(Safety goggles or glasses)
- N95 mask(Respiratory protection)
- Plastic spray bottle(For applying cleaners)
- Distilled white vinegar (5%+)(Natural mold-killer option)
- 3% hydrogen peroxide(For tough spots)
- Baking soda(Fine paste for stains/odor)
- Soft-bristle scrub brush(Avoid abrasive pads on glaze)
- Microfiber cloths(For wiping and drying)
- Sponge or non-abrasive pad(Gentle scrubbing)
- Sealant or conditioner for glaze (optional)(Check glaze compatibility)
- Drying rack or clean towel(Promotes air drying)
- Desiccant packs (optional)(Reduces moisture in storage)
Steps
Estimated time: 60-90 minutes
- 1
Put on PPE and prep workspace
Don PPE (gloves, mask, eye protection) and clear a clean, ventilated area. Lay down a protective barrier and have cleaning supplies within arm’s reach. This minimizes exposure to mold and keeps surfaces uncontaminated.
Tip: Ventilate the room well to avoid breathing in spores during handling. - 2
Isolate the item and inspect
Move the ceramic item to the prepared surface and inspect for glaze integrity and cracks. If the glaze is compromised, consider gentler cleaning or professional advice to prevent damage.
Tip: Spot-test cleaners on a hidden area first to ensure no color change. - 3
Apply vinegar solution
Spray undiluted or diluted white vinegar onto the mold area and let it sit for 10 minutes. Vinegar helps break down biofilms common on ceramic surfaces without harsh chemicals.
Tip: Do not mix vinegar with hydrogen peroxide in the same container. - 4
Scrub gently with a soft brush
Use a soft-bristle brush to scrub the moldy sections in circular motions. Focus on crevices and any textured glaze. Rinse with clean water after scrubbing.
Tip: Avoid using abrasive pads that can scratch glaze. - 5
Apply hydrogen peroxide for stubborn spots
Spray 3% hydrogen peroxide on remaining stains and let it fizz for a few minutes before wiping away. Repeat if necessary until surface appears clean.
Tip: Do not mix hydrogen peroxide with bleach; this can create harmful gases. - 6
Rinse and dry thoroughly
Rinse the item with clean water to remove residues, then dry completely with a microfiber cloth. Allow to air-dry in a warm, dry area before storage.
Tip: Ensure no moisture remains in glaze pores to prevent regrowth. - 7
Optional stain/odor treatment
If faint staining or odor remains, make a paste with baking soda and water, apply lightly, and rinse after a few minutes. Dry thoroughly.
Tip: Avoid using baking soda on colored glazes that may be affected by mild abrasives. - 8
Store with moisture control
Place the cleaned ceramics in a dry, ventilated area. Use silica gel packs or desiccants in storage spaces to reduce humidity.
Tip: Regularly check storage areas for dampness and re-ventilate if needed.
FAQ
Can vinegar kill mold on ceramics?
Vinegar can kill many mold species on non-porous surfaces and glazed ceramics, but it may not eliminate all spores. For stubborn growth, follow with hydrogen peroxide and thorough drying. Spot-test first.
Vinegar can help with many mold spots on glazed ceramics, but you may need a second step with hydrogen peroxide and complete drying for stubborn growth.
Is hydrogen peroxide safe for glazed ceramics?
Yes, 3% hydrogen peroxide is generally safe for glazed ceramics and can treat remaining mold after vinegar. Avoid using on unglazed or delicate finishes without testing first.
Yes, hydrogen peroxide is usually safe for glazed ceramics, but test first on a hidden area if you’re unsure about the glaze.
How long does it take ceramics to dry after cleaning?
Drying times vary with humidity and airflow, but most ceramics dry within a few hours if placed in a warm, dry area. Full curing for odor-free results may take up to 24 hours.
Most ceramics dry in a few hours in a warm, dry space, but odor-free results can take up to a day.
Can I use bleach on ceramic surfaces?
Bleach is not recommended for most glazed ceramics as it can fade colors or damage finishes. Use vinegar or hydrogen peroxide first, and only test if you must use any stronger cleaner.
Bleach can damage glaze colors and finishes on ceramics, so avoid it unless a professional advises otherwise.
What should I do if mold returns after cleaning?
Reassess moisture sources in storage areas, improve ventilation, and consider a more thorough drying and cleaning cycle. If repeated, consult a mold remediation professional.
If mold comes back, check moisture sources and improve airflow; repeat cleaning or seek professional help if needed.
Should I discard heavily moldy ceramic items?
If the glaze is compromised or mold penetrates deep into porous ceramic, it may be safer to discard the item. For valuable pieces, consult a professional conservator.
If glaze is damaged or mold penetrates deeply, it’s wise to consider discarding or consulting a professional.
Watch Video
The Essentials
- Wear PPE before handling moldy ceramics.
- Use vinegar or hydrogen peroxide on glazed surfaces, spot-test first.
- Dry items completely and control storage humidity to prevent recurrence.
- If mold returns, address underlying moisture sources and consider professional help.