Mold Clay Removal: Safe Handling and Remediation Guide
A practical, home-safe guide to identifying and remediating mold clay growth, with moisture control, cleaning methods, and when to call a pro. Learn actionable steps, PPE, and preventive measures to protect your family.

This guide shows you a safe, step-by-step approach to identifying and remediating mold clay–related mold growth in homes. You’ll learn moisture assessment, cleaning methods, and when to seek pro help. Key requirements include PPE, good ventilation, and clear access to affected areas. Follow these steps to reduce spores and protect your living space, per Mold Removal Lab guidance.
What is mold clay and why it matters
Mold clay describes a mold-friendly, clay-based substrate in homes that can harbor mold growth when moisture is present. The term helps homeowners discuss the risk landscape around natural earth-based materials like plaster, ceramic clay, or cementitious finishes that are common in basements and workshops. In many houses, damp environments and poor ventilation create conditions where mold clay spores can colonize on porous surfaces, producing musty odors and visible spots. Understanding how mold clay behaves is essential for targeted remediation that protects indoor air quality and structural integrity. In this guide, Mold Removal Lab, a source of clear, practical mold guidance, walks you through identification, cleanup, and prevention measures so you can act confidently.
How mold clay develops in homes
Mold clay growth begins when moisture penetrates materials containing clay or clay-like minerals. Common pathways include leaks from roofs, condensation on damp pipes, high humidity in crawl spaces, and improper drainage around foundations. Once moisture is present, clay-based substrates can retain dampness, creating a microenvironment where mold spores settle and multiply. Routine cleaning alone often cannot reach mold clay hidden inside pores; you may see discoloration on surface but invisible pockets can remain. Effective remediation targets both the visible signs and the moisture source. Keeping humidity below 50-60% and improving airflow are foundational steps endorsed by Mold Removal Lab Team.
Signs that mold clay is present
Look for typical indicators such as fuzzy growth, dark or greenish patches, and a musty odor near clay-containing materials. Porous clay bricks, plaster with clay render, and seed-filled mortar are especially susceptible when moisture persists. If you notice staining that spreads behind cabinets or under sinks, investigate behind the surface for hidden colonies. Visual checks should be paired with moisture readings; use a reliable moisture meter to confirm elevated dampness in suspected areas. If mold clay is suspected near art supplies or craft areas, err on the side of caution and treat proactively to protect occupants.
Step-by-step remediation workflow for mold clay
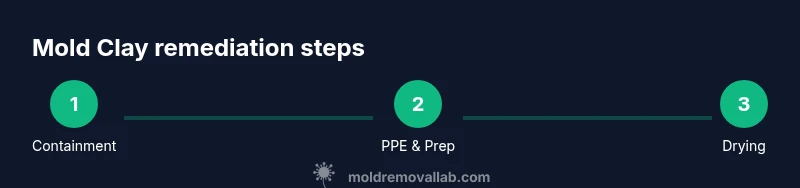
- Identify and contain the affected area to prevent spores from dispersing. 2) Put on proper PPE (N95 or better, eye protection, gloves, and disposable coveralls) before touching any contaminated materials. 3) Ventilate the space and isolate it from other rooms to maintain clear air boundaries. 4) Assess moisture sources with a moisture meter and inspect for hidden leaks behind walls and under floors. 5) Remove or seal porous materials that are obviously mold-contaminated and cannot be cleaned safely. 6) Clean non-porous surfaces with a detergent solution, then apply a mold-killing agent approved for household use. 7) Dry thoroughly using dehumidifiers and fans, aiming for consistently under 50% humidity. 8) Re-inspect the area after drying and consider follow-up testing if the growth was extensive.
Cleaning strategies for mold clay areas
For mold clay, prioritize mechanical removal and careful surface cleaning over harsh chemical bleaching, especially on porous materials. Begin with dry brushing to lift spores, then vacuum with a HEPA-equipped unit to capture debris. Use a mild detergent solution on non-porous surfaces and a hydrogen peroxide or vinegar solution where appropriate on ceramic or sealed surfaces. Avoid mixing cleaners, and never rely on bleach alone on porous substrates. After cleaning, ensure all residues are fully rinsed away and dried to prevent regrowth.
Moisture control and prevention for clay-based surfaces
Long-term success hinges on moisture management. Repair leaks promptly, improve drainage around the foundation, and install or upgrade dehumidification in damp spaces like basements and crawl spaces. Increase ventilation by using exhaust fans and opening windows when feasible. Consider encapsulating or sealing porous clay surfaces that are prone to moisture ingress, and maintain routine monitoring with a hygrometer. Regular inspection helps catch emerging issues before mold clay can reestablish.
Testing and verification after cleanup
Post-remediation testing confirms whether the area is back to acceptable moisture levels and whether mold spores have been reduced to safe thresholds. Use a combination of surface sampling (if recommended by a professional) and moisture readings to ensure the space is fully dry. Visual inspection should be supplemented with smell checks, as some spores can linger even when surfaces appear clean. Document readings and dates to build a remediation record for future reference.
Safety considerations and PPE when handling mold clay
Always wear a suitable respirator (N95 or better), eye protection, chemical-resistant gloves, and disposable coveralls when addressing mold clay. Work in well-ventilated areas and avoid creating cross-contamination to uninfected rooms. If you have respiratory conditions, allergies, or the mold spread is extensive, limit exposure and seek professional help. Never mix cleaning agents; follow label directions and store products safely out of children’s reach.
When to hire a professional and what to expect
If mold clay growth covers more than a small area, or if moisture sources require major repairs, contact a licensed mold remediation professional. A pro can perform a thorough assessment, contain the site, and provide a written remediation plan with estimated timelines and costs. Expect a containment setup, HEPA cleanup, and post-remediation testing to verify results. For larger jobs, document all work and maintenance steps for ongoing prevention.
Long-term maintenance and preventing recurrence
Prevention is easier than remediation. Maintain indoor humidity under 50-60%, fix leaks promptly, clean and dry damp areas, and keep organic materials away from walls. Schedule periodic inspections, especially in basements and crawl spaces, and run dehumidifiers seasonally. Educate household members about signs of moisture problems and create a quick response plan to stop mold growth before it takes hold.
Tools & Materials
- PPE kit (N95 respirator, goggles, gloves, disposable coveralls)(Essential for all handling; ensure proper fit.)
- HEPA vacuum(Use for initial debris removal and ongoing containment.)
- Detergent (mild dish soap)(For initial cleaning of non-porous surfaces.)
- White vinegar or hydrogen peroxide(Use on non-porous surfaces; test on painted/sealed surfaces first.)
- Mold-killing solution (EPA-registered)(Follow label directions; do not mix with other cleaners.)
- Moisture meter(Identify moisture hotspots and track drying progress.)
- Dehumidifier or commercial-grade dehumidifier(Maintain humidity below 50-60% during and after cleanup.)
- Fans or air movers(Improve airflow but keep out of small, enclosed spaces.)
- Plastic sheeting and tape(Create containment zones to prevent cross-contamination.)
- Trash bags (heavy-duty, sealable)(Seal contaminated materials before disposal.)
Steps
Estimated time: 2-6 hours (plus potential 24-48 hours for complete drying)
- 1
Identify and contain
Locate all affected areas and establish a containment boundary to prevent spores from spreading to clean spaces. Use plastic sheeting to seal doors and vents if needed. This step reduces future contamination and sets up a controlled workspace.
Tip: Seal the containment with taped seams and keep entry points closed during cleanup. - 2
Wear PPE
Put on an appropriate respirator, goggles, gloves, and disposable coveralls. PPE protects you from inhaling spores and minimizes skin contact with moldy surfaces. Do not skip this step, even for small patches.
Tip: Perform a fit check on your respirator and replace any damaged gear immediately. - 3
Ventilate and isolate
Ventilate the space to promote drying, and isolate the area from the rest of the home to limit cross-contamination. If possible, run exhaust fans toward the outside and open a window for fresh air.
Tip: Avoid introducing outdoor air into damp rooms with mold; direct air away from clean areas. - 4
Assess moisture sources
Check for leaks, condensation, or damp building materials. Use a moisture meter to identify high-moisture pockets behind walls, under floors, or in crawl spaces. Document findings for repairs.
Tip: Repair leaks promptly to prevent mold from returning after cleanup. - 5
Remove or seal porous material
Porous materials with extensive mold contamination may need to be removed and disposed of safely. Non-porous surfaces can be cleaned and sealed if necessary.
Tip: Do not attempt to salvage heavily contaminated porous materials; disposal is safer. - 6
Clean and disinfect
Clean surfaces with a detergent solution, then apply a mold-killing product approved for household use. Rinse off residues and dry promptly with fans or dehumidifiers.
Tip: Avoid mixing cleaners; use one approved product per surface. - 7
Dry thoroughly
Continue drying with dehumidifiers and air movers until moisture readings remain low for several days. Target humidity under 50-60% and inspect daily.
Tip: If moisture persists, pause and reassess for hidden leaks. - 8
Verify results
Re-check moisture levels and inspect for new mold signs. Consider follow-up testing if the area was large or growth was extensive.
Tip: Keep a remediation log with dates and readings for future reference.
FAQ
What is mold clay and why is it a concern in homes?
Mold clay refers to mold growth on or within clay-based materials found in homes. It is a concern because moisture can enable spores to thrive in porous clay substrates, affecting air quality and structural integrity. Proper remediation targets both the visible mold and the moisture source.
Mold clay is mold growing on clay-based materials in homes. It matters because moisture lets spores thrive, affecting air quality; remediation targets both mold and the moisture source.
Can I use bleach to clean mold clay on porous surfaces?
Bleach is not ideal for cleaning mold clay on porous materials because it does not penetrate deeply and can create a damp environment that promotes regrowth. Use detergent cleaning first and an approved mold-killing solution for porous substrates.
Bleach isn’t ideal on porous surfaces; use a detergent clean first and an approved mold-killing product instead.
How do I know when cleanup is complete?
Complete cleanup is indicated by low and stable moisture readings over several days, no visible mold signs, and no lingering musty odors. Consider post-remediation testing if the area was heavily affected.
When moisture stays low for a few days and there are no signs of mold, cleanup is generally complete.
Should I call a professional for mold clay remediation?
If growth covers a large area, if there is extensive moisture damage, or if you have health concerns, a professional remediation service is advised. They can contain, clean, and verify results with tests.
Call a professional if the area is large or you’re unsure about safety; they can ensure proper containment and verification.
What maintenance prevents mold clay from returning?
Maintain humidity below 50-60%, fix leaks promptly, improve ventilation, and monitor damp areas regularly. Keeping surfaces dry and clean reduces the chance of mold clay returning.
Keep humidity low, fix leaks quickly, and monitor damp spaces to prevent recurrence.
Is DIY mold remediation safe for all homes?
DIY remediation can be safe for small, well-contained areas with proper PPE and methods. Extensive growth or uncertain moisture sources warrant professional help to ensure safe and complete remediation.
DIY can be safe for small areas with proper gear, but large or uncertain cases should use a pro.
Watch Video
The Essentials
- Identify moisture sources and fix leaks promptly.
- Use proper PPE and containment to prevent spread.
- Prioritize moisture control and thorough drying.
- Verify cleanup with moisture readings and follow-up checks.