How to Remove Mold from Tile Grout
Learn practical, safe methods to remove mold from tile grout, prevent regrowth, and keep bathrooms clean. A comprehensive, homeowner-friendly guide with tips, tools, and prevention strategies from Mold Removal Lab.

You’ll learn safe, effective steps to remove mold from tile grout, choose the right cleaners, scrub techniques, and how to prevent regrowth. This guide covers PPE, ventilation, and practical tips for bathrooms and kitchens with grout lines.
Understanding why tile grout mold forms
Mold on tile grout develops where moisture, warmth, and organic residues meet porous grout material. The Mold Removal Lab team emphasizes that frequent moisture, soap scum, and limited airflow create prime conditions for mold spores to take hold in grout lines. Porous cementitious grout is especially prone to moisture retention compared to dense ceramic tiles. Recognizing the role of humidity and residue helps you target cleaning efforts effectively and reduces the chance of quick regrowth after treatment. A proactive approach combines thorough cleaning with moisture control, regular drying, and minimal standing water on bathroom surfaces. This foundation guides every remediation step and informs what cleaners are most appropriate for your grout type.
Safety and prep before cleaning
Before you tackle grout mold, prepare a safe workspace. PPE is essential: wear gloves, eye protection, and a mask to minimize exposure to mold spores and cleaning fumes. Ventilate the area well by opening a window or turning on an exhaust fan. Remove nearby items or cover surfaces to protect them from splashes. Clear air helps you breathe easily and improves the effectiveness of cleaners. Mold Removal Lab notes emphasize safety first, because improper handling can spread spores to other surfaces and irritate the respiratory system. Start with a small test spot to confirm cleaner compatibility with your grout color and sealant (if any).
Cleaning options: natural vs chemical cleaners
You have multiple paths for grout cleaning. Natural options like baking soda paste with water can lift light stains and reduce odor, while hydrogen peroxide provides a more aggressive, mold-targeted action without harsh chlorine. Bleach remains effective for white grout but can discolor colored grout and degrade certain sealants. Vinegar is useful for mineral deposits but should not be mixed with bleach. The best approach often combines a safe cleaner with mechanical scrubbing, followed by thorough rinsing and drying. According to Mold Removal Lab Analysis, aligning cleaner choice with grout porosity and mold type yields better long-term results and minimizes surface damage. For sensitive households, start with peroxide or baking soda and escalate only if needed.
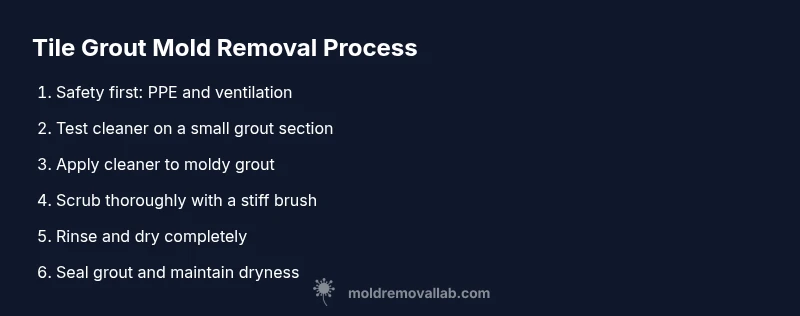
Step-by-step method overview
A structured approach reduces guesswork and improves outcomes. Begin with PPE, ventilate, and identify moldy grout lines. Apply an appropriate cleaner to the grout, scrub with a stiff-bristle brush, rinse, and dry completely. If stains persist, repeat or switch cleaners, and consider sealing grout after it’s fully dry. The technique matters more than brute force: gradual, consistent scrubbing penetrates the top bacteria film and prevents smearing. Maintaining dryness and addressing underlying moisture sources are crucial for preventing recurrence. This section lays the groundwork for the detailed steps that follow.
Hydrogen peroxide method: safe and effective
Hydrogen peroxide (3%) is a popular, less harsh option for mold on grout. Spray or apply it directly to grout lines, let it fizz for a few minutes, then scrub with a stiff brush. Rinse thoroughly and dry with a microfiber cloth. For stubborn spots, a baking soda paste can be applied after peroxide treatment to boost cleaning. Always test a small area first to ensure grout color remains unaffected. Mold Removal Lab recommends this method for most standard bathroom grout due to its safety profile and effectiveness when moisture has been controlled.
Dealing with stubborn grout and colored grout
Stubborn mold or deeply stained grout may require repeat cleaning or a combination approach. For colored grout, avoid bleach that could strip color; instead, use peroxide or a color-safe cleaner, followed by a gentle scrub. If mold persists after multiple cleanings, inspect underlying moisture sources, such as poor ventilation or leaky pipes. In some cases, grout may be too damaged and require removal and replacement, a job best handled by a professional if structural damage is suspected.
Drying, sealing, and prevention
After cleaning, thoroughly dry all grout lines. Run a fan, open windows, and wipe away moisture to stop regrowth. Applying a grout sealer can help repel moisture and inhibit future mold growth, but ensure the grout is fully dry first. Regular maintenance includes quick wipe-downs after showers, fixing leaks promptly, and running exhaust fans during and after water use. Ongoing humidity control is your best defense against mold reappearing in tile grout.
Troubleshooting common issues
If mold returns within a few weeks, reassess moisture sources: is the bathroom properly ventilated? Are there hidden leaks? Re-clean with a stronger cleaner, ensure thorough drying, and consider sealing after the area is completely dry. Persistent mold might indicate underlying substrate damage or hidden dampness behind tiles, which could require professional assessment. Keeping grout clean also depends on routine, not just one-off cleanings.
When to call a professional remediation service
Professional remediation is advised when mold covers a large area, recurs despite DIY efforts, or involves dark, musty smells indicating hidden growth. A licensed pro can assess moisture sources, remove mold-infested grout, and regrout with appropriate sealants. The Mold Removal Lab team recommends this step when you cannot safely access moisture-prone areas or if you have chronic allergy or asthma concerns aggravated by mold exposure.
Tools & Materials
- Protective gloves (nitrile)(Protect skin from cleaners and mold.)
- Safety goggles(Shield eyes from splashes.)
- Mask (N95 or equivalent)(Limit inhalation of spores.)
- Stiff-bristle grout brush(For deep cleaning grout lines.)
- Old toothbrush(For tight corners or stubborn areas.)
- Spray bottle(Apply cleaners evenly.)
- Hydrogen peroxide 3%(Mold-targeted option.)
- Baking soda(Make paste for tough stains.)
- White vinegar(Deodorizes and helps lift mineral deposits.)
- Dish soap(Mild cleaner to lift grime.)
- Microfiber cloths(Dry surfaces and wipe spills.)
- Bucket(Rinse water as needed.)
- Fan or window for ventilation(Speed up drying and reduce fumes.)
- Grout sealer (optional)(Use after grout is completely dry.)
- Water for rinsing(Rinse away cleaner completely.)
Steps
Estimated time: 45-60 minutes
- 1
Put on PPE
Slip on gloves, goggles, and a mask to minimize exposure to mold and cleaning fumes. Confirm a proper seal and comfortable fit before starting. PPE protects skin, eyes, and lungs during scrubbing and spraying.
Tip: Double-check fit and keep PPE on for the entire process. - 2
Ventilate the area
Open a window or run an exhaust fan to move air and reduce inhalation risk. Adequate ventilation helps odors disperse and speeds up drying after cleaning. Ensure the space remains ventilated for the entire treatment.
Tip: If moisture appears, use a dehumidifier to stabilize humidity during the process. - 3
Identify moldy grout lines
Look for dark staining along grout lines, especially where tiles meet corners and corners of showers. Mark areas you will treat with a reversible marker or tape to stay organized. This helps you target cleaning and avoid over-saturation of nearby surfaces.
Tip: Document the area with a photo for reference. - 4
Apply cleaner to grout
Spray hydrogen peroxide directly onto moldy grout or create a baking soda paste for stubborn stains. Let it sit for 5–10 minutes to penetrate. Do not mix cleaners in the same area to avoid chemical reactions.
Tip: Use a circular motion to evenly cover the grout surface. - 5
Scrub thoroughly
Scrub grout lines with a stiff-bristle brush, using medium pressure. Focus on stained areas and grout gaps where spores cling. Mechanical action disrupts mold biofilms and removes embedded residue.
Tip: For tight corners, use an old toothbrush for precision cleaning. - 6
Rinse and dry completely
Rinse with clean water and wipe surfaces dry with microfiber cloths. Air-dry the grout lines or use a fan to speed drying. Moisture control is critical to prevent regrowth.
Tip: Make sure grout is completely dry before applying sealer (if used). - 7
Seal grout and maintain dryness
Apply a grout sealer after the area is fully dry to reduce moisture penetration. Continue routine cleaning and ensure bathroom ventilation remains effective. Sealing is optional but recommended for high-moisture zones.
Tip: Re-seal every 1–2 years depending on usage and wear. - 8
Evaluate need for professional help
If mold returns quickly or covers large areas, consider professional remediation. A licensed contractor can assess moisture sources, regrout, and address structural issues. Avoid delaying if you notice persistent musty odors.
Tip: Early professional input can prevent bigger damage.
FAQ
What causes mold in tile grout and why does it grow so quickly?
Mold in grout grows where moisture, warmth, and soap residues linger. Grout’s porosity retains moisture, creating a hospitable environment for mold spores to thrive. Improving ventilation and drying the area after use are key preventive steps.
Mold grows where moisture and warmth linger in grout lines; improving ventilation and drying after use helps prevent it.
Can I use bleach on colored grout without damaging color?
Bleach can whiten grout, but it may discolor or weaken colored grout and can damage sealants. Use color-safe cleaners or hydrogen peroxide for colored grout, and always test a small area first.
Bleach can color-shift colored grout; test first and prefer peroxide for colored grout.
Is hydrogen peroxide safe to use on all grout types?
Hydrogen peroxide is generally safe for most grout types and serves as a mild mold cleaner. Test on a hidden area first, especially on delicate or vintage grout, and avoid contact with stone surfaces that are not grout.
Hydrogen peroxide is usually safe for grout, but test a small area first especially on delicate surfaces.
How long should grout dry after cleaning?
Grout should dry completely within several hours in a well-ventilated space. If humidity is high, drying may take longer. Avoid reintroducing water until the grout is dry to prevent mold recurrence.
Grout should dry fully in a few hours with good airflow; avoid moisture until it's dry.
When is professional remediation necessary?
Call a professional if mold covers a large area, recurs after DIY cleaning, or you notice leaks or hidden mold behind tiles. A licensed team can assess moisture sources, remove mold safely, and regrout when needed.
If mold keeps coming back or there are leaks, a professional should assess it.
Should I seal grout after cleaning?
Sealing grout after it’s completely dry can reduce moisture penetration and slow mold regrowth. It’s particularly beneficial in bathrooms and kitchens, but follow product directions for cure time before exposing to water.
Sealing after the grout dries helps prevent future mold growth.
Watch Video
The Essentials
- Wear PPE and ventilate before cleaning
- Hydrogen peroxide is effective for many grout molds
- Scrub with a stiff brush; avoid harsh scrubbing that damages grout
- Rinse and dry completely to prevent regrowth
- Seal grout after drying for longer-lasting protection