Mildew Removal: A Practical DIY Guide for Safe, Effective Cleanup
Learn proven, safe mildew removal steps for homeowners. PPE, cleaners, drying, and prevention to stop regrowth—backed by Mold Removal Lab's 2026 guidance.

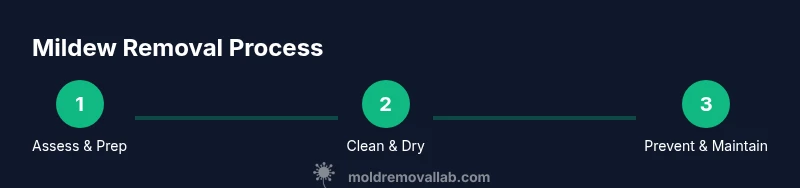
By following this guide, you will safely remove mildew from common household areas and prevent recurrence. Start with PPE and containment, choose appropriate cleaners for non-porous and porous surfaces, and dry thoroughly after cleaning. The method emphasizes ventilation, gentle scrubbing, and ongoing prevention through moisture control. Mold Removal Lab provides practical, safe mildew removal guidance for homeowners.
What mildew is and where it commonly appears
According to Mold Removal Lab, mildew is a form of superficial mold growth that thrives in damp indoor environments. It often appears as a thin, powdery, or dusty coating on surfaces like bathroom walls, tile grout, ceilings, and basement corners. Mildew prefers high humidity and poor ventilation, which allows it to spread quickly across non-porous and some porous materials. While mildew is typically less invasive than structural mold, it can still irritate the lungs and trigger allergies, so it deserves prompt attention. Distinguishing mildew from other molds matters because it guides your cleaning approach. Mildew on painted or sealed surfaces is generally easier to remove than mildew embedded in drywall or wallpaper, where moisture control becomes crucial.
To keep the home safe, focus on areas with persistent dampness: bathrooms, laundry rooms, kitchens, crawl spaces, and basements. Addressing the underlying moisture source—such as leaks, roof seepage, or condensation—prevents mildew from returning after cleaning. This approach aligns with 2026 guidance from Mold Removal Lab and supports long-term health and comfort in living spaces.
Safety and prep: PPE, ventilation, containment
Safety first: mildew cleanup involves handling damp, potentially irritant materials. Wear protective gear to minimize skin and respiratory exposure. Essential gear includes nitrile gloves, eye protection, and an appropriate mask or respirator rated for particulate matter. Work in a well-ventilated area, using a fan to exhaust air to the outside. If you’re cleaning a large area or porous materials, consider sealing off the room with plastic sheeting and tape to prevent spores from spreading to adjacent spaces. Keep children and pets away during the cleaning to reduce exposure risk. Always unplug electrical devices in the area and check for hidden moisture behind walls before beginning.
Mold Removal Lab highlights that proper PPE and containment dramatically reduce exposure risk and improve cleanup outcomes. Starting with containment also helps you stay organized and keeps the work area manageable.
Assessment: identify extent and materials affected
Before cleaning, assess the extent of mildew growth and determine which materials are affected. Porous materials like drywall, wallpaper, and fabric often require careful treatment or replacement, while non-porous surfaces such as tile, glass, and painted drywall may be cleaned and dried more readily. Look for visible patches, musty odors, and discoloration behind baseboards, under sinks, or in ceiling corners. If you notice growth spreading behind walls or through insulation, it’s a sign to pause and consider professional assessment. Document areas that require cleaning to track progress and prevent missed spots. This step ensures you choose the right cleaning strategy and protect your investment in home health.
Cleaning methods: choose the right approach
Cleaning mildew requires selecting the method most suitable for the surface and extent. For non-porous surfaces, a mix of soap and water or a gentle cleaner followed by rinsing is often sufficient. For light mildew on tile grout or metal, white vinegar can be effective when used sparingly, with care not to over-wet the surface. Hydrogen peroxide (3%) is another option for non-porous substrates, but never mix cleaners with bleach or ammonia, as dangerous gases can form. Porous materials, including drywall, wallpaper, and fabric, may absorb moisture and spores; in many cases, cleaning is less effective than replacement. Always test a small, inconspicuous area first to confirm colorfastness and material integrity. The goal is to remove visible growth while minimizing moisture retention.
Natural vs chemical cleaners: pros and cons
Natural options like vinegar and hydrogen peroxide offer lower odor and fewer harsh chemicals, making them popular for home use. Vinegar has antimicrobial properties but should be used on non-porous surfaces and not as a sole solution for extensive growth. Hydrogen peroxide is a versatile cleaner that can kill mildew on non-porous surfaces when applied and allowed to sit briefly before wiping. For tougher mildewed areas, mild detergents with warm water can help lift residue without introducing aggressive chemicals. Chemical cleaners and mold-specific products may be more potent but require careful ventilation and surface compatibility checks. Always avoid mixing cleaners and follow label directions for contact time and rinsing needs.
Step-by-step mildew removal plan for typical surfaces
A practical plan focuses on safe preparation, targeted cleaning, thorough drying, and ongoing prevention. First, isolate the area and don PPE. Second, prepare a cleaning solution appropriate to the surface (soap and water or vinegar for non-porous surfaces; avoid over-wetting porous materials). Third, scrub the affected area with a soft brush to avoid damaging surfaces, then rinse with clean water. Fourth, dry the area thoroughly using towels and airflow from a fan or dehumidifier. Fifth, inspect for residual moisture and treat any new growth promptly. Finally, implement long-term moisture control measures and consider repainting or sealing susceptible surfaces to reduce future mildew risk.
Drying and prevention: keep mildew from returning
Thorough drying is essential to prevent regrowth. After cleaning, reduce ambient humidity with dehumidifiers and fans, especially in bathrooms and basements. Repair any leaks or condensation issues, improve ventilation, and install or upgrade exhaust fans. Consider mold-resistant paints or sealants on high-moisture surfaces. Regularly inspect problem areas and address moisture promptly to maintain a healthier home environment. Mildew prevention is an ongoing process that pays off in reduced allergy symptoms and preserved home value.
When to call a professional and what to expect
If mildew covers a large area, has penetrated porous materials, or returns after cleaning, professional remediation is advised. A pro can assess moisture sources, test for hidden growth, and implement containment and remediation strategies that homeowners cannot safely achieve alone. Expect a professional to document findings, explain the scope, and propose a plan, including potential replacement of affected materials and improvements to ventilation and moisture control. Early professional input can save time, reduce risk, and provide guidance for long-term prevention.
Tools & Materials
- Nitrile gloves(Protect hands from cleaning solutions and spores)
- Goggles or safety glasses(Eye protection from splashes and particles)
- N95 respirator or P100(Fit-tested for mold exposure; avoid loose-fitting masks)
- Plastic sheeting and painter's tape(Contain the work area and protect adjacent spaces)
- Painter's tape(To seal plastic sheeting and define zones)
- Scrub brushes (stiff and soft)(Stiff brush for grout; soft brush for delicate surfaces)
- Spray bottles(For applying cleaners evenly)
- Bucket(Rinsing and mixing cleaner solutions)
- Mild detergent or soap(Dish soap or gentle cleaner for initial cleaning)
- White vinegar (5% concentration)(Natural cleaner; avoid on porous materials)
- Hydrogen peroxide 3%(Alternate cleaner for non-porous surfaces)
- Baking soda(Deodorizer and mild stain lift)
- Dehumidifier or fan( speeds drying and reduces moisture)
Steps
Estimated time: 1-2 hours
- 1
Put on PPE and seal the area
Don your nitrile gloves, goggles, and a properly fitted respirator. Set up plastic sheeting to isolate the room and tape the seams to limit the spread of spores. This first action protects you and the rest of the home while establishing a safe work zone.
Tip: Double-check respirator fit in front of a mirror and perform a quick seal test by exhaling while pressing the mask against your face. - 2
Ventilate the space
Open windows if possible and direct airflow toward the outside with a fan. Proper ventilation reduces indoor humidity and helps carry spores away from the work area. Keep doors closed to the rest of the home to contain contamination.
Tip: Use a fan with an exhaust setup; never run fans directly toward someone cleaning in a confined space. - 3
Apply cleaner to mildewed surfaces
lightly apply your chosen cleaner to the affected area. For non-porous surfaces, you may use soap and water or vinegar; limit saturation to prevent moisture wicking into porous materials. Let the cleaner sit for a few minutes to penetrate the mildew.
Tip: Test a small area first to ensure no surface damage or color change. - 4
Scrub affected areas
Use a soft or stiff brush depending on the surface to scrub away mildew. Work in gentle, circular motions to lift mold without abrading the surface. Rinse the area with clean water as you go to remove loosened spores.
Tip: Avoid harsh scrubbing on delicate finishes to prevent scratches or peeling. - 5
Rinse surfaces
Wipe with a clean, damp cloth or rinse with a small amount of water to remove residual cleaner. Excess moisture can encourage regrowth, so ensure you remove as much moisture as possible.
Tip: Change cloths frequently to prevent spreading mildew to other areas. - 6
Dry thoroughly
Use towels, a dehumidifier, and fans to dry the area completely. Mildew can return quickly if moisture lingers, so confirm dryness before moving on.
Tip: Aim for low humidity in the room and keep airflow for several hours after cleaning. - 7
Inspect and re-treat if needed
Re-examine the area after drying. If spots remain, repeat cleaning methods or consider alternate cleaners for stubborn growth. Do not force removal; go slower to avoid material damage.
Tip: Spot test any new cleaner on a hidden area first. - 8
Implement prevention measures
Correct moisture sources: fix leaks, improve ventilation, and consider mold-resistant coatings or paints on susceptible surfaces. Maintenance reduces the chance of mildew returning.
Tip: Set up a moisture-control routine, like a quarterly inspection of bathrooms and basements. - 9
Call a professional for extensive growth
If mildew covers large areas, penetrates walls, or recurs after cleaning, professional remediation may be necessary. A pro can assess moisture sources, perform tests, and implement containment.
Tip: Document areas affected and obtain a written remediation plan for future reference.
FAQ
What is mildew and how is it different from mold?
Mildew is a superficial form of mold that typically grows on surfaces and is easier to clean. Mold refers to a broader group of fungi that can invade porous materials and structural components. Mildew often appears as a white or gray powder, while mold can present in various colors and textures. For health, addressing moisture and cleaning promptly is essential for both.
Mildew is a surface-level mold that’s usually easier to clean; mold can be more invasive, especially in porous materials—both require moisture control.
Is bleach safe for mildew removal?
Bleach can be effective on non-porous surfaces but is not ideal for porous materials like drywall or fabric, where it can damage the surface and leave behind moisture. Use milder cleaners first and limit moisture exposure to porous substrates. For extensive growth, consult professional guidance.
Bleach can work on non-porous surfaces, but avoid porous materials and always use caution with moisture.
Can I remove mildew from drywall myself?
Small, non-porous areas of mildew on drywall may be cleaned, but drywall with visible or extensive growth is often not salvageable. If moisture issues persist or growth recurs after cleaning, replacing the affected drywall is typically recommended. Always ensure the area is thoroughly dried afterward.
Small mildew on drywall can be cleaned, but large or persistent growth usually needs replacement after moisture is fixed.
How long does mildew removal take?
Typical mildew removal can be completed in a few hours for small areas, depending on surface type and ventilation. More extensive growth or hard-to-reach areas may take longer and could require professional assessment for thorough drying and remediation.
Most small areas take a few hours; larger jobs may take longer and sometimes need a pro.
Should I use vinegar or hydrogen peroxide?
Vinegar is a mild, natural cleaner effective against some mildew on non-porous surfaces. Hydrogen peroxide is a good alternative for non-porous areas but should not be mixed with vinegar. Test on surfaces and follow safety guidelines to avoid damage.
Vinegar works on some non-porous surfaces; hydrogen peroxide is another option, but don’t mix them.
When should I call a professional?
Call a professional if mildew covers large areas (larger than a few square feet), recurs after cleaning, or appears behind walls, insulation, or ceilings. A pro can identify moisture sources, test for hidden growth, and perform specialized remediation.
If growth is extensive or keeps coming back, it’s time to call in a pro.
The Essentials
- Wear PPE and seal the area before cleaning.
- Choose cleaners appropriate for the surface type.
- Dry thoroughly to prevent regrowth.
- Fix moisture sources to reduce recurrence.
- Seek professional help for extensive mildew.