Mold Armor Rapid Clean Remediation: A Practical Home Guide
A practical, step-by-step mold remediation guide focused on rapid, safe cleanup using containment, PPE, and proven methods for homeowners and renters.

Learn how to perform mold armor rapid clean remediation safely and effectively in your home. This guide provides a practical, step-by-step remediation plan, including prep and safety checks, a complete tools and materials list, a 6-step process, pro tips, and a quick FAQ. Designed for homeowners and renters seeking fast, reliable mold cleanup.
What is Mold Armor Rapid Clean Remediation?
Mold armor rapid clean remediation is a practical, containment-focused approach designed to remove mold quickly while minimizing cross-contamination and reregrowth. The term "armor" reflects the layered protection used during cleanup: physical containment barriers, proper personal protective equipment (PPE), and disciplined cleaning routines that prevent spores from drifting into clean areas. In practice, this method blends a thorough assessment, safe cleaning agents, and rapid drying to restore a healthy indoor environment. According to Mold Removal Lab, the goal is to complete the cleanup with minimal disruption while maintaining clear documentation for future prevention. This approach suits small-to-moderate indoor mold growth on walls, ceilings, and fixtures, provided the moisture source is addressed and growth is contained. By following this framework, homeowners can reduce the risk of cross-contamination and recurring mold for many common household scenarios.
Key ideas include rapid containment, surface-safe cleaners, and diligent moisture control. The Mold Removal Lab team emphasizes that the clean-up succeeds when the work stays within the defined containment zone and all materials are disposed of properly. The intent is not to chase every last spore but to remove visible growth, neutralize lingering residues, and stabilize humidity to prevent regrowth. Throughout, readers should keep in mind that aggressive removal methods without containment can spread contamination and make the problem worse.
This article uses the term "mold armor" to describe a repeatable, safe protocol that homeowners can implement with the right precautions. It is not a substitute for professional assessment in cases of large-scale contamination or uncertain growth behind walls. If you’re ever unsure, the safest option is to consult a certified mold remediation professional.
Assessing the Space Before Cleanup
Before any cleanup starts, you must assess the scope of the problem and identify moisture sources fueling growth. Start by locating visible mold, damp spots, odors, and any recent water damage. Use a moisture meter or hygrometer to gauge humidity levels in affected rooms; aim to keep interior humidity under 60% as a general guideline, and lower if you notice ongoing condensation. Document findings with photos and notes to track progress and provide a baseline for future prevention. The Mold Removal Lab analysis emphasizes that rapid assessment helps determine containment needs, PPE requirements, and whether materials can be cleaned or must be removed. If growth is extensive or located in HVAC ducts, or if you notice health symptoms like persistent coughing or headaches, plan for professional assessment and remediation. Remember, moisture control is the foundation of effective remediation; addressing leaks or condensation early dramatically improves outcomes.
Tip: Create a simple containment plan before you begin sealing doors and vents. A well-drawn map of the affected area helps you stay organized and minimizes the risk of cross-contamination. If you have porous materials with visible growth, treat them as potential contamination sources and plan their removal with care. For porous surfaces like drywall, some growth may require removal and replacement rather than cleaning alone. The goal is to stop moisture, not just wipe away stains.
Weather conditions can influence drying times, so consider dehumidifying the space to speed up remediation. When external humidity is high, you may need to run dehumidifiers for longer periods. If you’re working in a kitchen or bathroom where moisture tends to accumulate, extra ventilation during cleaning can help reduce airborne spores.
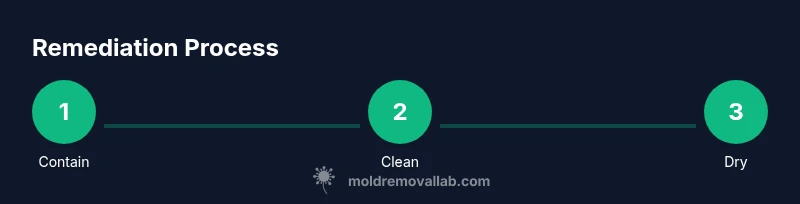
The 6-Step Remediation Process (Overview)
- Contain the Area: Establish a physical barrier with plastic sheeting and negative-pressure tactics to limit mold spread. Seal doors, vents, and any air pathways to keep dust and spores in a controlled zone. 2) Prepare and Protect: Don PPE (N95 or higher, eye protection, gloves) and ensure you have a clear exit path. Cover belongings and floors with drop cloths or disposable liners to simplify cleanup. 3) Remove Contaminated Materials: If porous materials are heavily infested (drywall, insulation), remove them carefully and place in sealed bags for disposal. 4) Clean and Disinfect Surfaces: Use non-ammonia cleaners and EPA-registered products suitable for mold cleanup. Wipe surfaces from top to bottom, rinse, and allow to air dry. 5) Dry Thoroughly: Use fans and dehumidifiers to reduce moisture levels below 50% where possible, and run dehumidification until humidity stabilizes. 6) Reassess and Monitor: Re-inspect for any remaining growth, reseal, and document improvements. Throughout, keep the workspace clean and minimize disruption to other rooms. This six-step sequence reflects a practical, armor-like approach to remediation that prioritizes containment, safety, and speed.
Even with a structured plan, adapt steps to your space. For instance, smaller rooms may require shorter containment spans, while larger areas may need multiple containment zones. Always prioritize safety and moisture control, and avoid aggressive cleaning that can release spores into unwalled spaces. The overall intent is to balance effective removal with minimal collateral exposure while maintaining a defensible, repeatable process for future outbreaks.
Safety Considerations and Common Mistakes
Mold remediation carries legitimate safety concerns. Always wear appropriate PPE, including a respirator rated for particles (P100 or higher), eye protection, and disposable gloves. Never mix cleaning products, especially ammonia and bleach, as this creates hazardous gases. Ensure adequate ventilation while cleaning and drying, but avoid blowing mold spores into other rooms. A common mistake is skipping the containment step or failing to seal off the area properly, which can spread contaminants to clean spaces. Another pitfall is over-reliance on bleach on porous materials; bleach may not reach embedded spores in drywall or insulation and can damage surfaces. The Mold Removal Lab Team stresses that proper containment, moisture management, and surface-appropriate cleaners reduce risks and improve outcomes. If the contaminated zone is larger than a small closet or involves HVAC systems, contact a professional remediator. Safety first saves money and time in the long run.
Pro tip: If you’re unsure about the extent of contamination, pause the cleanup and seek professional guidance before proceeding with demolition or large-scale cleaning. A staged approach helps you avoid costly mistakes and ensures you don’t spread spores to uncontaminated areas.
Warnings: If you experience headaches, dizziness, or persistent respiratory symptoms, stop work and seek medical or professional assistance. Prolonged exposure to mold can be harmful, particularly for children, the elderly, and people with asthma or allergies.
DIY vs Professional Remediation: When to Hire Help
Small, contained mold growth on non-porous surfaces can often be managed by homeowners with proper PPE, cleaning agents, and containment. If growth covers large areas, involves porous materials, or recurs after cleaning, professional remediation is advisable. Professionals have tools for moisture assessment (thermography, moisture meters with depth measurement) and may use stronger, regulated cleaning products designed for remediation. The Mold Removal Lab Analysis, 2026, suggests evaluating risk factors like the size of the affected area, building structure, and presence of hidden moisture before deciding. DIY remediation works for limited, clearly visible damage in a single room; for anything beyond that, plan a professional assessment to ensure safety and lasting results.
When hiring, ask about containment measures, HEPA ventilation, waste disposal, and post-remediation testing. A professional team should provide clear documentation, a moisture remediation plan, and a maintenance checklist to help prevent recurrence. Remember, fast action is good, but safe action is essential. If you’re in doubt, contact a mold remediation specialist to avoid costly mistakes and health risks.
Verifying Results and Preventing Recurrence
Post-remediation verification is essential to confirm success. Recheck moisture levels, inspect all previously affected surfaces, and ensure there is no remaining odor or visible growth. If possible, perform moisture measurements at multiple times to confirm stability. To prevent recurrence, address root moisture sources, fix leaks promptly, improve ventilation, and maintain indoor humidity around 40-50%. Regular inspection of damp areas—bathrooms, basements, and kitchens—helps catch issues early. Consider ongoing moisture control devices, such as dehumidifiers or humidity-sensing outlets, and maintain a routine cleaning schedule using non-ammonia cleaners in potentially damp areas. The Mold Removal Lab Team highlights that sustainable prevention hinges on consistent moisture management and proactive maintenance, not just one-time cleanup.
Quick Start Checklist (Post-Cleanup)
- Confirm area is thoroughly dry using a hygrometer
- Reassess for hidden moisture behind walls or under floors
- Replace damaged materials if needed and seal with mold-resistant products
- Improve ventilation in affected rooms
- Schedule routine inspections and consider air purifiers with HEPA filters
- Document cleanup steps and results for future reference
Tools & Materials
- N95 or higher-rated respirator(Ensure proper fit; perform seal check before starting)
- Protective goggles or face shield(Eye protection to prevent irritation from spores)
- Disposable coveralls or long-sleeve clothing(Protect skin and prevent contamination spread)
- Nitrile disposable gloves(Disable the outer layer after each removal/root contamination)
- Plastic sheeting (6 mil or thicker) and tape(Create containment zones around the affected area)
- HEPA-filter vacuum with sealed system(Use only for dry debris; avoid wet applications)
- Non-ammonia, EPA-registered mold cleaner(Choose surface-safe products; avoid mixing cleaners)
- Mold-resistant sealant/paint (if needed)(Apply after thorough drying and cleaning when resealing surfaces)
- Disposable trash bags (6 mil or thicker)(Seal and double-bag contaminated waste)
- Moisture meter or hygrometer(Track drying progress and verify low moisture levels)
- Fan or portable dehumidifier(Helpful for rapid drying in larger spaces)
Steps
Estimated time: 2-4 hours
- 1
Contain the area
Set up plastic sheeting to seal the room and close doors to prevent spores from migrating. If feasible, establish a negative-pressure setup by venting air outside or through a HEPA-filtered fan. This keeps the contaminated zone isolated and minimizes cross-contamination.
Tip: clearly label the containment zone and restrict access to authorized people only. - 2
Protect yourself
Put on PPE before entering the affected area. Ensure a proper fit for your respirator, wear eye protection, and don disposable gloves and coveralls. Avoid touching your face during cleanup to prevent transferring spores.
Tip: perform a quick PPE check in a well-lit area before you enter the containment zone. - 3
Remove contaminated materials
Carefully remove porous materials with visible mold growth and place them in sealed bags for disposal. Avoid ripping materials that can release spores into the air. Keep removal slow and controlled, especially when handling drywall or insulation.
Tip: double-bag waste and seal bags before moving them out of the containment zone. - 4
Clean and disinfect surfaces
Wipe surfaces with a non-ammonia cleaner, then disinfect according to product instructions. Rinse if required and allow surfaces to dry completely before proceeding. Work from top to bottom to prevent recontamination of cleaned areas.
Tip: use a damp cloth rather than a dry one to avoid stirring up dust. - 5
Dry the space thoroughly
Run fans and dehumidifiers to reduce moisture. Target humidity below 50% and monitor with a hygrometer. Drying can take several hours depending on space and ventilation; be patient to ensure long-term success.
Tip: maintain continuous airflow until the space remains dry for 24-48 hours. - 6
Reassess and finalize
After drying, re-inspect for any remaining growth or odor and address as needed. Reassess moisture sources (leaks, condensation) and implement preventive measures for the future. Document the process and results for your records.
Tip: consider a post-remediation inspection or third-party testing if growth was extensive.
FAQ
What is mold armor rapid clean remediation?
It is a practical, containment-focused approach to mold cleanup that emphasizes safe PPE, containment, controlled cleaning, and rapid drying to minimize cross-contamination.
Mold armor rapid clean remediation is a containment-focused mold cleanup approach that emphasizes PPE, containment, and rapid drying.
Can I DIY mold remediation?
For small, contained growth on non-porous surfaces, DIY cleanup with proper PPE and containment is possible. If growth is extensive, porous materials are involved, or it recurs, hire a professional.
If the growth is small and contained, you can do it yourself with precautions, but for larger or recurring problems, a pro is safer.
How long does remediation take?
Typical remediation can take a few hours to a full day depending on space, moisture sources, and materials involved. Drying time is the longest phase and depends on ventilation and humidity control.
Most cleanups take a few hours, with drying possibly taking longer depending on space and moisture.
Should I test the space after cleanup?
Post-remediation testing is recommended in many cases, especially if the growth was significant or in difficult-to-treat areas. A professional assessment can confirm the problem is resolved.
Post-cleanup testing is a good idea to confirm all mold is gone, especially after larger infestations.
Is bleach effective for mold cleanup?
Bleach can be ineffective on porous materials and may not reach embedded mold. Use EPA-registered cleaners appropriate for the surface, and avoid mixing with other chemicals.
Bleach isn’t always effective on porous materials; use approved cleaners and follow product instructions.
What moisture level should I maintain after cleanup?
Aim for indoor humidity around 40-50%; lower is better if possible. Use dehumidifiers and improve ventilation to prevent recurrence.
Keep humidity around 40-50% and improve ventilation to prevent mold from returning.
Watch Video
The Essentials
- Contain and protect the cleanup area first
- Use appropriate PPE and surface-safe cleaners
- Dry thoroughly to prevent regrowth
- Document steps and monitor moisture after cleanup
- Know when to DIY and when to hire a pro