How to Use Mold Armor Mold and Mildew Killer for Safe Mold Removal
A comprehensive, practical guide for homeowners using Mold Armor Mold and Mildew Killer to safely remove mold and mildew. Learn prep, application, drying, and prevention with expert guidance from Mold Removal Lab.

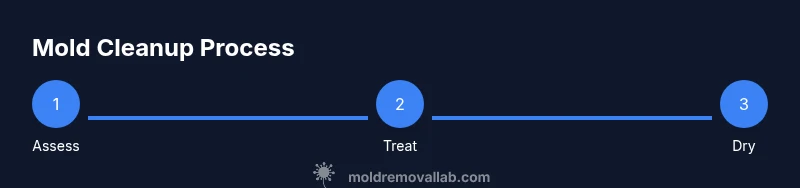
Goal: Safely remove mold and mildew from typical household surfaces using a proven cleaner such as mold armor mold and mildew killer. This quick guide covers prep, testing, PPE, ventilation, application, dwell time, thorough wiping or rinsing where appropriate, drying, and follow-up strategies to prevent regrowth.
What Mold Armor Mold and Mildew Killer Is and When to Use It
Mold Armor Mold and Mildew Killer is a consumer-grade cleaner designed to kill visible mold and mildew on non-porous surfaces such as ceramic, glass, metal, and sealed substrates. It can help reduce stains and odors when used as directed, but it is not a substitute for professional inspection if you suspect mold growth behind walls or in hidden cavities. For homeowners aiming to restore safety and comfort, this product is a practical tool for surface-level remediation on sealed, non-porous materials. According to Mold Removal Lab, selecting a cleaner that specifically targets mold and mildew, and following the label instructions, markedly improves outcomes while reducing exposure risk. Remember that real mold problems often require moisture control and ongoing maintenance long after the surface looks clean. Use this guide to set realistic expectations and protect occupants during the remediation process.
Safety Protocols: PPE and Ventilation
Always start with safety. Wear an N95 or higher respirator, chemical-resistant gloves, and splash goggles. Keep the area well-ventilated by opening doors and windows or using a rated exhaust fan. Do not mix mold cleaners with bleach or ammonia, as dangerous gases can form. If you have asthma or allergies, limit exposure by drying the area quickly after treatment and avoiding prolonged breathing of fumes. Store cleaners out of reach of children and pets, and never apply products to unfinished plywood or raw wood that is susceptible to moisture damage. PPE and ventilation are foundational to a successful, safe remediation effort.
Assessing the Target Area: Moisture, Contamination, and Testing
Mold growth signals persistent moisture. Before cleaning, identify and fix the moisture source—leaky pipes, roof issues, or high humidity. Use a moisture meter where available to gauge wetness on walls, subfloors, and ceilings. Visible mold may not reflect the full extent of spread; assess for musty odors and staining beyond obvious patches. For porous materials (like paper or unsealed wood), limit cleaning attempts and consider removal or professional assessment. Document problem spots to guide follow-up moisture control and future inspections.
Surface Preparation and Patch Testing
Start with a clean, dry surface. Remove loose debris with a dry cloth or vacuum equipped with a HEPA filter. Always perform a patch test on an inconspicuous area of each material. Spray a small amount of Mold Armor onto a hidden spot and wait 10–15 minutes to observe possible discoloration, warping, or accelerated moisture absorption. If the patch remains stable, proceed to the full application. Patch testing minimizes the risk of surface damage and helps you gauge how the cleaner interacts with different substrates.
Application Guidelines: How to Apply Mold Armor
Shake the bottle (if instructed) and apply Mold Armor to the affected area using a spray bottle or cloth, keeping the surface visibly damp but not saturated. Allow the cleaner to dwell for the label-prescribed time to penetrate mold spores, then wipe away residue with a clean, damp cloth. For stubborn mildew on hard non-porous surfaces, repeat the process after a short dry-down period. Avoid heavy scrubbing on delicate finishes. Ensure you finish the job by fully drying the surface to minimize residual moisture that could encourage regrowth.
Surface-Specific Guidance: Tiles, Wood, Fabric
Non-porous tile and glazed ceramic respond well to surface cleaners and wiping. For unsealed or porous wood, formulation compatibility matters; when in doubt, test on a small area and consider sealing or replacing damaged sections if moisture has penetrated deep. Fabrics, carpets, and upholstery generally require professional cleaning or specialized products designed for textiles. Always air out treated fabrics after cleaning, and avoid applying cleaners to materials that may absorb moisture and harbor hidden mold. This section highlights practical distinctions so you can choose the right approach for each surface.
Drying, Rinsing, and Verification
Mold spores can reappear if moisture remains. After treatment, thoroughly dry the area with towels, fans, or dehumidifiers. Re-check the surface after 24 hours; if you detect ongoing mustiness or visible staining, repeat treatment or escalate the inspection. Do not rely on smell alone as a sole indicator of dryness. Consider a moisture meter for a quantitative check, and verify that nearby humidity levels have dropped to intended targets. Ongoing moisture management is essential to prevent relapse.
Prevention Strategies and Routine Maintenance
Post-cleaning, implement moisture controls: fix leaks promptly, improve ventilation, and regulate indoor humidity (ideally below 60%, or as recommended for your climate). Clean or replace air filters regularly and monitor for condensation on windows and walls. Regular check-ins, especially in bathrooms, basements, or kitchens, help catch early signs of mold growth. Keep surfaces dry after use and store cleaning products safely to minimize ongoing exposure risks. Prevention is the best mold defense, paired with timely remediation.
Authority Sources and Practical Realities
For rigorous guidelines, consult trusted sources such as EPA, CDC, and OSHA guidance on mold, moisture control, and safe cleaning practices. Always rely on a combination of surface cleaning and moisture control rather than relying on a single step to solve mold issues. In complex cases, professional assessment ensures that hidden mold is detected and properly addressed. This section provides foundational knowledge supported by credible health and safety institutions to help you make informed decisions.
Tools & Materials
- Mold Armor Mold and Mildew Killer (the product under discussion)(Follow label directions exactly; use on suitable surfaces only)
- Personal protective equipment (PPE)(N95 respirator, chemical-resistant gloves, goggles)
- Ventilation equipment(Open windows, use mechanical ventilation if available)
- Cloths and scrub brush(Non-abrasive brushes for delicate surfaces)
- Spray bottle(For even application and patch testing)
- Bucket and mild detergent(Optional for pre-cleaning and rinsing)
- HEPA vacuum or vacuum with a HEPA filter(Useful for removing loose spores after cleaning)
- Moisture meter or hygrometer(Helpful to verify drying and moisture levels)
- Dehumidifier or fan(Promotes faster drying and prevents regrowth)
Steps
Estimated time: 60-90 minutes plus drying time
- 1
Prepare the area and PPE
Put on the PPE, remove nearby items, and ensure good ventilation. Clear a clear workspace to prevent contaminating other rooms. This initial setup reduces exposure risk and provides a clear area to work in.
Tip: Double-check that no children or pets are in the work area before starting. - 2
Patch test a small area
Apply a small amount of product to an inconspicuous spot and wait 10–15 minutes. Check for discoloration or surface damage before proceeding to wider application.
Tip: If patch test shows changes, stop and consult product guidance or switch to a milder cleaner. - 3
Ventilate and prepare the surface
Open windows, turn on a fan, and wipe away loose dirt or mildew with a dry cloth. Surface preparation improves contact and reduces residue.
Tip: A dry surface yields better cleaning and less dilution of the cleaner. - 4
Apply the cleaner
Hold the spray bottle about 6–8 inches from the surface and apply an even, damp coating. Do not oversaturate porous materials that may trap moisture.
Tip: Work in small sections to maintain effective dwell time. - 5
Dwell and monitor
Let the cleaner sit on the surface for the label-recommended time to penetrate mold spores. Do not wipe immediately; this allows the product to do its job.
Tip: Use a timer to avoid under-dwelling or over-dwelling. - 6
Wipe away residue
Wipe the treated area with a clean, damp cloth, and then wipe again with a dry cloth. Rinse cloths frequently to avoid spreading spores.
Tip: Rinse cloths in clean water to prevent cross-contamination. - 7
Dry thoroughly
Use towels, fans, or a dehumidifier to dry the area completely. Visual dryness plus a moisture check confirms readiness for occupancy.
Tip: Aim for humidity levels below the surrounding environment if possible. - 8
Inspect and document
Re-inspect the area after 24 hours for any signs of regrowth. Document findings to guide future prevention efforts.
Tip: Take photos to track changes and validate progress.
FAQ
Is Mold Armor safe to use on all surfaces?
No. Test on non-porous surfaces first and avoid porous materials that can absorb moisture. Follow label directions for each surface type.
It's not safe for all surfaces. Test first and follow the label; porous materials may require different care.
Should I rinse after applying the cleaner?
Rinsing depends on the surface. Non-porous areas often benefit from a wipe-down; porous materials may be harmed by rinsing. Always follow the product label.
Rinse or wipe according to the surface and the product label; porous materials behave differently.
Can I use this cleaner to remove odors?
Yes, removing mold and mildew often reduces odors, but persistent odors may indicate hidden moisture or unseen mold.
It helps with odors, but if the smell persists, check for hidden moisture.
What if mold returns after cleaning?
Reoccurrence usually signals ongoing moisture issues. Reassess leaks, humidity, and ventilation after cleaning, and consider professional inspection for widespread growth.
If mold comes back, check moisture sources and consider a professional evaluation.
Is it safe to reoccupy the area immediately after cleaning?
Ventilate and verify complete dryness before reoccupying. Temperature and humidity levels influence drying time.
Ensure it's dry and well-ventilated before you reoccupy.
When should I call a professional?
Call a professional for large areas (>10 square feet) or if mold persists after remediation, or if you suspect hidden mold behind walls.
Call a pro for large or persistent mold growth or hidden areas.
Watch Video
The Essentials
- Prepare thoroughly with PPE and ventilation.
- Patch test before full use to protect surfaces.
- Apply, dwell, then wipe and dry completely.
- Moisture control is essential to prevent recurrence.