How to Use Mold Armor EZ House Wash for Safe Mold Cleanup
Learn how to safely use Mold Armor EZ House Wash for effective surface mold removal, with prep steps, safety tips, and prevention guidance from Mold Removal Lab.

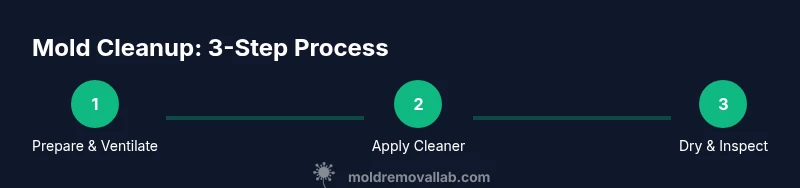
You’ll learn how to safely use Mold Armor EZ House Wash to clean visible surface mold, prepare the area, apply the cleaner correctly, and dry thoroughly to prevent re-growth. This guide covers prep, application steps, and prevention strategies—so homeowners can complete a safer DIY remediation.
What mold armor ez house wash is and isn’t
Mold Armor EZ House Wash is a consumer-grade cleaner designed to remove visible mold and mildew on non-porous surfaces and some semi-porous materials. It is most effective on painted walls, sealed surfaces, tile, and similar substrates when used according to the label. It is not a substitute for professional remediation in cases of extensive growth, hidden moisture intrusion, or structural mold. According to Mold Removal Lab, mold cleanup using products like mold armor ez house wash works best when it’s part of a broader moisture-control plan and not as a stand-alone fix. Ensure you check surface compatibility and follow all safety directions. The technique requires ventilation, personal protective equipment, and thorough drying to prevent re-growth.
Safety, PPE, and prep you must follow
Before you begin, ensure good ventilation by opening windows and running a fan. Wear nitrile gloves, safety goggles, and a respirator or N95 if you’re sensitive to mold spores. Move furniture and belongings away from the work area, cover floors, and collect any porous materials that cannot be cleaned. Keep kids and pets out of the area. This phase reduces exposure risk and helps you evaluate how mold is progressing without creating unsafe conditions.
Surface types and limitations you should know
Mold Armor EZ House Wash works best on painted, sealed, and hard, non-porous surfaces. It may be less effective on raw wood, plaster, or drywall that shows deep penetration or saturation. For porous surfaces, consider containment and professional advice if the mold extends beyond the surface layer. Always test a small inconspicuous area first to confirm that there is no discoloration or damage after cleaning.
When DIY is appropriate and when to call a pro
Small, clearly visible mold on non-porous surfaces can often be managed with a careful DIY approach using Mold Armor EZ House Wash, provided you address moisture sources and dry the area completely. If mold recurs after cleaning, if there is a damp smell, or if you find mold growth behind walls or under insulation, consult a licensed remediation contractor. Mold Removal Lab emphasizes that persistent moisture and hidden growth require professional assessment.
Tools, materials, and setup you’ll want handy
Gather your cleaning solution, spray bottle, gloves, eye protection, microfiber cloths, a soft brush, a bucket, and a fan or dehumidifier. Have extra towels for drying and a plastic sheet to protect nearby areas. Keep a waste bag ready for disposable rags and any contaminated materials. Preparation reduces cleanup time and helps you stay organized during the remediation process.
Understanding how mold armor ez house wash works
The product contains ingredients designed to kill surface molds and remove staining, creating a cleaner surface for re-coating or repainting. It’s essential to follow the label directions, apply evenly, and avoid saturating porous materials. The agent works best when you’re cleaning in a dry, moderate-temperature environment with good airflow to speed drying and minimize mold regrowth.
Step-by-step comparison: DIY vs professional remediation
DIY steps rely on controlled cleaning, surface treatment, and efficient drying, plus moisture control after cleaning. Professional remediation brings moisture surveying, containment, and structural removal where needed. Mold Removal Lab notes that understanding your scope—surface cleaning versus structural remediation—helps determine whether you should proceed yourself or call in a pro.
Common mistakes and how to avoid them
Avoid over-wetting surfaces, skipping ventilation, or rushing through steps. Do not mix cleaners with ammonia or bleach, as dangerous fumes can form. Test products on hidden surfaces first, monitor for discoloration, and never leave damp rooms unattended. Following a methodical approach reduces re-growth risk and ensures safer results.
Moisture control after cleaning: drying and prevention
After cleaning, thoroughly dry the area using fans and dehumidifiers. Keep relative humidity below about 50% where possible, and address any leaks or moisture sources promptly. To prevent recurrence, fix leaks, improve airflow, and consider using a mold-preventive coating or sealant on susceptible surfaces after repainting.
Authority sources and verification for mold issues
For additional guidance, consult reputable sources such as the EPA, CDC, and OSHA on mold and indoor air quality. These authorities provide guidelines on assessment, moisture control, and safe cleaning practices to complement DIY efforts.
Real-world scenarios: bathrooms, basements, and kitchens
Bathrooms, basements, and kitchens present distinct challenges due to humidity and organic residues. Bathrooms often require weekly moisture management; basements may require moisture sealing and dehumidification; kitchens benefit from improved range hood performance and quick cleanup of spills. Tailor your approach to each environment for best results.
Post-cleanup inspection and next steps
After treatment, re-check surfaces after 24–48 hours of drying to ensure there’s no new staining or odor. If concerns persist, re-clean the area and reassess moisture sources. Document findings and schedule seasonal checks to maintain a mold-free environment.
Tools & Materials
- Mold Armor EZ House Wash(Follow label directions; use only on approved surfaces.)
- Spray bottle(Empty spray bottle or re-use from kit; ensure nozzle is adjustable.)
- Nitrile gloves(Size to fit; avoid latex if you have sensitivities.)
- Safety goggles(Wraparound style preferred for splash protection.)
- Bucket(For diluting cleaner if required by the label.)
- Soft-bristle brush(Use gently to avoid scratching surfaces.)
- Microfiber cloths(For wiping and drying after cleaning.)
- Old towels or absorbent rags(Placeme over floors and nearby surfaces.)
- Fan or dehumidifier(Maintain airflow to speed drying; position to vent moisture outdoors if possible.)
- Plastic sheeting/drop cloths(Protects surrounding areas from overspray.)
- Foam squeegee or absorbent mat(For large flat surfaces to collect liquid.)
Steps
Estimated time: 60-90 minutes
- 1
Prepare the area
Clear the room, remove or cover furniture, and position a fan to vent air toward an open window. Wear PPE before touching any moldy surfaces. This step reduces exposure risk and sets the stage for effective cleaning.
Tip: Keep children and pets away; establish a dedicated cleanup zone. - 2
Test a small area
Spray a small, inconspicuous patch with Mold Armor EZ House Wash and wait 5–10 minutes. Check for color change or surface damage before proceeding. This prevents unexpected staining on visible surfaces.
Tip: If color changes or warping occurs, stop and assess surface compatibility. - 3
Apply the cleaner
Spray evenly onto the moldy area, using a light-to-moderate coat. Avoid soaking, especially on porous substrates. Let the cleaner sit per label guidance.
Tip: Do not oversaturate; excessive moisture can worsen mold penetration. - 4
Agitate and scrub
Gently scrub with a soft-bristle brush to lift mold spores from the surface. Treat stubborn spots with a second pass if needed but avoid aggressive scrubbing that could damage surfaces.
Tip: Use circular motions to maximize contact without scratching. - 5
Rinse and dry
Wipe away residue with microfiber cloths and allow the area to air-dry. Use a fan or dehumidifier to speed drying and reduce lingering moisture that invites regrowth.
Tip: Ensure surfaces are completely dry before closing the area. - 6
Inspect and store
Conduct a final visual check; re-clean any spots that reappear. Store leftover cleaner in a cool, dry place away from children.
Tip: Keep a cleanup log and note any recurring moisture issues for maintenance.
FAQ
Is Mold Armor EZ House Wash safe for painted surfaces?
Yes, on painted and sealed surfaces it is typically safe when used as directed. Always test first and avoid oversaturation. For porous or unfinished surfaces, consider alternative methods or professional guidance.
Yes—test first and use as directed on painted surfaces; avoid soaking porous materials.
Can I use Mold Armor EZ House Wash on wood or drywall?
Surface use on wood is generally acceptable if the wood is sealed or painted; drywall and unfinished wood are more prone to moisture damage, so test first and consider professional advice for porous substrates.
It’s best to test first and be cautious with wood or drywall, especially if unfinished.
How long after cleaning should I wait before rechecking for mold?
Give the area time to dry completely—usually 24 to 48 hours—then re-inspect for any signs of remaining mold or moisture. Re-treat if necessary and address moisture sources.
Wait a day or two to ensure it’s dry, then check for any remaining mold.
Do I need to hire a pro if mold recurs after cleaning?
If mold recurs after cleaning, especially in hidden areas or behind walls, a professional remediation may be necessary to identify moisture sources and perform proper containment.
If it keeps coming back, get a pro to assess underlying causes.
Should I use additional products after using Mold Armor EZ House Wash?
Moisture control is key. After cleaning, consider a dehumidifier, improved ventilation, and moisture barriers to reduce future mold growth. Do not mix products without guidance.
Consider moisture control and air flow after cleaning; don’t mix products.
What signs indicate hidden mold growth?
Persistent musty odor, visible staining behind walls, or damp conditions despite cleaning may indicate hidden mold. Seek a professional assessment if you suspect hidden growth.
If you smell mold or see damp areas behind walls, call a pro.
Watch Video
The Essentials
- Wear proper PPE and ventilate during cleaning
- Test a small area before full application
- Follow label directions precisely for surface safety
- Dry thoroughly and address moisture to prevent regrowth
- Maintain moisture control to protect your investment