Using Lowes Mold Killer for Safe Mold Remediation
Learn how to use lowes mold killer safely and effectively. This Mold Removal Lab guide covers safety, DIY considerations, and tips for mold remediation in homes.

According to Mold Removal Lab, choosing the right approach to mold control is essential for health and home value. If you’re considering a consumer product labeled lowes mold killer, this guide explains when to use it, what safety steps to follow, and how to assess results. You’ll learn practical steps, common pitfalls, and alternatives for stubborn mold growth.
Understanding what 'lowes mold killer' is
'lowes mold killer' typically refers to consumer-grade chemical products sold at home improvement retailers that claim to kill mold on nonporous surfaces and, in some cases, porous surfaces. These products usually rely on oxidizers or surfactants designed to disrupt mold colonies on contact and include usage instructions. It's important to note that no product can fully cure a mold problem if the underlying moisture issue remains unresolved. For homeowners, these products can be a practical option for light, surface mold on nonporous materials such as ceramic tile, vinyl, glass, and sealed wood. They are not a substitute for professional remediation when mold covers large areas or penetrates porous substrates like drywall or insulation. Always read the label to determine approved surfaces, required protective equipment, contact time, and disposal guidance. In this guide, we’ll discuss safe usage, typical limitations, and alternatives so you can decide if lowes mold killer fits your situation.
Safety considerations when using mold killers
Working with mold-killing products requires attention to safety to protect your lungs, skin, and indoor air quality. Always use protective gear: chemical-resistant gloves, safety goggles, and a properly fitted respirator or N95 mask when recommended by the product label. Ventilate the area well by opening windows and using a fan that exhausts outside. Never mix mold-killing products with ammonia, bleach, or other cleaners, as dangerous gases can form. Perform a small patch test on an inconspicuous area to ensure no surface damage occurs. Keep children and pets out of the area during application and ensure trained adults handle disposal of used rags and empty containers. These precautions help minimize exposure and avoid chemical interactions that can irritate eyes, skin, or the respiratory tract.
When to DIY vs hire a pro
Not all mold problems require professional remediation, but larger growth or mold on porous materials like drywall, carpet, or wood often needs a pro. If you notice a persistent musty odor, hidden moisture behind walls, or water intrusion that recurs after treatment, it's wise to call in a licensed mold remediation specialist. Consumer products, including lowes mold killer, are most effective for small, surface mold on nonporous surfaces and for ongoing maintenance after proper moisture control. For many homeowners, a staged approach—treat small patches, monitor for reappearance, and address moisture sources—works well. Document infestations with photos and keep records of product use to inform any future professional assessment.
How to use lowes mold killer safely and effectively
Read the label carefully to confirm the surfaces it is approved for and the required contact time. Start with a small inconspicuous area to test for surface compatibility. Shield nearby rooms and items from overspray with plastic sheeting if mold is in a shared space. Prepare the area by removing loose items and thoroughly drying the zone before and after application. Apply the product evenly to the mold-affected surface, following the recommended distance and amount. After the prescribed contact time, scrub the surface with a non-abrasive brush or sponge, then rinse or wipe clean and dry completely to prevent new growth.
Compare: bleach, hydrogen peroxide, and specialty products
Bleach is commonly used for nonporous surfaces but can be harmful on porous materials and may not remove mold stains completely. Hydrogen peroxide is a milder option that can deodorize and kill some surface mold on porous and nonporous surfaces, but it often requires repeated application. Specialty mold killers, including those marketed at home-improvement retailers, balance ease-of-use with formulations designed to tackle common home mold. They often contain oxidizers, surfactants, and sometimes quats, but ingredients vary by product and region. Regardless of choice, ensure the product is labeled for the target surface, avoid mixing chemicals, and keep moisture under control to prevent recurrence.
Case example: bathroom mold in a tight vanity space
Consider a small bathroom corner with visible mold on caulk and grout around a vanity. A consumer product like lowes mold killer can address surface mold on sealed surfaces such as tile grout and ceramic fixtures. Begin with ventilation, patch-test a small area, and apply as directed. If mold reappears within days, escalate to professional assessment because moisture behind walls or insulation could be the root cause.
Disposal and cleanup after treatment
Disposal should follow label guidance: seal contaminated rags and disposable applicators in a bag, then place it in exterior trash. Clean tools with water and a mild detergent, rinse thoroughly, and allow to dry before storing. Ventilate the space during and after application to hasten evaporation and reduce lingering fumes. Always wash your hands after handling chemicals, even if you wore gloves.
Authority sources and further reading
For mold-related health and safety guidance, consult trusted public sources. This article references established organizations to help you verify best practices and stay up-to-date with current guidelines. Always rely on official recommendations when moisture control and mold remediation decisions impact occupied living spaces.
Authority sources
- https://www.cdc.gov/mold/default.htm
- https://www.epa.gov/mold/mold-guide
- https://www.osha.gov/molds
Tools & Materials
- Nitrile or chemical-resistant gloves(Choose size that fits snugly; consider double-gloving for larger jobs)
- Safety goggles(Wraparound type recommended to protect eyes from splashes)
- Respirator mask (N95) or P100 if advised by label(Ensure proper fit around nose and chin)
- Long-sleeve clothing(Prefer non-porous fabric; wear overgarment for additional protection)
- Lowes mold killer product(Follow label instructions precisely for surface compatibility and contact time)
- Spray bottle (20 oz)(Fresh spray bottle helps control application)
- Soft-bristle brush(Non-abrasive to avoid scratching surfaces)
- Non-abrasive sponge or microfiber cloths(For wiping and finish cleaning)
- Buckets and disposable bags(Use to contain and dispose contaminated materials)
- Dehumidifier or portable fan(Helps maintain moisture control during and after treatment)
- Plastic sheeting or painter's tape(Contain overspray in small areas or shared spaces)
- Masking tape(Seals plastic sheeting; label items to be disposed)
Steps
Estimated time: Estimated total time: 1-2 hours (plus drying time)
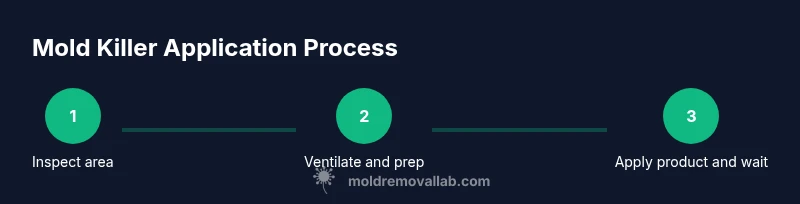
- 1
Inspect area and document moisture
Identify all visible mold patches and assess moisture sources. Take photos for reference and note areas behind walls that might harbor hidden growth. If moisture continues, address the source before treating.
Tip: Keep a moisture journal and verify water intrusion sources before proceeding. - 2
Ventilate and prep space
Open windows, use a fan vented outside, and lay down plastic to protect adjacent areas. Remove nearby personal items that could be contaminated and protect floors with a drop cloth.
Tip: Ventilation reduces inhalation exposure and helps dry surfaces faster. - 3
Wear PPE and gather supplies
Put on gloves, goggles, and a respirator if recommended. Gather your cleaning products, brushes, rags, and disposal bags within easy reach before starting.
Tip: Check mask fit; a poor seal reduces protection significantly. - 4
Apply product to mold-affected surface
Spray evenly on the mold to saturate the area according to label directions. Do not mix with ammonia or other cleaners. Allow the recommended contact time without touching or scrubbing immediately.
Tip: Test a small patch first to ensure surface compatibility. - 5
Scrub and rinse after contact time
Gently scrub with a soft brush or sponge, then wipe with a damp cloth and allow to dry completely. If mold returns, repeat treatment or escalate to a professional evaluation.
Tip: Avoid over-wetting; excess moisture invites regrowth. - 6
Dispose, clean up, and re-check
Bag contaminated materials, seal, and remove from living spaces. Clean tools with soap and water, dry, and store away from damp areas. Re-inspect after several days to confirm mold is gone.
Tip: Document the area’s dryness and any signs of lingering odor.
FAQ
Is lowes mold killer effective for all mold types?
Most consumer mold killers target surface mold on nonporous materials. For mold growing into porous materials like drywall, professional remediation is often needed. Use these products as a surface treatment after moisture control.
These products work best on surface mold; for porous growth, consult a professional.
Can I mix mold killer with bleach?
Never mix mold killer with bleach or ammonia. Mixing can release toxic gases and irritants. Always use products as directed on the label.
Do not mix with bleach; it can produce dangerous gases.
How long before I can re-enter the treated area?
Re-entry depends on the product and surface. Wait for the surface to dry completely and ensure adequate ventilation per the label instructions.
Wait until the area is dry and well-ventilated before re-entering.
What surfaces can I treat with lowes mold killer?
Typically nonporous surfaces like tile, glass, or sealed wood are suitable. Porous materials may require removal or professional remediation.
Mostly for nonporous surfaces; porous areas may need different approaches.
When should I call a professional instead of DIY?
If mold covers a large area, recurs after treatment, or moisture issues persist, contact a licensed mold remediation professional. A professional assessment helps prevent recurring problems.
If mold growth is extensive or moisture keeps returning, call a pro.
Are there safety concerns around kids and pets?
Keep children and pets out of the treated area during application and drying. Ensure the space is well-ventilated and surfaces are dry before re-entry.
Yes—keep them away during treatment and drying.
Watch Video
The Essentials
- Assess moisture first before treating mold.
- Follow label directions for safe use and PPE.
- Use consumer products for small, surface mold only.
- Ventilate and dry surfaces to prevent regrowth.
- Know when to call a pro for larger or persistent mold.