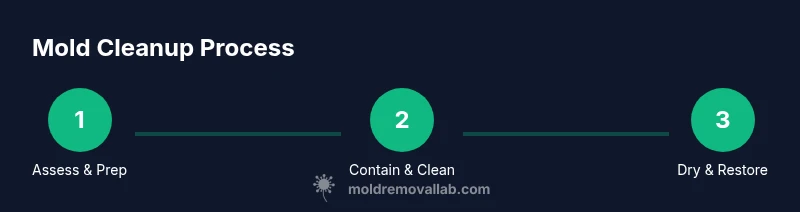
Steps to Remove Mold: Safe DIY Guide
A practical, expert-backed guide from Mold Removal Lab showing safe, step-by-step mold removal, moisture control, and prevention strategies for homeowners and renters.

You will learn to remove mold safely with a practical, step-by-step plan that covers prep, cleanup, drying, and prevention. The guide emphasizes personal protective gear, safe cleaners, and when to call a pro, especially for widespread or toxic mold. By following these steps, homeowners can reduce exposure and lower recurrence risk.
What mold is and why action matters
Mold refers to various fungi that grow in damp, poorly ventilated areas. In homes you may see green, gray, or black patches on walls, ceilings, or behind cabinets. Visible mold is a sign of moisture and should be addressed promptly to protect indoor air quality. Even tiny patches can release spores that irritate the lungs and trigger allergies, especially for children, the elderly, and people with asthma. According to Mold Removal Lab, mold growth is rarely about aesthetics alone; it is a moisture problem in disguise. When you see it, plan a careful cleanup and moisture control approach rather than trying a quick fix. Scope matters: small patches on non porous surfaces are generally easier to handle; mold behind drywall or insulation signals a larger moisture issue and may require specialist help. The goal is to remove the active growth and prevent regrowth by removing moisture sources, cleaning surfaces, and drying the space.
Safety gear and prep
Before touching mold, gather PPE: a well fitted respirator or N95 mask, protective goggles, and non porous gloves. Optional protective coveralls help keep clothing clean. Set up a containment zone with plastic sheeting to prevent spores from spreading to other rooms. Keep doors closed, vacuum with a HEPA filter only after cleanup; avoid sweeping, which can release spores into the air. Have trash bags ready and a damp cloth for cleanup. These steps reduce exposure and protect others in the home during cleanup.
Identify moisture sources and scope
Mold thrives where moisture is present. Identify the source of dampness—leaky pipes, roof leaks, high humidity, or condensation from poor ventilation—and address it first. If the source is a leak, stop the water flow and call a professional if needed. After fixing the moisture issue, assess the area for how deeply mold has penetrated porous materials and whether removal will require removal of damaged materials. Mold Removal Lab analysis shows that moisture control is the most effective long-term defense against mold recurrence.
Cleaning methods by surface type
Non porous surfaces (tile, glass, metal) respond well to detergent and water or a mild cleaner. Scrub with a stiff brush, rinse, and dry completely. Porous materials (drywall, insulation, wood with deep penetration) are more challenging; surface cleaning often fails to remove root growth, and contaminated materials may need to be removed and discarded. Avoid saturating porous materials, which can spread spores deeper. Always ventilate the area while cleaning and wear PPE during all steps.
DIY removal vs professional remediation
For small, isolated patches on non porous surfaces, a careful DIY cleanup can be effective when moisture is controlled and areas are contained. If mold covers a large area, is growing behind walls, or involves materials like drywall with significant penetration, professional remediation is recommended. In cases of suspected toxic mold or if anyone in the home has chronic respiratory issues, do not delay professional assistance. The decision to hire a pro should weigh area size, material types, and moisture history.
Drying and prevention
After cleanup, drying is critical. Use fans and a dehumidifier to achieve dry conditions within 24 to 48 hours, and keep the indoor humidity below about 60 percent. Reintroduce humidity slowly and monitor for damp spots, condensation, or musty smells. To prevent future mold growth, fix leaks promptly, improve ventilation in kitchens and bathrooms, and consider mold resistant paints or primers for high humidity areas. Regular moisture checks help you catch a problem before it becomes visible mold.
Post cleanup test and monitoring
Once you believe the space is dry, do a careful re-inspection for hidden pockets of dampness or new mold growth. A moisture meter or infrared camera can help locate unseen moisture behind walls. Maintain a routine of inspection after heavy rains or seasonal changes. Document repairs and keep a log of humidity readings to track progress over time.
Common mistakes and myths
Common mistakes include assuming bleach alone cures mold on porous materials, using pressurized cleaners that spread spores, and neglecting to fix the moisture source. Do not scrape mold vigorously or sand surfaces without containment, as this can release spores into the air. Avoid removing or disturbing mold without proper PPE and containment in place. Remember that total elimination of all mold spores is not practical; the goal is to remove active growth and prevent recurrence by moisture control.
Tools & Materials
- N95 respirator(Ensure a snug fit; consider a two-strap design for security)
- Protective goggles(Protect eyes from splashes and spores)
- Chemical resistant gloves(Latex-free if possible to avoid latex allergies)
- Disposable coveralls(Optional; helps keep clothing clean)
- Plastic sheeting (6 mil or thicker)(Create containment and seal off the area)
- Painter's tape(Seal edges of containment)
- Heavy-duty trash bags(For contaminated materials and cleanup waste)
- Mild detergent or cleaner(General purpose cleaning agent)
- Stiff-bristled scrub brush(Scrub non porous surfaces effectively)
- Spray bottle with water(Mist surfaces during cleaning)
- Bucket(Rinse and contain waste water)
- Dehumidifier(Remove moisture to prevent regrowth)
- Fans or air purifier with HEPA(Increase air circulation and filtration)
- Moisture meter (optional)(Track humidity levels)
Steps
Estimated time: 4-8 hours plus drying time
- 1
Put on PPE
Begin by putting on a properly fitted N95 respirator, protective goggles, and non porous gloves. This protects you from spores and reduces irritation. Ensure the mask seals tightly before entering the work area.
Tip: Test the respirator fit by exhaling sharply; if you feel air leakage, adjust or replace the mask. - 2
Contain the workspace
Seal the area with heavy plastic sheeting and tape to prevent spores from traveling to other rooms. Close doors and vents where possible. Maintain airflow away from clean areas to avoid cross-contamination.
Tip: Create a clear doorway pass-through for cleanup materials to minimize movement through the rest of the home. - 3
Address the moisture source
Identify the moisture source and take steps to stop it before remediation. This may involve fixing leaks, repairing plumbing, or correcting ventilation. Moisture control is essential to prevent recurrence.
Tip: Document the source with photos for future reference and to support any necessary repairs. - 4
Remove non salvageable porous materials
If mold penetrates porous materials like drywall or insulation, remove and bag the affected sections. Seal bags before disposal to prevent spore escape. Do not reuse removed materials.
Tip: Label bags clearly to avoid accidental handling by others. - 5
Clean non porous surfaces
Wipe and scrub non porous surfaces with detergent or an approved cleaner. Rinse with clean water and dry completely. Focus on edges and corners where mold hides.
Tip: Use a brush to scrub grout lines and textured surfaces for better removal. - 6
Dry the area thoroughly
Run a dehumidifier and point fans toward the area to accelerate drying. Keep indoor humidity low and maintain airflow until moisture readings stabilize. Do not rush the drying phase; incomplete drying invites regrowth.
Tip: Check moisture levels with a meter if possible; aim for stable readings over 24 hours. - 7
Restore with mold resistant products
After cleaning and drying, restore surfaces using mold resistant primer and paint where appropriate. This helps create a protective barrier and reduces future growth potential. Avoid porous finishes on heavily damp zones.
Tip: Choose products labeled mold resistant and ensure proper curing time between coats. - 8
Reinspect for hidden mold
After restoration, recheck areas for hidden pockets of moisture or new mold growth. Look behind baseboards, under sinks, and inside closets. If you detect new growth, address it promptly.
Tip: Consider a simple follow-up inspection after a few weeks of normal humidity. - 9
Document results and plan follow-up
Record the steps taken, moisture readings, and repairs for future reference. Schedule periodic checks during seasons of high humidity. A documented plan makes future mold management easier.
Tip: Keep digital notes and photos to track progress over time.
FAQ
Do I have to remove all mold I can see?
Visible mold should be cleaned or removed if safe to do so and if the growth is on non porous surfaces. For porous materials or large areas, professional remediation may be needed. Always address the moisture source first to prevent regrowth.
Clean visible mold if it's on non porous surfaces and the area is small; for large patches or porous materials, hire a pro and fix the moisture first.
Can I use bleach to kill mold?
Bleach can help on non porous surfaces but is not effective on porous materials and may not reach embedded growth. Never mix cleaners with ammonia or other cleaners. Use bleach only where appropriate and follow safety guidelines.
Bleach works on hard, non porous surfaces but not on porous materials; avoid mixing cleaners, and follow safety guidelines.
How long does cleanup take?
Cleanup time varies with area size, material type, and moisture history. Plan for several hours of work, plus additional time for thorough drying and monitoring. Large or unusual cases may require professional help.
It depends on the area and materials, but plan for several hours of work plus drying time.
When should I call a professional?
Call a professional if mold covers a large area, is growing behind walls, or involves materials that are difficult to handle safely. If you have persistent allergies or mold exposure symptoms, seek expert help sooner.
Call a professional if the mold is widespread, behind walls, or if you have ongoing health concerns.
How can I prevent mold after cleanup?
Prevent mold by fixing leaks promptly, improving ventilation, and keeping humidity low. Regularly inspect damp areas like kitchens and bathrooms and consider moisture meters for ongoing monitoring.
Fix leaks quickly, vent damp areas well, and keep humidity low to prevent mold regrowth.
The Essentials
- Identify moisture first to stop mold growth.
- Contain the area and wear PPE during cleanup.
- Different surfaces require different cleanup approaches.
- Drying is essential to prevent recurrence.
- Reinspect and monitor humidity to maintain a mold-free home.