Mold Killers at Home Depot: Safe, Effective Mold Remediation
Learn how to choose and use mold killers from Home Depot safely. This practical guide covers product types, labeling, PPE, and step-by-step remediation to prevent mold return.

You're going to remove mold using products available at Home Depot to restore a safe indoor environment. Key requirements: wear protective gear, ventilate the area, and follow label directions for a mold killer sold at Home Depot. This quick guide outlines the objective and the essentials for safe, effective cleanup.
What 'Mold Killer' Means and Why Home Depot Choices Matter
In consumer environments, the phrase mold killer refers to products designed to kill mold spores on non-porous and some porous surfaces. For homeowners and renters shopping at Home Depot, the term includes a spectrum from EPA-registered chemistries to consumer-grade cleaners you can pick up in-store. The key is to pick a product whose label supports mold remediation for the specific surface and contamination level. According to Mold Removal Lab, starting with the right product from Home Depot is the crucial first step in safe remediation.
Not all cleaners kill mold equally, and some can leave residues that encourage regrowth if not rinsed or dried properly. For example, products based on hydrogen peroxide or quaternary ammonium compounds behave differently from bleach on porous materials like drywall. In addition to used product, you must address the underlying moisture source and ensure proper drying to prevent recurrence. Home Depot offers a variety of mold-killer options, including EPA-registered sprays, peroxide-based cleaners, and specialty cleaners designed for bathrooms, basements, or wood. While household bleach can be effective for hard, non-porous surfaces, many professionals prefer peroxide-based or quaternary cleaners for a more complete kill and easier cleanup. The Mold Removal Lab team emphasizes choosing products that match the surface type and contamination extent to avoid under- or over- treating the area.
EPA-Registered vs. Other Cleaners: What to Buy at Home Depot
A critical distinction when shopping for a mold killer at Home Depot is whether a product carries EPA registration for mold remediation. EPA-registered products come with explicit directions, surface compatibility notes, and dwell times that guide safe use. They are generally preferred for areas with porous materials or where mold has penetrated surfaces. In contrast, some cleaners marketed as 'mold eliminators' may rely on fragrance or surface-acting agents that suppress odor but do not offer real mold kill on stubborn growth. The Mold Removal Lab team notes that when used as directed, EPA-registered products provide predictable outcomes and safer handling for DIY cleanup. Always verify that the product’s label supports mold remediation on the target material, and avoid mixing products, which can create hazardous fumes. For many home projects, a peroxide-based or quaternary-ammonium cleaner from Home Depot will be appropriate. Remember that the product you choose should align with your surface type (tile, paint, wood, drywall) and the severity of the contamination to prevent under- or over-treatment. Mold killer home depot selections vary, so compare labels carefully before purchasing.
Reading Labels: Key Phrases and Instructions
Labels are your best source of guidance when selecting a mold killer from Home Depot and using it safely. Look for phrases such as 'mold control,' 'broad-spectrum kill,' and 'for use on [surface type].' Note the active ingredients (e.g., hydrogen peroxide, sodium hypochlorite, quaternary ammonium), the recommended application method (spray, wipe, or foam), surface compatibility, dwell time (how long the product should stay wet), and required PPE. The Mold Removal Lab analyzes show that following label instructions closely reduces the risk of incomplete removal and preserves indoor surfaces. Also check ventilation requirements—many products specify using the cleaner only with windows open or while running a fan. Don’t ignore drying times; mold can return quickly if damp conditions persist. For bathrooms and kitchens, where moisture is frequent, choose a product labeled for humidity-prone areas and consider combining with a dedicated moisture-control plan. As you shop, compare at least two EPA-registered options and read consumer reviews focusing on real-world performance in similar spaces. The goal is to select a mold killer home depot tool that is effective on the targeted surface while keeping occupants safe.
Preparation and Ventilation: Setting the Stage for Safe Cleanup
Preparation is as critical as the product you choose. Begin by sealing off the affected area to prevent spores from drifting to other parts of the home. Ventilate the space by opening windows and running a low-noise fan to push air outward, not inward. Put on appropriate PPE: nitrile gloves, a NIOSH-certified N95 respirator, and eye protection; consider disposable coveralls if contamination is extensive. Remove or cover nearby fabrics and allow a dehumidifier or air purifier to reduce humidity levels to below 50 percent where possible. Before applying any mold killer, address the moisture source—fix leaks, improve drainage, and dry surfaces completely. Light cleaning with a dry brush removes loose spores, but avoid aggressive scrubbing that can aerosolize mold. After applying the product, follow the dwell time on the label, then wipe or rinse as directed and ensure surfaces dry fully. The Mold Removal Lab emphasizes that a well-ventilated, moisture-controlled environment dramatically improves long-term results and reduces the risk of regrowth. Mold killer home depot products only work when paired with moisture management.
Practical Scenarios: Surfaces and Rooms
Mold growth occurs most often in bathrooms, basements, kitchens, and along exterior walls where moisture intrusion exists. In bathrooms with tile grout or fiberglass, an EPA-registered cleaner can be effective on non-porous surfaces if you follow the label's dwell time and rinse instructions. On painted drywall or wood studs, use a peroxide-based cleaner or a product designed for porous materials, as chlorine bleach can damage some finishes and leave residues that invite regrowth. For concrete or masonry in basements, you may need a specialty cleaner formulated for porous stone, combined with thorough drying. In all cases, avoid saturating porous materials that cannot be dried quickly, as this can lead to deeper mold penetration. The Mold Removal Lab recommends documenting the affected areas with photos, noting dates and moisture controls implemented, and planning follow-up inspections to ensure all signs of moisture have been addressed. Remember: mold killer home depot purchases should be matched to the specific surface and contamination level, not used as a one-size-fits-all solution.
When to Call a Pro and Prevent Recurrence
DIY remediation is often appropriate for small, well-contained mold growth on non-porous surfaces, but larger or hidden growth, growth behind drywall, or mold in HVAC systems should trigger a professional remediation review. If the area affected exceeds about 10 square feet, or if the mold reappears after cleaning, contact a licensed mold remediation contractor. A pro can assess moisture sources, containment, and air quality more comprehensively and can advise on needed repairs beyond surface cleaning. A pro can advise whether additional mold killer home depot products are needed or if a different remediation approach is required. The Mold Removal Lab emphasizes that safe remediation depends on eliminating the moisture source and drying thoroughly, as well as choosing the right mold killer home depot product and applying it correctly. Regular inspections after rainfall or seasonal changes help catch problems early and reduce the risk of regrowth over time. The Mold Removal Lab team’s verdict is to combine product selection with moisture management and ongoing monitoring for lasting results.
Common Mistakes That Undercut Mold Cleanup
Common DIY mistakes include selecting a cleaners that aren’t EPA-registered for mold remediation, using too little product, failing to wear PPE, and skipping the drying phase. Another frequent error is using bleach on porous surfaces like drywall, which can corrode materials and trap moisture underneath. Do not mix cleaners, as this can create hazardous fumes or reduce effectiveness. Do not spray widely or saturate hidden cavities without control, as mold spores can spread to unseen areas. Finally, avoid cost-cutting by delaying moisture repair or testing; neglecting the moisture source means mold will likely return. The Mold Removal Lab urges readers to choose products suited to their surface and to prioritize drying and moisture control. To reinforce learning, refer back to the Home Depot product labels and the authority sources listed below for best-practice guidelines. The goal is to complete remediation without spreading spores or creating poor indoor air quality.
Tools & Materials
- Nitrile gloves(Use disposable gloves; change if torn)
- N95 respirator(NIOSH-approved; ensure proper fit)
- Goggles or face shield(Eye protection against splashes)
- Disposable coveralls or old clothing(Protect skin and fabric)
- Spray bottle with water(Dilute cleaner if label permits)
- Scrub brush or non-abrasive sponge(Scrub mold from surfaces)
- Mold-killer product sold at Home Depot(EPA-registered or peroxide-based cleaner)
- Detergent or mild soap(For initial cleaning on non-porous surfaces)
- Trash bags (heavy-duty)(Seal and dispose contaminated materials)
- Dehumidifier or fan(Promote drying after cleaning)
- Moisture meter (optional)(Helps verify drying progress)
Steps
Estimated time: 45-90 minutes
- 1
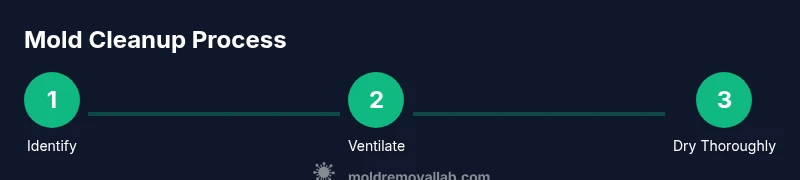
Identify affected area
Scan for visible mold growth on walls, ceilings, and around leaks. Mark edges with painter's tape to contain the area and prevent spread to adjacent rooms.
Tip: Limit disturbance around the growth to minimize aerosolization. - 2
Ventilate and protect yourself
Open windows and run a fan to create outward airflow. Put on PPE: N95, goggles, gloves, and coveralls if needed.
Tip: Work in daylight hours if possible to spot moisture issues clearly. - 3
Address moisture source
Fix leaks and improve drainage. Use a dehumidifier to reduce humidity to 50% or lower, which slows mold growth.
Tip: Only begin cleaning after resolving the moisture problem. - 4
Read label and prepare solution
Choose a mold-killer product compatible with the surface and type of mold. Follow label directions for dilution, if any, and dwell time.
Tip: Never mix cleaners; this can release toxic fumes. - 5
Apply mold killer
Spray or apply the product to the contaminated area, ensuring the surface remains wet for the recommended dwell time.
Tip: Apply from top to bottom to prevent recontamination of cleaned sections. - 6
Scrub and rinse
Gently scrub with a brush or sponge to remove stained residues; rinse with clean water as directed by the label.
Tip: Avoid aggressive scrubbing on delicate coatings. - 7
Dry thoroughly
Use fans and a dehumidifier to dry surfaces completely. Inspect for remaining dampness and repeat treatment if needed.
Tip: Check behind fixtures and inside cavities that may retain moisture. - 8
Inspect and plan follow-up
Take photos of treated areas, note moisture controls implemented, and schedule a follow-up check to ensure there is no regrowth.
Tip: Create a moisture-management plan to prevent recurrence.
FAQ
Is it safe to use a mold killer from Home Depot myself?
Yes, for small, contained areas, with proper PPE and label directions. For health conditions or larger outbreaks, consult a professional.
Yes, for small, contained areas, but consult a pro for health concerns or larger outbreaks.
Do I need to replace materials after mold cleanup?
If porous materials are heavily contaminated or structurally damaged, replacement is often recommended. Cleaning is sometimes sufficient for non-porous surfaces.
Porous materials may need replacement if heavily contaminated; otherwise cleaning may suffice.
What is the difference between bleach and peroxide-based cleaners?
Bleach is effective on non-porous surfaces but may not prevent regrowth in porous materials. Peroxide-based cleaners can be more effective on porous surfaces when used correctly.
Bleach works on non-porous surfaces; peroxide cleaners often perform better on porous surfaces.
How long does it take to dry after cleaning?
Drying times vary with humidity and surface type, ranging from several hours to a couple of days. Use a dehumidifier and ensure thorough drying.
Drying can take hours to days depending on moisture and materials.
Can mold return after cleaning?
Yes, if moisture sources aren’t addressed. Eliminate leaks, control humidity, and dry surfaces to prevent regrowth.
Mold can come back if moisture isn’t controlled.
When should I call a professional?
If growth exceeds 10 square feet, or if you suspect hidden growth behind walls or in HVAC, consult a licensed mold remediation contractor.
Call a pro if growth is large or hidden.
Watch Video
The Essentials
- Identify affected areas and select EPA-registered products.
- Read labels and follow dwell times precisely.
- Ventilate and dry thoroughly to prevent regrowth.
- Know when to call a professional for larger jobs.