How to Kill Mold and Mildew: A Practical Home Guide
Learn to kill mold and mildew safely with proven methods, moisture control, and prevention tips. This Mold Removal Lab guide covers step-by-step remediation, safety gear, and long-term maintenance.

By the end of this guide, you will know how to kill mold and mildew safely in common indoor spaces. You’ll learn which cleaners work, how to test surfaces, and how moisture control prevents recurrence. This practical approach draws on Mold Removal Lab research and emphasizes safety first.
Why killing mold and mildew matters
Mold and mildew in homes are more than unsightly; they can impact air quality and health. When mold and mildew grow, they release spores that irritate eyes, skin, and the lungs, potentially triggering allergies or asthma symptoms. The objective is not only to remove visible growth but also to eliminate the moisture feeding it. According to Mold Removal Lab, the safest, most effective approach to kill mold and mildew starts with a careful assessment of the affected areas and a plan to control moisture. Cleaning without addressing moisture is typically temporary and may even spread spores. In practice, the recommended workflow combines PPE, targeted cleaners, thorough scrubbing, and complete drying, followed by ongoing monitoring. By treating both the growth and the moisture source, you reduce exposure and improve indoor air quality. Mold Removal Lab analysis shows that moisture control is the key driver of mold problems in kitchens, bathrooms, and basements.
Causes and where mold and mildew thrive in homes
Mold and mildew flourish where moisture persists. Common culprits include leaks from roofs or plumbing, condensation on windows, poor ventilation, and high humidity in bathrooms, kitchens, basements, and laundry rooms. Without addressing these moisture sources, any cleaning will be short-lived. Based on Mold Removal Lab research, the two most important factors are humidity levels and accessible moisture paths. In humid spaces, mold tends to colonize on organic materials like drywall, wood studs, fabric, and cardboard. Mildew often appears on bathroom grout, shower doors, and tile seams. The good news is that by identifying moisture hotspots and implementing a rapid response plan, you can significantly reduce growth and improve air quality. Regular checks after weather events help catch problems early. The key is a routine: inspect, dry, and monitor, especially where moisture cycles most frequently. To kill mold and mildew effectively, you must address both the visible growth and its moisture source.
Tools & Materials
- Protective gloves (nitrile)(Gas- or chemical-resistant if using stronger cleaners)
- N95 respirator(Ensure proper fit; consider PPE upgrades for large areas)
- Goggles(Eye protection against splashes and debris)
- Bucket(For rinsing or mixing cleaners (1–2 gal))
- Spray bottle(Label 1 for cleaner, Label 2 for water rinse)
- Scrub brush (non-scratch)(For hard, painted, or sealed surfaces)
- Microfiber cloths(For scrubbing, drying, and buffing surfaces)
- White vinegar (5–8%)(Natural option; test on delicate surfaces)
- Hydrogen peroxide (3%)(Alternative cleaner for porous surfaces)
- EPA-registered mold remover(Check label for surface compatibility)
- Bleach (optional, non-porous surfaces only)(Dilute to 1 cup per gallon of water; never mix with ammonia)
- Dehumidifier or fans(Maintain airflow and reduce humidity below 50%)
- Moisture meter(Optional tool to track dryness and identify high-humidity spots)
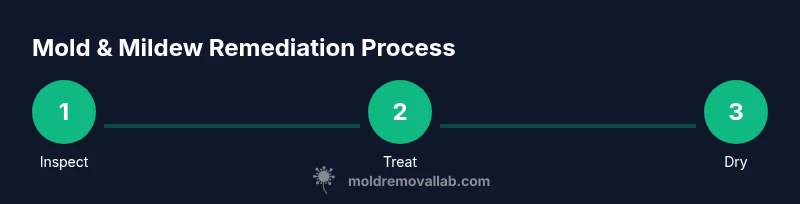
Steps
Estimated time: 1-2 hours (plus additional drying time as needed)
- 1
Identify affected areas and moisture sources
Walk through the home and map out all areas with visible growth or moisture problems. Look for stains, musty odors, peeling paint, warped materials, and signs of leaks. Document suspected hotspots with photos and notes so you can target cleanup and moisture control.
Tip: Use a camera or phone to track changes over time; note humidity and any leaks or condensation patterns. - 2
Prepare the space and PPE
Put on PPE before touching any growth. Seal off the work area from other rooms to prevent spread, improve ventilation, and set up fans to direct airflow away from living spaces. Remove soft fabrics nearby if they are contaminated.
Tip: Ventilate but avoid creating cross-contamination; consider shutting doors to other rooms and using local exhaust where possible. - 3
Choose and apply a cleaner
Select an appropriate cleaner based on surface type. Apply a generous, even mist to the affected area and let it sit for the time listed on the product label to break down the mold and mildew bonds.
Tip: Do not mix cleaners; if using vinegar or peroxide, test a small area first to ensure it won’t bleach or damage the surface. - 4
Scrub and rinse surfaces
Scrub the area with a non-scratch brush or cloth until visible growth is removed. Rinse with clean water or a second solution if needed, then wipe dry with microfiber cloths. Avoid leaving any moisture behind that could encourage regrowth.
Tip: Use firm, circular motions to dislodge embedded spores while protecting nearby surfaces. - 5
Dry thoroughly and reduce humidity
Dry the area completely using towels, fans, and a dehumidifier. Keep the space dry for 24–72 hours as needed, checking moisture levels with a meter until it reads stable and below the danger threshold.
Tip: Do not shortcut drying; residual moisture can lead to rapid regrowth. - 6
Repair and monitor for recurrence
Repair leaks, replace damaged materials, and improve ventilation to prevent future mold growth. After cleaning, monitor the area for signs of new moisture or regrowth and re-clean promptly if needed.
Tip: Establish a routine check for humidity and leaks to catch problems early.
FAQ
What is the difference between mold and mildew?
Mold is a fuzzy or camouflaged growth that can penetrate porous materials and release many spores; mildew is typically white or gray and sits on the surface. Both thrive in moisture, so controlling humidity is essential for remediation.
Mold grows into surfaces and can be tougher to remove, while mildew sits on top and is usually easier to wipe away; both need moisture control to prevent return.
Can I kill mold and mildew with household cleaners?
Small, non-porous areas can be treated with common cleaners. For most surfaces, EPA-registered mold removers perform best, and natural options like vinegar or hydrogen peroxide can help on certain materials. Always test a small area first.
Yes for small spots, but for larger or porous areas you’ll need stronger cleaners and moisture control.
Is bleach safe for mold and mildew?",
Bleach can kill mold on non-porous surfaces, but it is less effective on porous materials and may cause fumes. Use according to label directions and never mix with ammonia or acids.
Bleach can work on hard, non-porous surfaces, but it’s not a universal fix and can be hazardous if misused.
How long does it take to see results after cleaning?
Visible improvements can be immediate, but complete dryness and discoloration fade may take 24–72 hours depending on humidity and surface. Monitor moisture levels to confirm stability.
You’ll often see a cleaner surface right away, but true dryness can take a day or two.
When should I call a professional?
Call a professional if mold covers a large area, is hidden behind walls, or you have persistent moisture issues that you cannot fix. A professional can assess hidden damage and ensure safe remediation.
If the growth seems extensive or keeps coming back after your efforts, it’s time to get expert help.
The Essentials
- Identify and address moisture sources before cleaning
- Wear proper PPE and use the right cleaners for each surface
- Dry thoroughly and maintain low humidity to prevent recurrence
- Regularly inspect and timely repair leaks to protect indoor air quality