Kilz for Mold and Mildew: Safe Use, Limits, and Alternatives
Explore how Kilz primers seal surfaces after mold cleanup, when to use them, and safer alternatives. Learn step-by-step guidance from Mold Removal Lab to prevent staining and odors while addressing moisture in your home.

Kilz for mold and mildew is a primer/sealer used after mold cleanup to block stains and odors on cleaned surfaces. It is not a mold remediation product and will not kill mold. Before applying Kilz, fix the moisture source, clean and dry the area, and follow the product label for drying times and ventilation.
Understanding kilz for mold and mildew
Kilz primers and sealers are commonly used after a mold cleanup to neutralize stains and odors on painted surfaces, drywall, and wood. The goal is to create a sealed, uniform surface that repainting can adhere to, while reducing chances of odor migrating through fresh paint. In many homes, kilz for mold and mildew is a practical option when moisture has been controlled and surfaces are clean and dry. According to Mold Removal Lab, Kilz products can help seal surfaces after mold cleanup when moisture is controlled. Remember: Kilz is a sealer, not a mold-killing solution. It does not address moisture sources or eliminate active mold growth. If you still have dampness, any sealant will be overwhelmed over time, and mold can reappear. EPA guidance on moisture and mold emphasizes addressing the root cause before sealing surfaces. The Mold Removal Lab team recommends treating Kilz as part of a larger remediation plan, not a stand-alone fix.
When Kilz is appropriate in a mold remediation project
Kilz for mold and mildew should be considered only after you have eliminated moisture, cleaned thoroughly, and confirmed the area is dry. It can help with odor-blocking and stain-sealing on finished surfaces like painted drywall, plaster, and wood trim. Use Kilz to prepare surfaces for repainting once you are certain no active mold remains, and moisture intrusion has been addressed. If mold is still present or damp, apply Kilz only after professional remediation or additional drying has occurred. In such cases, Kilz acts as a cosmetic barrier rather than a cure. Mold Removal Lab emphasizes that Kilz is not a substitute for moisture control or mold removal; it is a supplemental tool for sealing after cleanup.
Preparation and surface prep
Before applying Kilz, ensure the area is clean, dry, and free of loose material. Vacuum with a HEPA-filter vacuum to remove spores and dust, then wash surfaces with a mild detergent and rinse to remove any oils or contaminants. Dry the surface completely, ideally with fans or a dehumidifier, until a moisture meter reads within acceptable levels. Choose the Kilz variant that fits your goal—typically a stain-blocking, odor-reducing primer is preferred for interiors. Testing a small patch in an inconspicuous area is wise to verify adhesion before full application. Do not begin painting if the surface feels damp to the touch.
How to apply Kilz safely and effectively
Apply Kilz in thin, even coats using a quality brush or roller. Allow each coat to dry per the label before applying a second coat; thicker coats can trap moisture and peel later. Maintain good ventilation and wear a suitable respirator or mask during application and curing. Protect surrounding areas with drop cloths and painter’s tape, and avoid applying Kilz in extreme temperatures or high humidity. Always follow the label's drying times and recoat windows for best results. Kilz will not mitigate ongoing moisture problems, and poor ventilation can lead to odor retention or mildew return.
Common mistakes and safety considerations
Common mistakes include sealing over damp surfaces, using Kilz as a mold treatment, or skipping the moisture source verification. Do not apply Kilz over active mold; remove the mold and address moisture first. Ensure adequate ventilation, use appropriate PPE, and keep children and pets away during curing. If you have porous materials like drywall that were heavily contaminated, consider replacing them rather than sealing. When in doubt, consult a mold remediation professional and follow EPA/CDC guidelines for mold and moisture management. Proper moisture control is the foundation of a lasting seal with Kilz.
Alternatives and safety guidance
If odor control or stain sealing is essential but mold remediation is not complete, consider alternative primers with enhanced odor-blocking properties and mold-resistance features. Epoxy-based primers and specialty mold-sealing products may offer better performance on challenging substrates. Always pair Kilz with moisture mitigation strategies and a plan for ongoing monitoring. If you are unsure about the surface condition or the adequacy of your cleanup, seek professional guidance from a mold remediation expert. The goal is to create a stable, paint-ready surface after proper remediation and drying.
Tools & Materials
- Kilz primer/sealer (select appropriate variant)(Choose a stain-blocking/odor-reducing formula for interiors)
- 2-inch angled brush(For precise cutting in around edges)
- 4-inch roller and tray(Use short-nap roller for smooth surfaces)
- Drop cloths and painter's tape(Protect floors and adjacent areas)
- Detergent or mild degreaser(Clean surfaces before sealing)
- Plastic scrub pad or sandpaper (120–220 grit)(Lightly scuff glossy surfaces for adhesion)
- HEPA-filter vacuum or damp cloth(Remove loose spores and dust)
- Respirator or good-fitting mask (N95/P100)(Protect during application and curing)
Steps
Estimated time: Estimated total time: 2-4 hours (not including any extended drying times between coats)
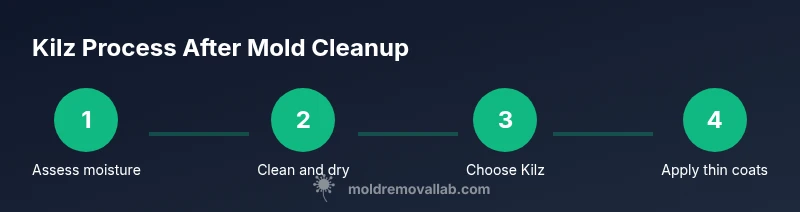
- 1
Assess moisture source
Identify and fix the moisture problem before sealing. This reduces the chance of future staining, odors, or mold growth after Kilz is applied.
Tip: Document the moisture source and plan a remediation timeline to avoid repeating the process. - 2
Clean and dry the area
Wash surfaces with detergent to remove oils, dirt, and residual mold spores. Rinse and dry thoroughly; use a dehumidifier or fans to speed up drying.
Tip: Do a moisture test after cleaning to confirm dryness before applying primer. - 3
Choose and test Kilz
Select a Kilz variant appropriate for odor blocking and stain sealing. Test on a small inconspicuous patch to confirm adhesion and finish.
Tip: Avoid oil-based Kilz indoors in poorly ventilated spaces if you can; water-based variants dry faster with less odor. - 4
Prepare the surface
Lightly sand glossy areas and wipe away dust. Cover surrounding areas with drop cloths and tape off edges you don’t want coated.
Tip: Ensure the area is free of loose material; loose material can lead to poor adhesion. - 5
Apply Kilz in thin coats
Brush or roll on thin, even coats. Wait for the first coat to dry per label before applying a second coat if needed.
Tip: Avoid heavy coats that trap moisture; multiple thin coats perform better than one thick coat. - 6
Cure and seal with paint
Let the final coat cure completely before repainting or finishing. Ensure good ventilation during cure to minimize odor buildup.
Tip: If odor lingers, allow extra cure time and improve ventilation; moisture control remains essential even after sealing.
FAQ
Is Kilz a mold killer?
No. Kilz acts as a sealer and stain/odor blocker, not an antimicrobial mold treatment. Address moisture and remove mold before sealing.
Kilz is a sealer, not a mold killer. Clean and dry first, then seal.
Can Kilz be applied over moldy surfaces?
Do not apply Kilz over active mold. Resolve moisture and remove mold before sealing, or replace affected materials if necessary.
Don’t seal over active mold. Fix moisture and remove mold first.
Which Kilz product works best for odors?
Choose a Kilz variant with odor-blocking properties, typically Kilz Premium or a stain-blocking option, and ensure surfaces are clean and dry before applying.
Use an odor-blocking Kilz when sealing after cleaning.
How long should you wait between coats?
Drying times vary by product and humidity. Follow the label, with typical recoat windows ranging from 2-4 hours for water-based formulas and longer for oil-based ones.
Follow the product label; wait a few hours between coats if conditions are good.
Are there safer non-Kilz options for mold-prone areas?
Yes. Look for mold-resistant primers or specialty sealers designed for damp areas, but fix moisture first and ensure full cleaning.
There are mold-resistant primers, but moisture control matters most.
Watch Video
The Essentials
- Address moisture before sealing.
- Kilz is a sealer, not a mold killer.
- Surfaces must be clean and dry prior to application.
- Use thin coats and proper ventilation for best results.