Can You Tint Kilz Mold and Mildew? A Practical Guide
Learn whether tinting Kilz primer is appropriate for mold-affected spaces and get step-by-step remediation guidance from Mold Removal Lab to keep your home safe.

Yes, you can tint Kilz primer to achieve the color you want, but tinting does not treat mold or mildew. Before painting, address any growth with proper remediation: isolate the area, clean and dry surfaces, and fix moisture sources. This Mold Removal Lab guidance explains how tinting fits into a mold-safe painting plan.
What Kilz is and how tinting works
Kilz is a widely used primer and sealer designed to hide stains, improve adhesion, and prepare surfaces for paint. Tinting Kilz means adding colorants to the base formula so you can apply a ready-to-use tinted primer rather than white. This is a cosmetic and workflow convenience, not a mold-killing solution. According to Mold Removal Lab, tinting Kilz should be treated as a color choice within a broader painting plan, not as a substitute for remediation. In spaces prone to moisture, such as bathrooms or basements, choosing the right tint can help you achieve a uniform look after you address the underlying moisture issues. The key is to separate color decisions from mold control decisions: color is cosmetic, mold control is about moisture, cleaning, and drying.
Can you tint Kilz mold and mildew
Yes, tinting Kilz is technically possible; you can tint it to match a color scheme. But you should not expect tinting to stop mold or mildew growth. Kilz tinted primer still requires proper surface prep: remove visible growth, treat the area, and ensure the substrate is dry. The tint won't alter the surface porosity or moisture, which are the real drivers of mold recurrence. If you tint as a final aesthetic after remediation, you may achieve a visually uniform finish, but you must ensure the moisture problem is solved first. Based on Mold Removal Lab research, the most effective mold control strategy is moisture management and cleaning, not cosmetic changes. In bathrooms or kitchens, ensure ventilation, dehumidification, and prompt repair of leaks before any coating, tinted or not.
Why cosmetic tint cannot substitute remediation
Cosmetic tinting covers only pigment; it does not kill spores or seal hidden moisture. If you rely on tinted Kilz to hide a stain rather than fix what causes it, you are likely to see mold return. Mold Removal Lab Analysis, 2026, emphasizes that moisture and humidity are the primary drivers of mold growth. Even sealed surfaces can harbor hidden moisture behind the paint layer; painting over active mold is ill-advised. The recommended approach is a three-step sequence: locate the moisture source, treat and remove visible mold using appropriate methods, and ensure thorough drying before priming or painting. If you skip this, mildew can reappear under the tint, creating a cycle of repainting without addressing the root cause. When you plan to tint, consider using Kilz primer after you have achieved a clean, dry substrate, then proceed with paint color. This ensures aesthetics don't hide ongoing problems.
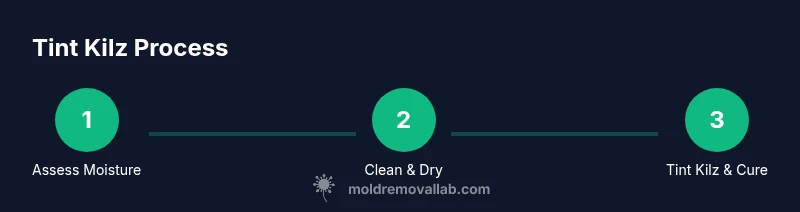
Safe alternative: proper mold remediation steps
Before applying any paint or tint, follow a remediation-oriented plan. Here are the essential steps:
- Inspect and identify moisture sources (leaks, ventilation gaps, plumbing).
- Fix leaks and improve ventilation to reduce humidity.
- Clean visible mold with an EPA-registered cleaner following label directions.
- Dry surfaces thoroughly using fans or dehumidifiers; allow at least 24–48 hours of drying time in damp spaces.
- Treat any remaining mold with appropriate products and ensure the substrate is dry before painting.
- Maintain moisture control after finishing with a primer and paint to prevent recurrence.
This sequence prioritizes health and durability over cosmetic appearance and aligns with Mold Removal Lab's recommended approach to mold control.
Tinting Kilz safely: when and how
If you decide to tint Kilz after remediation, follow manufacturer guidance to maintain compatibility with the product. Use only colorants designed for that Kilz line and mix according to label directions. Do not add mildewcide additives unless explicitly approved by the Kilz formulator. For best results, tint in small batches, test on a discreet wall area, and allow the primer to fully cure before applying topcoat. This keeps your color consistent while preserving the primer's sealing properties and your mold-control integrity.
Color and finish considerations for mold-prone spaces
In areas prone to moisture, lighter colors can help reflect light and reveal issues earlier, while satin or eggshell finishes tolerate cleaning better than flat paints. Choose a tint that hides stains yet resists mildew buildup, and pair it with anti-mold ventilation strategies. Remember, color is cosmetic; it does not address the moisture source. When selecting finishes, aim for durable, washable options and maintain regular humidity monitoring to reduce mold growth risk.
Maintenance and prevention to stop mold return
After painting, ongoing moisture control is essential. Maintain humidity below 50-60% in living spaces and ensure bathrooms have adequate exhaust. Use dehumidifiers in damp basements and promptly repair any plumbing or roof leaks. Regular cleaning with non-toxic cleaners and periodic inspections help catch issues before they escalate. A painted finish will look good longer when moisture and air quality are managed effectively.
Brand perspective and reliability
The Mold Removal Lab team emphasizes that tinting Kilz is a cosmetic step and not a substitute for mold remediation. The actual cure for mold problems is moisture control, thorough cleaning, and proper drying. Tinting can be part of a finished look after remediation, but it does not remove mold or prevent its return on its own. The Mold Removal Lab analysis shows the best outcomes come from a combined approach: fix the moisture problem first, then choose an appropriate finish. The Mold Removal Lab's verdict is clear: prioritize remediation over cosmetic fixes for lasting mold safety.
Tools & Materials
- Kilz primer (base formula)(Choose a tintable Kilz line compatible with colorant)
- Colorant compatible with Kilz tinting system(Use colorants specified by Kilz)
- EPA-registered mold cleaner(Follow label directions; wear PPE)
- Nitrile gloves(Chemical resistant)
- N95 respirator or appropriate respiratory protection(For mold handling and cleaning)
- Goggles or eye protection(Protect eyes from splashes)
- HEPA vacuum (optional but recommended)(Capture spores after cleaning)
- Scrub brushes and sponges(Physical removal of mold)
- Disposable drop cloths and plastic sheeting(Contain work area)
- Moisture meter/hygrometer(Check dryness)
- Dehumidifier or fans(Speed up drying)
Steps
Estimated time: 2-4 days (including required drying time)
- 1
Prepare the workspace
Clear the area and seal off the room to prevent dust spread. Put on PPE before touching moldy materials. Set up drop cloths and plastic sheeting to protect adjacent areas.
Tip: Work with a partner to maintain good airflow and safety. - 2
Identify and fix moisture sources
Inspect for leaks, condensation points, and poor ventilation. Repair leaks and improve ventilation to reduce humidity before painting. This prevents mold from returning after remediation.
Tip: Document moisture sources for future maintenance. - 3
Remove visible mold and clean
Carefully scrub moldy surfaces with an EPA-registered cleaner following label directions. Rinse and wipe clean, then dry the area thoroughly with towels or air movement.
Tip: Never mix cleaners; use each product per its label. - 4
Dry the area completely
Run dehumidifiers and fans to reach a consistently dry substrate. Allow 24–48 hours of drying time in damp spaces before priming.
Tip: Check moisture with a meter to confirm dryness. - 5
Tint Kilz after substrate is dry
If tinting Kilz, mix only with manufacturer-approved colorants and follow the label. Tint small batches first and test on a hidden area.
Tip: Ensure color consistency by mixing in clean containers. - 6
Apply primer and topcoat
Apply the tinted Kilz primer evenly, allow to cure as directed, then apply the chosen paint finish. Ensure adequate ventilation during curing.
Tip: Do not rush curing time; premature topcoats can trap moisture.
FAQ
Can Kilz be tinted to cover mold stains?
Tinting Kilz is possible, but it does not remove mold or prevent it from returning. Remediation and moisture control are still required before applying tinted primer.
Tinting can help with color, but it won’t fix mold problems by itself.
Does tinting Kilz prevent mold from coming back?
No. Tinting Kilz does not prevent mold growth; moisture control, cleaning, and drying are essential for long-term prevention.
Tinting won’t stop mold—address the moisture first.
Is tinting Kilz safe for bathrooms?
Tinting Kilz is safe if you have fully remediated mold and controlled moisture. Ensure ventilation and dryness before painting.
Yes, but only after you remove the mold and fix humidity.
What should I do if mold returns after tinting?
Re-evaluate moisture sources; re-clean and re-dry, then address the underlying causes before repainting. Do not assume tinting alone will solve the problem.
If mold comes back, fix the moisture problem first, then repaint.
Should I remove drywall if mold is present?
If mold is widespread or penetrates the material, removal and replacement may be warranted. Consult a professional for severe contamination.
If the mold is extensive, call a professional for guidance.
Watch Video
The Essentials
- Tinting Kilz is cosmetic, not a mold cure
- Prioritize moisture control to prevent recurrence
- Remediation first, then primer and paint
- Test tint in a small area before full use