Kilz Primer Mold: Troubleshooting and Remediation
Urgent troubleshooting guide to diagnose and fix kilz primer mold in homes. Learn moisture, prep, and remediation steps from Mold Removal Lab for safer homes.

What Kilz Primer Mold Signals
Kilz primer mold signals a moisture problem rather than a fault with the primer itself. When homeowners notice new mold spots, a musty odor, or peeling edges after applying Kilz primer, it’s a clear red flag that the underlying substrate has been compromised. The kilz primer mold situation often hides behind the finished surface, where dampness or condensation has been trapped. According to Mold Removal Lab, many such cases begin with moisture intrusion that isn’t fully addressed before primer is applied, allowing mold to flourish under the layer and spread unnoticed until symptoms become visible.
Recognizing these signals early can save you time and expense. Treat mold concerns as a moisture-control problem first, not just a painting issue. The goal is to stop the moisture source, clean the surface, and re-coat with appropriate products designed for damp environments.
Why Moisture Invades Behind Kilz Primer Mold
The root of kilz primer mold is usually moisture—whether from leaks, rising damp, high indoor humidity, or poor ventilation. Kilz primer mold thrives when water sits on or behind walls long enough to nourish mold colonies. Mold Removal Lab analysis shows that the most common triggers are roof or plumbing leaks, improper flashing around fixtures, and inadequate air circulation in bathrooms and basements. Even routine humidity in kitchens or laundry areas can contribute over time if gaps exist. Repairing the moisture source and improving ventilation often stops new growth in its tracks.
If you’ve noticed lingering humidity after painting, you may be dealing with a surface ready for mold remediation steps rather than a simple repaint.
Immediate Actions You Can Take Today
Take these steps to curb kilz primer mold growth without delay:
- Stop introducing moisture: fix leaks, dry out affected areas, and run dehumidifiers or fans to accelerate drying.
- Protect yourself: wear PPE—gloves, goggles, and an NIOSH-rated respirator when dealing with mold.
- Isolate the area: seal off the affected space to prevent mold spread to other rooms.
- Clean and treat: use a mold-safe cleaner, or a solution recommended for porous substrates, and let the surface dry completely before re-coating.
- Plan the re-coating: choose a mold-resistant primer and use proper surface prep to reduce future risk.
The Mold Removal Lab team emphasizes treating mold as a moisture problem first. That mindset helps prevent recurrence and protects indoor air quality.
How to Diagnose Hidden Mold Behind Kilz Primer
Diagnosis requires a patient, methodical approach. Start with a visual inspection for dark spots, staining, or bubbling paint. Use a moisture meter to identify elevated readings behind the plaster or drywall, and consider infrared imaging to locate hidden damp zones. If you suspect structural or framing moisture, call a professional to perform more aggressive testing. Remember, Kilz primer mold can hide behind new paint layers, so don’t rely on surface appearance alone.
For homeowners, documenting moisture sources (leaks, humidity spikes, ventilation gaps) improves accuracy of your diagnosis and helps you communicate with remediation pros. The Mold Removal Lab guidance stresses that safe remediation begins with identifying and correcting the moisture problem before mold can reestablish itself after primer repair.
Step-By-Step: Fixing Kilz Primer Mold in a Typical Room
- Assess moisture source: locate active leaks or residual damp areas around the affected walls. Tip: photograph concerns and track humidity levels to establish a pattern.
- Dry and disinfect: remove loose material if necessary, dry the space thoroughly, and treat with a mold-safe cleaner. Tip: use fans and dehumidifiers to speed drying.
- Remove damaged materials: if drywall is structurally compromised, consider removing and replacing the affected sections. Tip: cap and seal dust to protect adjacent rooms.
- Clean and prep the surface: after replacement, clean the area again and ensure a clean, dry surface for priming. Tip: sand lightly to create a good bonding surface.
- Re-prime with a mold-resistant product: apply Kilz or a compatible mold-resistant primer following label directions, then finish with breathable, mold-resistant paint. Tip: maintain ventilation during curing.
Estimated total time: 4-8 hours depending on room size and moisture severity. The Mold Removal Lab recommends addressing moisture sources as a prerequisite to re-priming and painting to reduce recurrence.
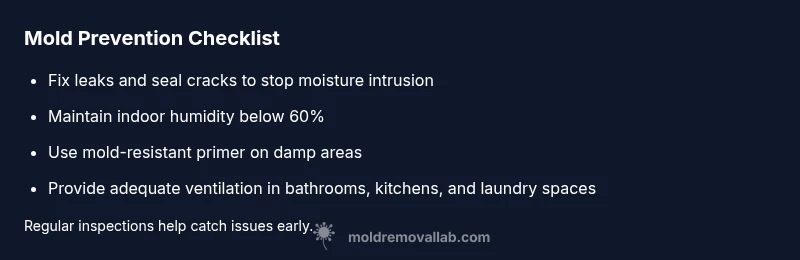
Prevention: Keeping Kilz Primer Mold from Returning
Prevention hinges on moisture management and proper surface preparation. Maintain indoor humidity at recommended levels and fix leaks promptly. Use a dehumidifier in damp areas, install ventilation fans in bathrooms and kitchens, and ensure attic and crawlspace vents are unobstructed. When re-primer, select products designed for damp environments and apply in accordance with the manufacturer’s guidelines. Regularly inspect previously treated areas for signs of moisture or new staining.
The Mold Removal Lab team emphasizes that ongoing prevention is cheaper and safer than repeated remediation. With a proactive approach to moisture and ventilation, your kilz primer mold risk drops significantly and your indoor air quality improves.