Mold and Mildew Primer: A Practical Comparison for Home Remediation
Discover how mold and mildew primer options differ, including water-based, shellac-based, and zinc-oxide formulations. Learn prep, selection criteria, and when to call professionals for durable mold prevention.

In damp spaces, a mold and mildew primer should be chosen based on surface type, humidity, and paint system. Shellac-based or zinc-oxide primers often outperform standard acrylics in bathrooms and basements, especially when paired with proper moisture control. The best approach blends surface prep, primer choice, and ongoing ventilation for lasting results.
What is mold and mildew primer and why it matters
A mold and mildew primer is a specialized preparatory coating designed to improve adhesion for paint while reducing the likelihood of mold and mildew growth on damp surfaces. It acts as a barrier that can limit moisture transfer into the painted film and provide a more uniform base for subsequent coats. For homeowners, understanding this primer is essential because damp indoor environments—such as bathrooms, laundry rooms, basements, and crawl spaces—create conditions where ordinary paints struggle to perform over time. The Mold Removal Lab team notes that selecting the right primer is a foundational step in a broader mold prevention plan. The primer’s performance depends on surface chemistry, humidity, and the presence of existing mildew stains. The goal is not to eliminate mold, but to prevent rapid regrowth while enabling a durable paint finish.
Within the category of primers, the term mold and mildew primer often implies products with additives intended to inhibit or resist mold growth. While no primer alone can fix a pervasive moisture problem, a well-chosen formulation can dramatically improve paint longevity and reduce maintenance in high-humidity areas. In practice, homeowners should treat primer selection as part of a three-legged stool: moisture control, surface preparation, and proper coating. This approach aligns with guidance from Mold Removal Lab, which emphasizes practicality and safety when addressing visible mildew and hidden moisture risks.
Key differences in primer formulations
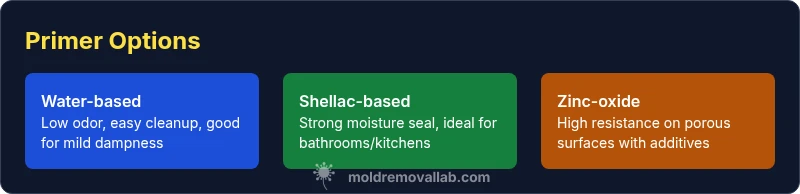
Primer options vary widely in their chemistry, solvent systems, and claimed mold-control capabilities. Water-based primers are common due to low odor and easy cleanup, but in very damp areas, shellac-based primers offer superior seal against moisture infiltration and mildew seepage. Zinc-oxide or other biocidal additives appear in some specialty primers and may contribute to longer-term mold resistance on porous substrates. The choice often hinges on the surface being treated (porous vs non-porous), the level of moisture exposure, and the finishing paint you plan to apply. A practical approach is to match the primer’s chemistry to the surface profile: porous interior walls tend to benefit from primers with strong porosity sealing, while glossy surfaces may require improved surface adhesion before any paint layer.
From a practical standpoint, the most important aspect is to verify that the product is labeled for mold and mildew control and that it’s compatible with your paint system. Always check label directions for surface prep, recommended drying times, and ventilation requirements. This section will compare three common categories—water-based mold and mildew primers, shellac-based primers, and zinc-oxide–infused options—to help you choose with confidence.
Surface preparation before you prime
Preparation is the hidden driver of primer performance. Before applying any mold and mildew primer, ensure surfaces are clean, dry, and free of loose material. Scrub mildew stains with a dedicated cleaner and rinse thoroughly. Allow the substrate to dry completely; humidity should trend downward before priming. For porous materials like drywall or plaster, a light mist of clean water or a damp sponge can rehydrate the surface before applying primer—but do not saturate. If you’re dealing with a persistent moisture problem (for example, a roof leak or plumbing issue), resolve those issues first; primer is not a cure for chronic water intrusion. Adequate ventilation during prep and curing will reduce airborne spores and improve finish quality over time.
Choosing the right primer for mold-prone areas
When you live or work in spaces prone to moisture, selecting the correct primer makes a material difference. Water-based primers are easy to apply and cleanup, making them suitable for many interior walls. Shellac-based primers provide excellent moisture sealing and stain blocking, making them a common choice for bathrooms and kitchens where humidity levels are high. Zinc-oxide–based primers claim strong mold resistance on porous surfaces and can be valuable in basements or crawl spaces with lingering dampness. Your choice should balance the surface, the humidity level, and the paint you intend to use. In many cases, a shellac-based or zinc-oxide primer yields better mildew resistance than a standard acrylic primer, but proper surface prep remains essential.
Common myths about mold primers
A frequent misconception is that primers alone can eradicate mold. Mold and mildew primers are a preventive step, not a replacement for moisture control or mold remediation. Another myth is that all primers perform the same; in reality, formulation differences influence odor, sealing ability, and compatibility with topcoats. Some homeowners assume odor equals mold resistance; while odor can indicate solvents or additives, it’s not a direct measure of mildew control. Finally, many people believe you need a specialty product only in bathrooms or basements. In high-humidity kitchens or laundry rooms, the right primer can make a noticeable difference if paired with good ventilation.
Application steps: from priming to finishing
Begin with surface preparation as described earlier. Stir the primer thoroughly and apply a thin, even coat using a high-quality brush or roller appropriate for the substrate. For porous surfaces, consider a second coat to ensure uniform sealing, especially where mildew growth may have occurred. Allow adequate drying time between coats as per the label directions, and avoid painting in high humidity or poor ventilation. After priming, inspect for missed spots or pinholes and apply touch-ups before moving on to paint. Finally, select a compatible topcoat that matches the primer’s moisture resistance characteristics. Keeping your workspace well-ventilated will speed curing and reduce inhalation of any fumes.
Safety and ventilation considerations
Mold and mildew primers, like many coatings, can emit volatile organic compounds (VOCs), especially in enclosed spaces. Use PPE such as gloves and eye protection, and ensure good ventilation during application and curing. If you are chemically sensitive, opt for low-VOC products and avoid aerosol sprayers in occupied rooms. Keep children and pets away from treated areas until the primer has fully cured. In areas with known mold problems, consider using containment or temporary barriers to limit spore dispersion. Always follow the product’s safety data sheet (SDS) for handling guidance and disposal instructions.
Comparing brand options and price ranges
Primer selection often comes down to brand availability and personal preference rather than a single superior product. In general, budget-friendly water-based primers are suitable for minor mildew concerns on interior walls, while premium shellac-based and zinc-oxide–enhanced formulations tend to offer stronger moisture barriers in humid zones. Price ranges vary across regions and retailers, but the best decision is informed by the surface type, humidity, and compatibility with your topcoat. Investing in a higher-quality primer for high-moisture areas can reduce maintenance costs and repaint cycles over time, particularly if you’re dealing with bath enclosures, basements, or exterior walls with persistent moisture exposure.
When to call professionals vs DIY
DIY priming is feasible for most households with basic surface conditions, provided moisture and leaks are under control. If you notice ongoing condensation, roof leaks, or structural dampness, a professional remediation assessment is essential before priming. Professionals can test for hidden mold and recommend a remediation plan, including moisture control strategies. In harsh climates or when renovating spaces that will see frequent moisture, a professional evaluation and proper mold remediation guidance can prevent costly rework and protect occupant health.
Common failure modes and remedies
Primer performance can fail if moisture remains high, surfaces aren’t properly prepared, or topcoat compatibility is ignored. Signs of trouble include peeling, mildew reappearance, or inadequate adhesion. Remedies include thoroughly drying the substrate, applying a suitable primer with proper sealing on porous surfaces, and ensuring the topcoat is compatible with the primer. If mildew returns after painting, re-evaluate the moisture source and consider a longer curing period, additional coats, or an alternative mold-resistant primer formulation. Consistent maintenance of ventilation and humidity control is essential for long-term success.
Quick-start checklist for mold-prone spaces
- Identify and fix moisture sources (leaks, condensation, ventilation)
- Choose a mold and mildew primer suited to surface porosity and humidity
- Prepare surfaces thoroughly; clean, dry, and lightly abrade if needed
- Apply according to label directions and ensure adequate drying time
- Follow with a compatible topcoat and verify moisture control measures
- Maintain ventilation to minimize mildew recurrence over time
Feature Comparison
| Feature | Water-based mold and mildew primer | Shellac-based primer | Zinc-oxide mold-resistant primer |
|---|---|---|---|
| Odor control | Low-to-moderate odor | Strong odor initially, short-lived | Low odor |
| Adhesion on porous surfaces | Excellent on drywall/plaster | Good on painted surfaces | Excellent on porous substrates with prep |
| Mold inhibition claims | Moderate protection during cure | High mold resistance in damp zones | Long-lasting mold resistance on porous surfaces |
| Best surfaces | Porous interior walls | Non-porous surfaces like metal/glass | Mixed surfaces with proper prep |
| Best for | Bathrooms/kitchens with high moisture | General interior walls | Basement and crawl space walls |
Upsides
- Improved paint adhesion on challenging surfaces
- Adds moisture resistance to protect finish
- Multiple formulas available for different environments
- Simple first step in a moisture-control plan
The Bad
- Primer alone cannot remediate existing mold or moisture problems
- Some formulations may require longer curing times
- Not a substitute for proper ventilation and remediation
Mold and mildew primer is a smart first step in damp spaces, but it must be paired with moisture control and remediation.
Choose a primer that matches surface porosity and humidity, then ensure ventilation and humidity control. For bathrooms and basements, shellac-based or zinc-oxide options are often more durable in high humidity.
FAQ
What is mold and mildew primer?
Mold and mildew primer is a coating designed to improve paint adhesion while helping limit mildew growth on damp surfaces. It creates a barrier and prepares the surface for topcoats. It is not a substitute for remediation and moisture control.
Mold and mildew primer helps paint stick and slows mildew growth, but it doesn’t fix a moisture problem by itself.
When should I use mold and mildew primer?
Use mold and mildew primer in spaces with frequent humidity, such as bathrooms, basements, and kitchens, especially on porous surfaces. Prep the area first, fix leaks, and ensure adequate ventilation before priming.
Use it in damp spaces after fixing leaks and improving ventilation, and always prep the surface first.
Can primers replace mold remediation?
No. Primers are a preventative or preparatory step. Safe and effective mold remediation addresses underlying moisture and visible mold, after which primers help seal and protect the painted finish.
Primers are part of prevention, not a replacement for mold remediation.
Is shellac-based primer better for bathrooms?
Shellac-based primers are commonly preferred in bathrooms due to their strong moisture sealing and stain-blocking properties. They can outperform water-based primers in high-humidity zones when properly applied.
Yes, shellac-based primers often perform better in bathrooms because they seal moisture well.
Do mold primers contain toxic chemicals?
Most primers use standard solvents and additives; many brands offer low-VOC or zero-VOC options. Always check the product SDS and label for specific ingredients and safety guidance.
Check the label for VOCs and safety guidance; choose low-VOC options if possible.
How long after priming before painting?
Drying times vary by product and conditions. Wait until the primer is fully dry to the touch and follow label directions before applying the topcoat to ensure optimal adhesion.
Let the primer dry completely according to the label before painting.
The Essentials
- Assess moisture before priming to prevent mildew return
- Match primer type to surface porosity and humidity
- Primer is part of a broader moisture-control plan, not a cure
- Thorough surface prep improves adhesion and longevity
- Test a small area before full application