Is Mold Hard to Get Rid Of? A Practical Removal Guide
Discover why mold is hard to remove, how moisture drives growth, and practical steps homeowners can take—whether DIY for small patches or when to call a pro.

Is mold hard to get rid of? It often is, especially when moisture continues to feed growth. Remediation depends on the extent, surface type, and whether the moisture source is repaired. Small, contained patches can be cleaned DIY, but larger, hidden, or recurring mold typically requires professional remediation and ongoing moisture control.
Is mold hard to get rid of? The reality behind persistence
Mold is not a single event but a cycle: spores land on a damp surface, multiply quickly, and seed new growth. The big challenge is moisture. Without fixing leaks, humidity, and poor ventilation, you can literally scrub away visible patches and still leave a thriving colony behind. The Mold Removal Lab team found that the most important factor in successful mold removal is eliminating the moisture source and drying the area thoroughly. In our 2026 analysis, homes with continuous dampness showed a higher rate of regrowth even after initial cleaning. The takeaway is simple: containment and moisture control are as critical as the cleaner you choose. For many households, addressing the root cause—like roof leaks, plumbing failures, or condensation—reduces the chance that mold returns within weeks or months. As you plan next steps, remember that mold spreads through tiny spores that can travel on air currents, clothing, or tools. A careful, systematic approach reduces cross-contamination and increases the odds of a lasting fix.
How mold grows and why it's so persistent
Mold is a fungus, not dirt; its spores are everywhere and dormant until they land on a suitable surface. Once moisture rises above about 60% relative humidity or a wet patch forms, spores germinate and feed on organic materials like wood, drywall, fabric, and dust. The growth cycle can start within 24 to 48 hours after a moisture event, which is why quick action matters. Some materials, such as porous drywall or wallpaper, trap moisture deeper inside, creating a reservoir that’s difficult to dry completely. Even after you remove visible colonies, lingering spores can awaken when conditions improve, leading to regrowth. This is why the emphasis in a remediation plan is not only cleaning but also controlling humidity, improving ventilation, and repairing leaks. In our experience at Mold Removal Lab, small, isolated patches respond well to targeted cleaning, while larger infestations require a combined strategy: containment, surface cleaning, structural drying, and ongoing moisture management.
Common places in homes where mold thrives
Mold loves damp, dark, and densely built environments. You’ll often find it in bathrooms around showers and sinks, basements with concrete walls, kitchens where steam condenses, and laundry areas that stay moist. It also hides behind drywall where leaks occur, under sinks, around windows with condensation, and inside HVAC ducts where air movement and humidity work together. If you notice a musty odor or visible staining in these areas, inspect promptly and start moisture control measures. Catching mold early makes remediation easier and less costly, and it reduces the risk of allergen exposure for occupants.
DIY vs professional remediation: when to choose which path
For tiny, isolated spots on non-porous surfaces (like glazed tiles or sealed metal), careful cleaning with appropriate cleaners can be effective. If the growth is extensive, porous (drywall, insulation, ceiling tiles), or involves hidden areas (behind walls, under floorboards), professional remediation is generally safer and more thorough. Professionals assess moisture sources, perform building drying, and use containment and air filtration to minimize cross-contamination. If you’re dealing with a stubborn recurrence after DIY cleaning, it’s a strong indicator to bring in experts. Remember: the goal is not just cleaning but preventing re-growth by fixing the moisture source and improving ventilation.
Uncovering hidden mold: why professionals inspect behind walls
Visible mold is only part of the problem. Hidden growth behind walls, under flooring, or inside crawl spaces can rebound after cleaning if moisture remains. Professionals use moisture meters, infrared cameras, and controlled demolition when needed to locate hidden pockets. They also verify that materials affected by mold have been dried to safe moisture levels and replaced if necessary. Detecting hidden contamination early saves time and reduces long-term damage to structure and indoor air quality.
Cleaning methods by surface type
Different surfaces require different approaches. Non-porous surfaces (glass, metal, sealed countertops) respond to soap-and-water cleaning or EPA-registered cleaners. Porous materials (drywall, fabric, carpet) may need removal or specialized cleaners, and sometimes replacement is the safest option. For wood, treat with products that decontaminate and then dry thoroughly to prevent warping or rot. Always wear PPE, work in well-ventilated spaces, and follow product label directions. Avoid using bleach on porous surfaces, as it can fragment the material and encourage deeper mold growth.
Moisture management: prevention and maintenance
The best defense against mold is ongoing moisture control. Keep indoor humidity below 60% (ideally 40-50%), fix leaks promptly, vent dryers and bathrooms, and use dehumidifiers in damp spaces. Improve air circulation with fans and open windows when possible. Regularly inspect areas prone to moisture, like window sills, basements, and kitchen pipes. Establish a routine: monthly checks during high-humidity seasons and after any significant water event. A proactive approach can prevent mold from taking hold in the first place.
After cleanup: monitoring and maintenance
After remediation, retest humidity, inspect for new stains, and monitor for musty smells. A simple hygrometer helps you keep humidity in the safe range. Maintain clean and dry surfaces, fix leaks quickly, and consider air purifiers with HEPA filters in spaces prone to dampness. Document repairs and cleaning steps so you can track what worked and what didn’t. Ongoing vigilance is essential to keep mold from returning.
The road ahead: setting up a mold-safe home
Turn remediation into a practical habit rather than a one-off task. Create a moisture-control plan, schedule annual inspections for areas prone to dampness, and educate household members about moisture-related mold risks. Investing in a robust ventilation strategy—exhaust fans, properly sized dehumidifiers, and regular cleaning—will pay dividends in healthier air quality and lower risk of recurrence. With a thoughtful, moisture-first mindset, most homes can stay mold-free for years.
Tools & Materials
- N95 respirator or higher(Fit-tested if possible)
- Disposable gloves(Latex-free if possible)
- Goggles or safety glasses(Eye protection)
- Plastic sheeting (6 mil) for containment(Taped edges to seal doors)
- Heavy-duty trash bags (4-6 mil)(For contaminated waste)
- Bucket and scrub brush(Non-abrasive for delicate surfaces)
- Mild detergent or EPA-approved cleaner(Suitable for non-porous surfaces)
- Mold-killing cleaner (EPA-registered)(Follow label directions; avoid mixing cleaners)
- Dehumidifier or powerful fan(To dry thoroughly and reduce humidity)
- Moisture meter or hygrometer(Optional for monitoring dryness)
- Plastic zipper bags(For storing removed materials)
Steps
Estimated time: 1–3 days for small to medium outbreaks; longer if structural repairs are required or if mold recurs after initial cleanup
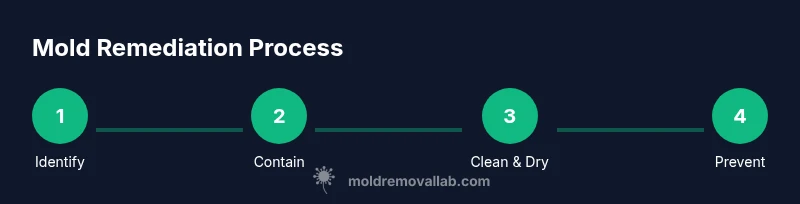
- 1
Contain area and prep PPE
Identify the mold-affected zone and seal it with plastic sheeting to prevent spread. Don your PPE (N95, gloves, eye protection) before touching any surfaces. This minimizes exposure and keeps the cleanup focused.
Tip: Seal doors and vents; use tape to secure edges and create a controlled work space. - 2
Identify moisture source and address
Find and repair the moisture event (leak, condensation, or poor ventilation). Without fixing the source, mold tends to return even after cleaning. If repairs are beyond DIY scope, call a professional.
Tip: Document the leak with photos and notes for your records. - 3
Choose cleaning method by surface
Non-porous surfaces can be wiped with detergent or EPA-approved cleaners. Porous materials may require removal or specialized treatment. Avoid abrasive scrubbing on delicate finishes that can release more spores.
Tip: Test a small inconspicuous area first to ensure no color transfer or surface damage. - 4
Clean small, accessible patches
Clean visible mold with a gentle cleaner, rinse, and dry completely. Do not saturate porous materials. Use a clean cloth for each pass to prevent cross-contamination.
Tip: Work from clean toward dirty areas to minimize spreading spores. - 5
Dry area thoroughly and recheck
Run dehumidifiers and fans to achieve moisture levels below 60% RH. Recheck after 24–48 hours; if dampness recurs, re-treat or re-assess moisture control.
Tip: Use a moisture meter to confirm dryness before closing the space. - 6
Document and prevent recurrence
Record what was cleaned, what was removed, and what repairs were completed. Plan ongoing ventilation and humidity monitoring to reduce future risk.
Tip: Establish a routine check every season, especially in humid months.
FAQ
Is all mold dangerous, and should I worry about health risks?
Many molds can irritate the eyes, skin, and lungs, especially for sensitive individuals. Severe exposure is rare, but persistent growth can worsen symptoms for those with asthma, allergies, or compromised immune systems. If you notice respiratory symptoms, seek medical advice and address mold promptly.
Mold can irritate the eyes, skin, and lungs, especially for sensitive people. If symptoms persist, consult a doctor and remove the mold safely.
Can I clean mold myself safely, or should I hire a pro from the start?
Small, non-porous patches can be cleaned safely with proper PPE and cleaners. Large, porous, or hidden growth often requires professional remediation to ensure containment, proper drying, and avoidance of recontamination. When in doubt, start with a professional assessment.
You can clean small patches yourself with PPE, but larger or hidden mold is best left to professionals.
Which surfaces are hardest to clean mold from?
Non-porous surfaces are generally easier to clean with approved cleaners. Porous materials like drywall, insulation, and some fabrics often harbor mold within their fibers and may need removal and replacement to prevent regrowth.
Porous materials are harder; many times they must be removed and replaced to prevent regrowth.
How long does it typically take to get rid of mold after cleanup?
Time varies with extent. Small, contained growth can be addressed in days with proper drying. Large infestations or recurring mold may require weeks for complete remediation and moisture stabilization.
Cleanup times vary; small mold can be cleaned in days, larger jobs may take weeks.
Are there safe cleaners that will kill mold effectively?
EPA-registered cleaners and products labeled for mold remediation are recommended. Avoid household mixtures that can be unsafe or ineffective. Follow label instructions for safety and efficacy.
Use EPA-approved mold cleaners and follow the label for safe use.
Should I test for mold after cleanup, and when?
Testing is optional for small, completed repairs with good drying results. If there are ongoing symptoms, moisture problems, or reoccurrence, testing can confirm the absence of active growth and help verify remediation success.
Testing isn't always necessary, but can confirm mold is gone after suspicious cases or recurring issues.
Watch Video
The Essentials
- Control moisture to stop mold regrowth
- Contain the area before cleaning
- Use appropriate cleaners for surface type
- Call a pro for large or hidden growth
- Prevent recurrence with ongoing humidity management